Print Parameters
Configure the various settings for printing and cutting with Print Parameters.
Quality, Cut Controls, and Others are included in Print Parameters. The items that can be selected vary depending on the output destination printer.
For information on settings during output, refer to the user's manual for the model that you are using.
Quality tab

Quality Settings
Configures print quality and print mode settings for a job. Select the media or object from Media Type, and then specify the printing resolution from Print Quality. Specify the printing order for the inks you are using from Mode. (v) prints in variable dot modes (modes that use dots of varying sizes).- Media Type
- BN2-20/BN2-20A
- Generic
- Generic Vinyl
- Generic Clear Film
- Generic Heat Transfer Sheet
- Generic Paper
- Print Quality
-
- High Quality
- Standard
- High Speed
- Draft
- Mode
-
- CMYK (v)
- This prints using CMYK inks only.
- White->CMYK (v)
- This prints first with Wh ink followed by CMYK inks. This allows printing that is not affected by the media color, such as with transparent media.
- CMYK->White (v)
- This prints first with CMYK inks followed by Wh ink. This is used in cases such as printing on transparent media when the image will be viewed from the opposite side of the printed surface.
- White (v)
- This prints using Wh ink only.
- Primer->CMYK (v)
- This prints first with the primer followed by CMYK inks. This is used for improving adhesion to the media.
- Primer->White->CMYK (v)
- This prints the primer, then Wh ink, and then CMYK inks. This is used for improving adhesion to the media while allowing printing that is not affected by the media color, such as with transparent media.
- Primer->CMYK->White (v)
- This prints the primer, then CMYK inks, and then Wh ink. This is used for improving adhesion to transparent media and when the printed image will be viewed from the opposite side of the printed surface.
- Primer->White (v)
- This prints first with the primer followed by Wh ink. This is used for improving adhesion to the media.
- CMYK (v)
- Preset
- Visually select the color setting from seven color settings using Brightness and Vibrancy.

Special Color Plate Generation
Select the White Plate Generation check box to generate a white plate. The following white plate types are available.- Generated Pattern
-
- Print Area
- The white plate is generated below the objects.

- Outside PrintArea
- The white plate is generated in a location where no objects are present.

- Entire Image
- The white plate is generated for the entire image size.

- Print Area
- Size Correction
-
- Do Not Generate
- The white plate is generated in the same size as the objects.
- Generate
- The white plate is generated slightly smaller than the objects. Use this setting to prevent the white plate from extending outward.
- Do Not Generate
Rotary Controls
Use this setting when printing using a rotary axis unit. Enter the diameter of the media (object) to set the nozzle amount to be used during printing.Layout
-
Center on the Media
Select this check box to place the object in the center of the printing area.
-
Mirror
Select this check box to print the image mirrored. This setting is effective for printing on transparent media when the image will be viewed from the opposite side of the printed surface.
Cut Controls tab
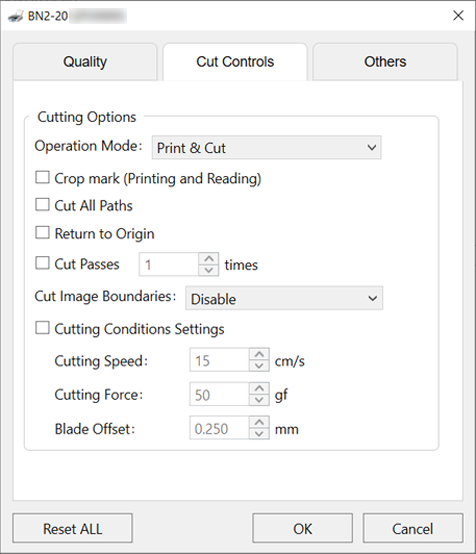
Sets the printer control method during cutting.
- Operation Mode
-
Selects the printing and cutting operation mode.
- Print & Cut
- Select to perform printing and cutting continuously.
- Cut & Print
- This method uses printing data including cutting lines to perform cutting first followed by printing. Performing cutting first reduces the drying time compared to cutting after printing.
- However, depending on the conditions of the media after cutting, there may be an effect on printing results.
- Print Only
- Use to perform printing only.
- Cut Only
- Select to perform cutting only.
- Print & Cut
- Crop mark
- Select whether to print or read crop marks.
- Cut All Paths
-
All paths will be recognized as cutting lines and will be cut regardless of whether they are drawn with the spot color CutContour.
- Return to Origin
- Pulls back the media after printing.
- Cut Passes
- Specifies the number of cut passes.
- Cut Image Boundaries
-
- If you select Normal Cut, the border of the job is cut regardless of whether a cutting line is present.
- Cutting Conditions Settings
-
- Cutting Speed
- Enter the cutting speed in cm/s.
- Cutting Force
- Enter the blade force in units of gram-force.
- Blade Offset
- Enter the blade offset value (the distance between the tip and the center of the blade) in millimeters. Enter the offset value for the blade being used.
- Cutting Speed
Others tab
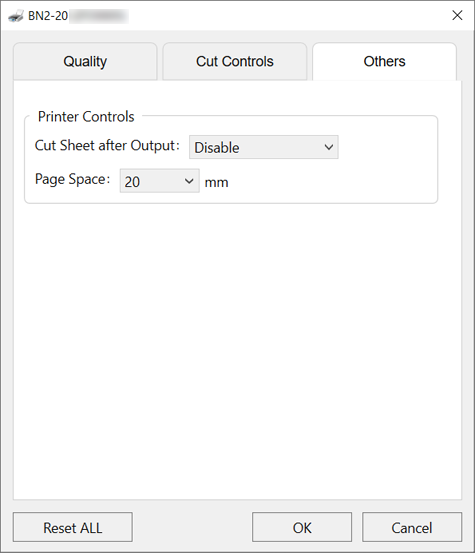
Sets the printer control method during printing.
- Cut Sheet after Output
-
- Select Normal Cut to cut the sheet after output.
- Page Space
-
Sets the space to the next printing start location.