
Configuring Output Manager
Set the print data output destination (save folder).
If you are using VersaWorks, this will be detected automatically and it is not necessary to set it. To add a new output device, perform detection with Output Manager again.
When printing using a RIP other than VersaWorks, set the print data output destination folder. This setting is enabled when the RIP used includes a function for monitoring the specified folder and automatically importing print data. If it does not include this function, manually load the output print data into the RIP.
-
Double-click the "PrintAutomate OutputManager" icon on the desktop.
If the User Account Control dialog box appears, click はい.
Output Manager starts.
-
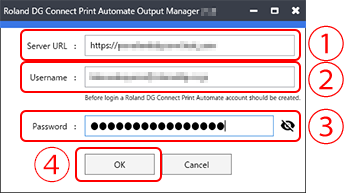
Log in to PAM.
Log in using a PAM account and password, not Roland DG Connect.
-
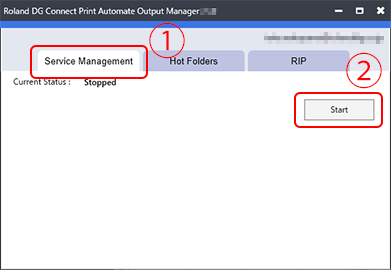
Turn on the Output Manager operation.
When "Current Status" is "Running," it is currently operating. In this case, skip this step and proceed to the next step.
- Click the Service Management tab.
- Click Start.
-
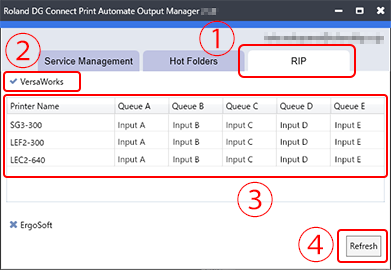
When printing using VersaWorks, check the output destination.
VersaWorks installed on the same PC as Output Manager is detected, and the output destinations are registered automatically.
Check that there are no problems in the registered output destinations.
- Click the RIP tab.
- Check that there is a checkmark next to the installed RIP, and that it is recognized by Output Manager.
- Check that there are no problems in the registered output destinations.
- If there is a problem in RIP recognition and the output destination, click Refresh.
-
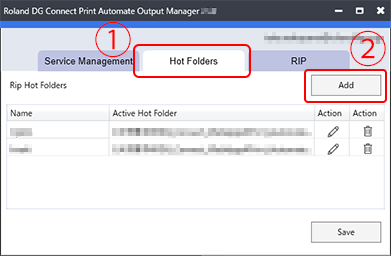
When printing using a RIP other than VersaWorks, set the print data output destination folder.
The print data saved in the settings folder is automatically loaded into the RIP.
-
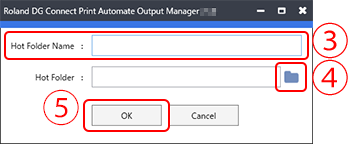
Click Add.
 The Add Hot Folder display appears.
 -
Click
 and select the folder.
-
Click OK.
-
Click Add.
- Click Save.