
Setting the Output Preset
The Output Preset setting contains a combination of the output device (actually the input port for RIP print data) and its output position (print layout that sets the position where the fixing jig is installed). It is possible to configure some of the printing settings that are delivered to the RIP. This is used by a user who has Operator privileges (or Power User privileges) when printing an assigned Order.
It is expected that in most cases, the administrator who is in charge from order receipt to production will be the person who prepares the fixing jig for efficiently creating the product and who decides the positioning location together with the printer. For this reason, it is more efficient for the administrator to configure all of the Output Preset settings at once. The set Output Preset is the method of printing that is used by the Operator in each location.
- Installation of Output Manager
- Startup of Output Manager and PAM login
- Registration of printers in VersaWorks (registration of printers that can output from each Operator PC)
- Start the Web browser and access the following URL.
-
Log in to PAM-Web.
Log in as a user with Admin privileges.
Log in using a PAM account and password, not Roland DG Connect.
- Enter the URL to access in Your environment name.
- Enter the user account name in User name.
- Enter the password in Password.
- Click Log in.
-
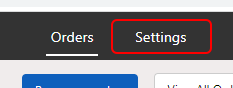
Click Settings.
-
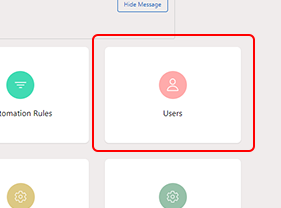
Click Users.
-
Click the User Name of the user you want to set.
"Output Presets" appears on the right side of the screen.
-
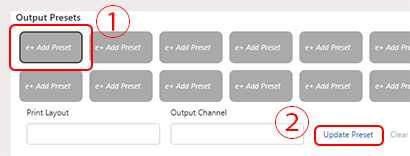
Configure the Output Presets settings.
The Output Presets setting contains a combination of the output device (actually the input port for RIP print data) and its output position (print layout that sets the position where the fixing jig is installed). Select the combination of device and fixing jig that are used for printing, and paste in the print data.
-
Click Update Preset.
 The Output Presets display appears.
 -
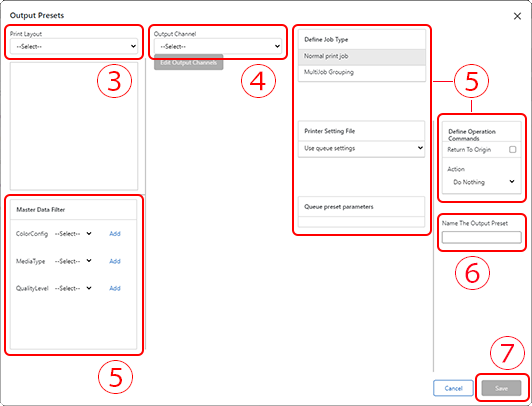
Click Save.
-
Click Update Preset.
- Set the Output Preset in the same way for each user.