Imprinting Is Always Faint in the Same Parts
Is the change in the height of the imprinting surface too large?
If imprinting is always faint in the same parts even though you're performing imprinting using a head cap, the imprinting surface may have an excessive height displacement. Recheck the parameters of materials that the machine can imprint and select material that meets the parameters. Also, image quality is not assured when imprinting photographic data on a curved surface with this machine.
Have you tried to adjust the levelness of the machine?
If the image is often faint at the same location, such as near the front right corner of the table, then the machine may be installed in a location that is not level. Adjusting the levelness of the machine may improve the image quality.
Please note that this is not effective when unevenness in the image is unrelated to the imprint location, such as when uneven areas vary from one piece of material or image to another. We recommend using a head cap whenever such use is possible.
-
Using an adhesive sheet, load a piece of the included test-use imprinting material in the center of the table.
If the included material has been used up, prepare material that meets the following conditions, and then imprint without using the head cap.
- Larger than 60 mm × 60 mm (2.37 in. × 2.37 in.)
- Smoothness of 0.05 mm (1.96 mil) or less
-
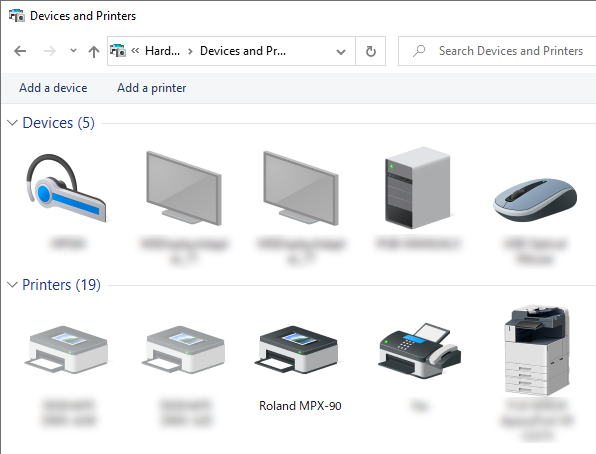
Display the list of devices and printers.
-
Windows 11
- Click .
- Click Control Panel.
- Click View devices and printers.
-
Windows 10
- Click .
- Click View devices and printers.
-
-
Right-click
Roland MPX-90.
-
Click
Printing Preferences.
 The setting window for METAZA Driver appears.
 -
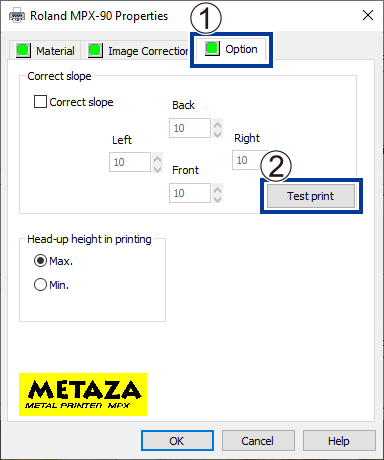
Imprint a test pattern.
-
Click Test print.
The test pattern is imprinted on the material.
-
Click Test print.
-
Use the scale to read and note the locations where the test pattern is not continuous or not visible.
Note the values in all four directions (front, back, left, and right).
-
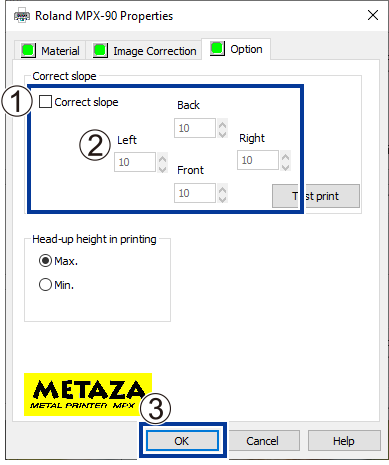
Adjust the levelness.
- Select the Correct slope check box.
- Enter the scale values you noted into the driver.
- Click OK.