
Adjusting the Location of the Machine's Origin Point
Set the origin point of the machine to the center of the scale on the table. You can check the origin point by imprinting calibration data. Use the following procedure to adjust the origin point if it is displaced.
To adjust the origin point, use a plate-shaped material with a size of at least 20 mm × 20 mm (0.79 in. × 0.79 in.).
Imprinting Calibration Data
-
Switch on the power to the machine.
The machine performs initialization, and the lamp of the Power/Movement button turns on.
Switching On the Power -
Load the material.
When adjusting the origin point, be sure to attach a head cap and use it together with the adhesive sheet to load the material.
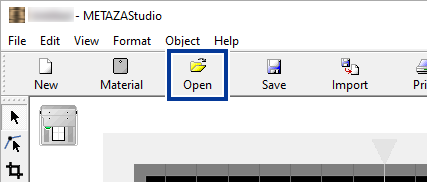
Loading Material - Start METAZAStudio.
-
Open the calibration data.
-
Click
 .
.
-
Select Axis.mzs and click Open.
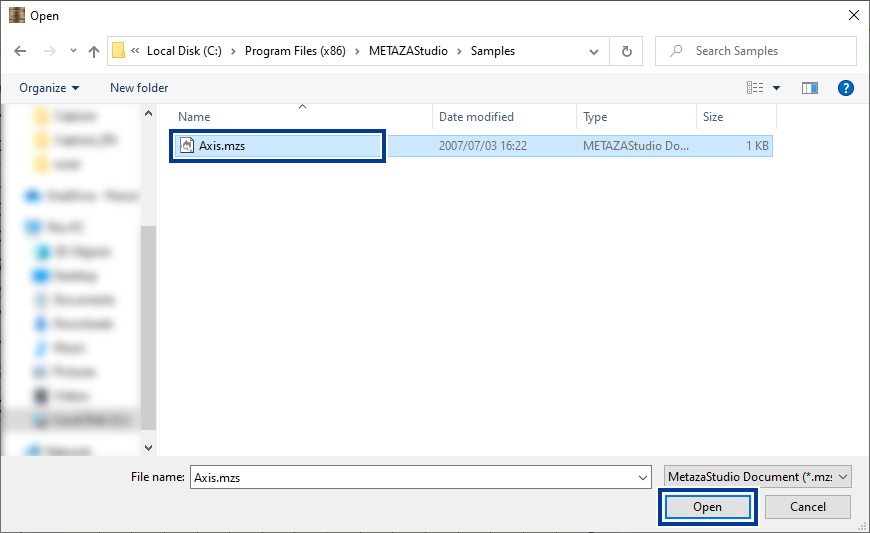
-
Click
-
Click
 .
.
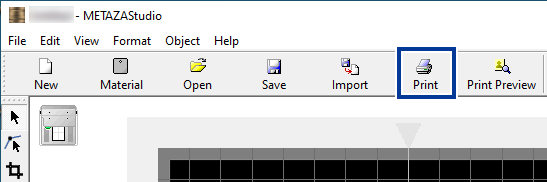
The imprinting of calibration data starts.
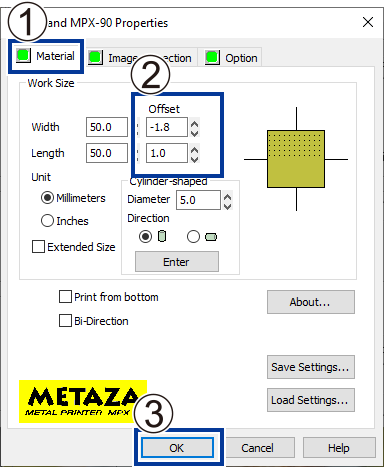
Measuring the Displacement of the Origin Point and Entering the Correction Values
-
Measure and note down the offset between the centerline on the table scale and the crossed lines on the material .
In the example shown in the following figure, the origin point is displaced by +0.3 mm (+0.01 in.) in the Width direction (A) and by −0.5 mm (−0.02 in.) in the Length direction (B).

-
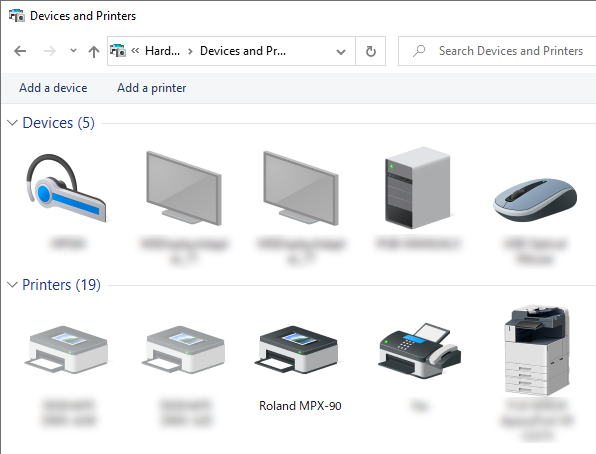
Display the list of devices and printers.
-
Windows 11
- Click .
- Click Control Panel.
- Click View devices and printers.
-
Windows 10
- Click .
- Click View devices and printers.
-
-
Right-click
Roland MPX-90.
-
Click
Printing Preferences.
 The setting window for METAZA Driver appears.
 -
Adjust the origin point.
 MEMO
MEMOWhen the setting window of METAZA Driver for METAZAStudio is displayed, the values for any settings made are temporary and are not saved.
To enable corrections to the origin point even after METAZAStudio closes, you have to open METAZA Driver from the Windows printer settings and make the adjustment there.