
Composition Registration and Striking-force Adjustment
Registering a Composition and Adjusting the Striking Force
Here you register a composition in METAZA Driver and adjust the striking force to match the hardness and other parameters.
With this machine, imprinting using a striking force appropriate to the composition of the material used allows even higher quality imprint results to be obtained. METAZA Driver has premade settings for a number of compositions and their appropriate striking forces, but you can also register the optimal striking forces for these compositions yourself. In order to obtain better imprint results, you can also carry out later adjustment of the striking force of compositions whose striking force you've registered yourself.
-
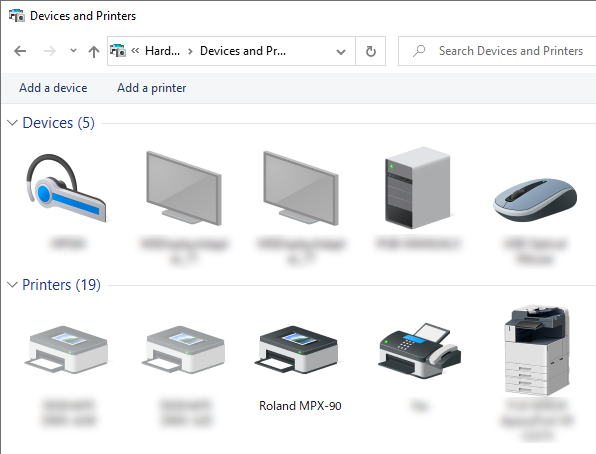
Display the list of devices and printers.
-
Windows 11
- Click .
- Click Control Panel.
- Click View devices and printers.
-
Windows 10
- Click .
- Click View devices and printers.
-
-
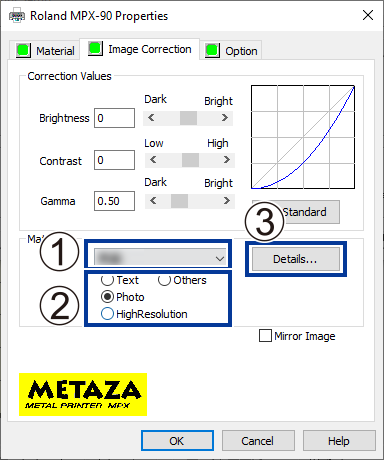
Right-click
Roland MPX-90.
-
Click
Printing Preferences.
 The setting window for METAZA Driver appears.
 -
Click the Image Correction tab and set the following items.
-
Configure the detailed striking force settings.
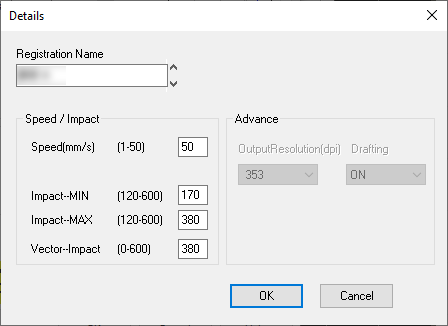
Table 1. Speed/Impact Impact-MIN You can set the minimum value of imprint impact for an image. Lower the value when dark areas of the image are whitish or when overall striking is too forceful.
Impact-MAX You can set the maximum value of imprint impact for an image. Raise the value when bright areas of the image are struck with too little force or when overall striking is too weak.
Lower the value when bright areas of the image are struck with too much force.
Vector Impact You can set the maximum value of imprint impact for a line. Table 2. Advance Output Resolution You can specify the number of dots per inch. Drafting You can skip image information in increments of one dot. Table 3. Compositions and Values of Impact (Reference Values) Composition Impact-MIN Impact-MAX Brass or copper 200 350 to 450 Iron or Stainless steel 200 400 to 500 Titanium 200 500 to 600 Paint on the surface of the material may be peeled off if the striking force is too strong. Paint peeling off may lead to machine malfunctions. Adjust the values of impact to prevent paint from peeling off during imprinting.
-
Click OK.
The settings are saved, and the Printing Preferences window closes.To obtain imprint results of higher quality, perform test imprinting or perform overstriking on the same material and adjust the values of impact on the basis of the imprint results.