This section explains how to use a USB cable to connect the printer.
Please note that a USB connection requires a separate Windows-based driver, which is included with the printer.
Procedure
Check that the second printer is turned on, and then connect this printer to the computer.
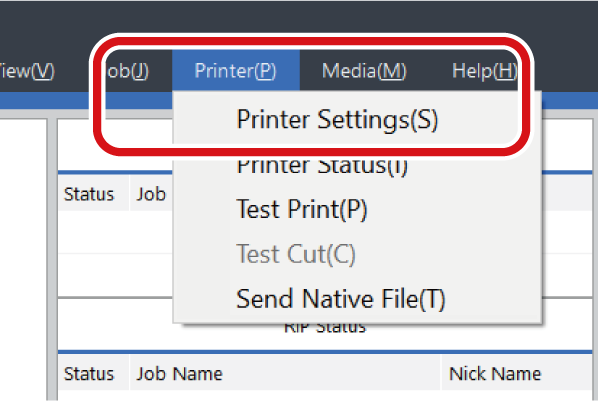
From the menu bar, click Printer - Printer Settings.
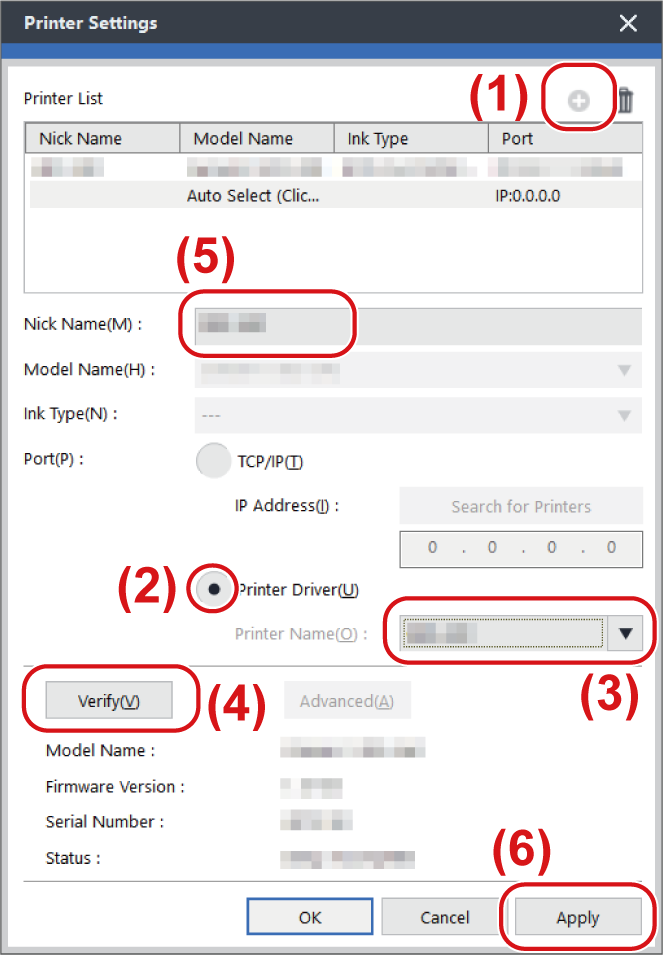
The Printer Settings window appears.
Set the printer to connect.
The way to set the printer differs depending on the printer model and on the type of the connection port.
Click .
Select Printer Driver.
Select the printer to connect to from the Printer Name list.
Click Verify.
Items such as the Model Name, Firmware Version, and Serial Number are displayed.
Set the Nickname.
If you do not set a nickname, the model name is displayed.
Click Apply.
When the message Do you want to install the virtual printer driver? is displayed, click Yes.
This message does not indicate the printer driver to use in communication. It indicates the virtual printer driver to use when printing directly from the application.
When the User Account Control window appears, click Yes (or Allow).
When the Add Printer Wizard window appears, click Next.
The information of the connected printer appears in the Printer List.
Click OK.
To add more printers, repeat steps 1 to 3.
When you're done making all the settings, click OK.

 .
.