
Step 2: Set the Spot Color Plate Automatic Generation Function
Procedure
-
In the job list, double-click the job whose printing settings you want to configure.
The Job Settings window appears.
-
Click
 .
.
-
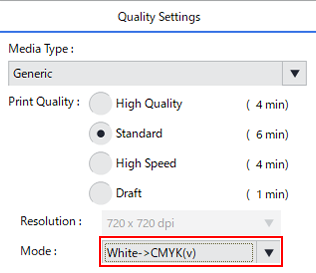
Under Quality Settings, use Mode to select the setting that can be used in white ink mode.
Select White -> CMYK(v) in this section.
Select CMYK - > White(v) to display the side opposite the printed surface.
-
Click
 .
.
-
Select Generate Special Color Plate.

MEMO If the printing data includes RDG_WHITE, the Generate Special Color Plate check box is grayed out. -
Select Print Area.
Select the generated pattern from the three available to match the application.
The generated white ink spot color plate is displayed in the [Job Settings] window in pink. You cannot generate a plate only for a specific object.
Generated Pattern Image of the spot color plate to generate
(display with the White mode selected)
Job Settings window
(display with the White - > CMYK mode selected)
Print Area The plate is generated below the objects.


Outside Print Area The plate is generated in locations where no objects are present.


Entire Image The plate is generated for the entire job size.


- Specify the Density.
- Click OK.