
Pasting Print Data to Print Layout and Outputting to the RIP
Paste the print data for creating an ordered product into the print layout, and create data for writing to the RIP.
After the work is completed, output the data to the RIP. With PAM, the work includes up to writing the printing PDF file to the RIP input folder.
This operation is performed by the user who is in charge of producing ordered products.
-
If you are not logged in to PAM-Web, log in.
Log in using a PAM account and password, not Roland DG Connect.
-
Click Orders.
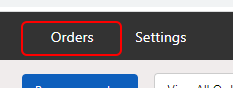 A list of orders that have been assigned to a login user is displayed.
 -
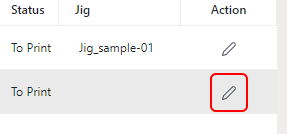
If there is an order where the caution mark (
 ) is displayed, click
  .
indicates that a jig has not been set.
.
indicates that a jig has not been set.Because an order where a jig has not been set cannot be pasted into the print layout, be sure to set a jig.
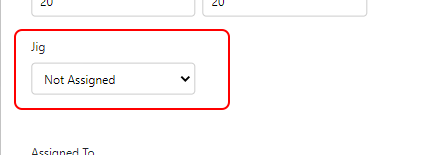
 The Edit order display appears.
 -
Click Jig and select the fixing jig for creating the ordered products.
- Click Save.
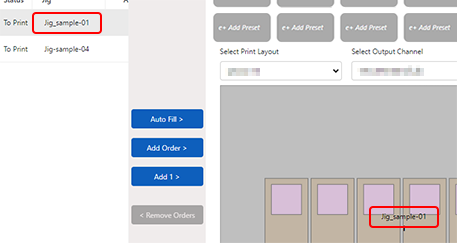
- Click the order to paste into the print layout.
-
Click an Output Preset to select it.
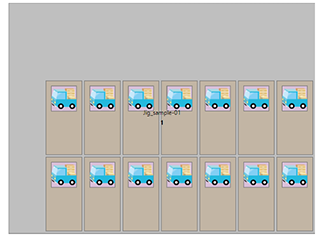
The selected print layout is displayed in Preview.
Preview also displays the name of the jig that is placed in the print layout. Check that the jig is the same jig that is set in the order.
-
Click Auto Fill.
This pastes print data to all placed jigs as the upper limit for the unprinted quantity.
The conditions after the print data was pasted are displayed in Preview.
-
Click Print.
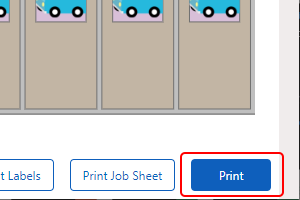
The print file is written to the output device (input folder of the device) that was set in Output Preset.
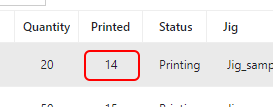
After outputting, check that the quantity displayed in Printed for the order has changed.
-
Start the RIP and check that the printing file has been loaded.
Do not yet send the print data to the output device.
You must first configure the RIP printing settings and complete the work for installing the object on the fixing jig.