
Installing the Rotary Axis Unit
Procedure
-
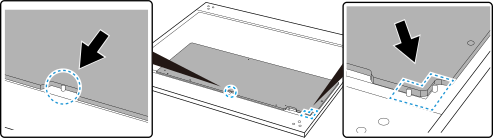
Lightly push the plate against the positioning pins to place it on the flat table.
-
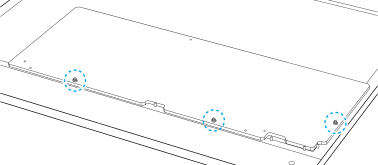
With the plate in contact with the positioning pins, install the plate fixing screws using the included hexagonal wrench.
MEMO If the plate is not in contact with the positioning pins, this will cause printing misalignment.
-
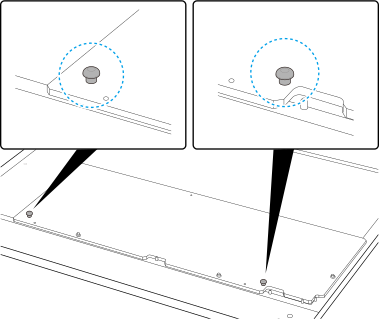
Install the positioning screws at the positions shown in the figure using the included hexagonal wrench.
-
Lightly push the rotary axis unit against the positioning screws to place this unit on the plate.
-
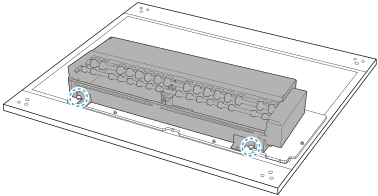
Use mounting screws to temporarily secure the rotary axis unit.
Partially tighten the mounting screws while adjusting the rotary axis unit position.
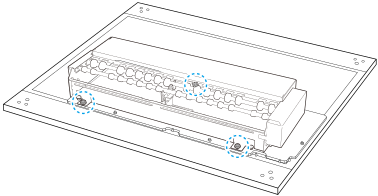
- Fully tighten the mounting screws.
-
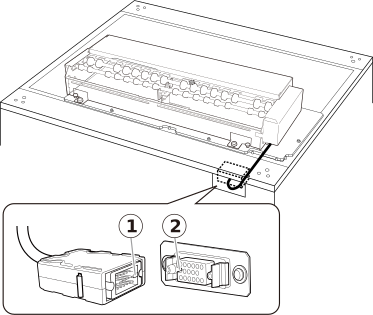
Connect the rotary axis unit connector to the flat table connector.
Align the protrusion on the rotary axis unit connector with the indentation on the connector , and then insert the former into the latter.
Insert the rotary axis unit connector until you hear a click.
- Tap Finish All on the operation panel.
-
Tap
 to return to the home screen.
When the rotary axis unit is connected, the image shown on the home screen changes from [A] to [B].
to return to the home screen.
When the rotary axis unit is connected, the image shown on the home screen changes from [A] to [B].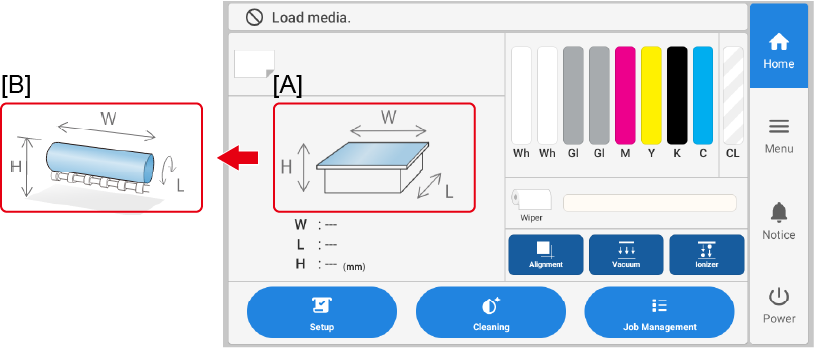
[A]: Display when the rotary axis unit is not connected
[B]: Display when the rotary axis unit is connected