
Removing the Rotary Axis Unit
Procedure
-
Disconnect the rotary axis unit connector from the flat table connector.
While pressing down on the arrow parts, remove the rotary axis unit connector.
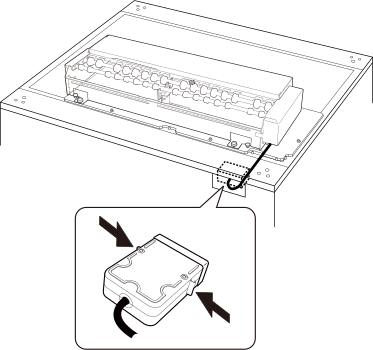
-
Attach the cover to the flat table connector.
MEMO If you are not using the connector, be sure to attach the cover to prevent dust and debris from adhering to the connector.
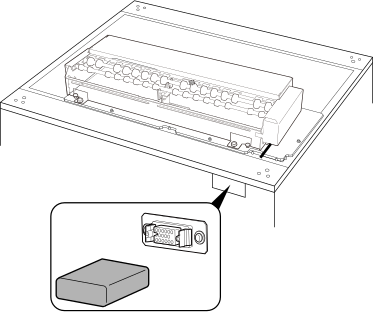
-
Remove the mounting screws.
After removing the mounting screws, remove the rotary axis unit.
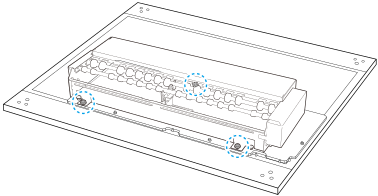
-
Remove the positioning screws using the included hexagonal wrench.
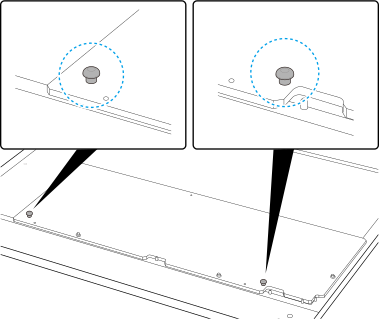
-
Remove the plate fixing screws using the included hexagonal wrench.
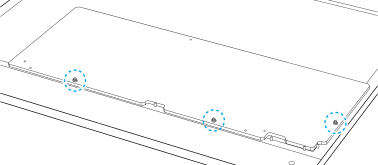
- Remove the plate from the flat table.
- Tap Finish All on the operation panel.
-
Tap
 to return to the home screen.
When the rotary axis unit is removed, the image shown on the home screen changes from [A] to [B].
to return to the home screen.
When the rotary axis unit is removed, the image shown on the home screen changes from [A] to [B].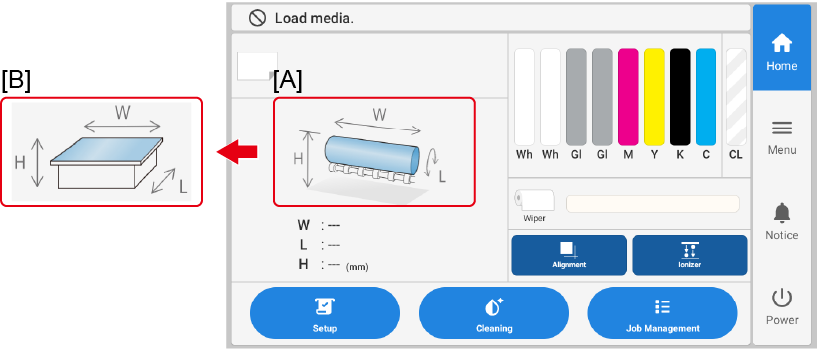
[A]: Display when the rotary axis unit is connected
[B]: Display when the rotary axis unit is not connected