
3. Detecting the Height of the Object to Be Printed on Automatically
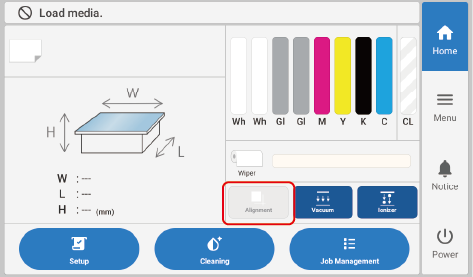
If the height of the object to be printed on is 4.0 mm (0.15 in.) or less, switch off Alignment and lower the positioning pins. If the positioning pins are higher than the object to be printed on, the height is set with the positioning pins, not the object to be printed on, used as the reference.
If the object to be printed on presses firmly against the positioning pins, they may not lower even if Alignment is switched off. In this case, lower the positioning pins by pressing them with your fingers.
-
Set up the object to be printed on.
Refer to Steps 1 through 6 of Determining the Print Surface Height and Printing Position to perform Select of Preset.
- Tap Change next to Table Height.
-
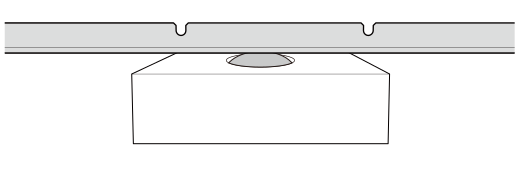
Move the highest position of the printing surface closer to the head gap sensor.
-
Move the object to be printed on so that it is under the head gap sensor.
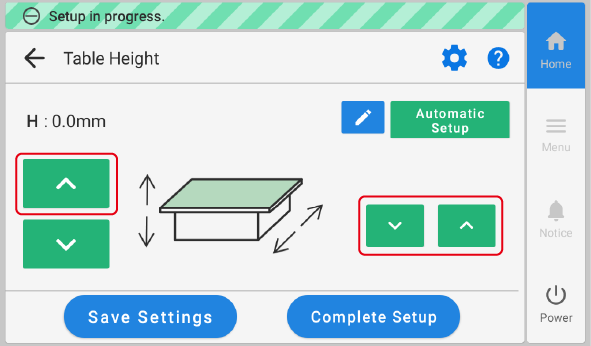
Long tap or tap

 lined up on the right side of the screen to move the flat table forward or backward.
 -
Move the highest position of the printing surface closer to the head gap sensor.
Long tap or tap lined up vertically on the left side of the screen to bring the highest printing position of the print surface closer to the head gap sensor.
-
Move the object to be printed on so that it is under the head gap sensor.
-
Tap Automatic Setup.
The height of the object to be printed on will be set automatically to a position about 1 mm (39.4 mil) away from the print head's ink emission surface.
MEMOYou can change the distance between the ink emission surface of the print heads and the object to be printed on.
- Tap OK.