
Changing the Operation Performed When Setting Up the Printing Area
*1: This is an operation setting for the flat table that assumes the print-head carriage moves in the forward/backward direction.
-
Set up the object to be printed on.
Refer to steps 1 through 10 of Determining the Print Surface Height and Printing Position to configure settings for outside the printing area.
- Tap Change next to Printing Area.
- In the Printing Area Settings screen, select the Print Origin.
-
Tap
 .
The Print Origin screen appears.
.
The Print Origin screen appears.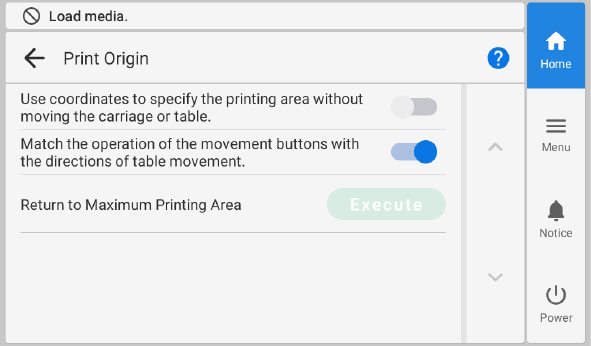
-
Tap
 ,
,  , or Execute to change the settings.
Use coordinates to specify the printing area without moving the carriage or table. Description Configure settings without moving the print-head carriage or flat table.
This is used when it is clear in advance at which position on the flat table the object is placed, such as when a retainer is used to hold the object.
Tap
 ,
,  ,
,  , and
, and  on the operation panel to specify the location.
Move the print-head carriage or flat table, and then use the pointer to check the position of the print-head carriage or table as you configure settings.
The print-head carriage and flat table are moved in conjunction with the
, , , and operations on the operation panel.Match the operation of the movement buttons with the directions of table movement. Description Tap
on the operation panel to move the flat table toward the back or to move the flat table forward.Tap
on the operation panel to move the flat table forward or to move the flat table toward the back.Return to Maximum Printing Area Description Execute You can tap Execute when Use coordinates to specify the printing area without moving the carriage or table. is set to
and the setup of the object to be printed on is not completed.MEMOYou can select Printing Area in the Printing Area Settings screen and then tap
to change the settings. -
Tap
 .
.
-
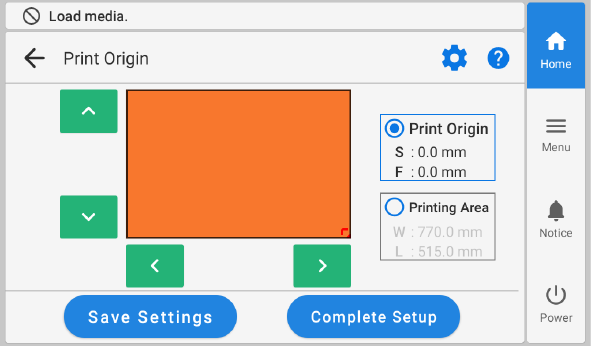
Set the Print Origin and Printing Area.
Refer to steps 12 through 15 of Determining the Print Surface Height and Printing Position to set the printing area.
- Close the front cover if it is open.
-
Tap Complete Setup.
MEMO
-
Tap Save Settings to return to the setup item selection screen to change the settings as necessary.
-
When Setup has completed for the object to be printed on, you can also change the settings from
 > .
> .
MEMODefault setting:- Use coordinates to specify the printing area without moving the carriage or table.: Off
- Match the operation of the movement buttons with the directions of table movement.: Selected
-