
4. Setting the Printing Area
For a printing test, set the printing area with W (width) of 110 mm (4.34 in.) or more and L (length) of 110 mm (4.34 in.) or more. An error will occur and printing tests cannot be performed if the area is smaller than this.
- Tap Change next to Printing Area.
-
Tap
 ,
,  ,
,  , or
, or  once.
The flat table and print-head carriage will move, and the pointer will point to the previously-set print origin.
once.
The flat table and print-head carriage will move, and the pointer will point to the previously-set print origin.Subsequently, when you have finished setting the printing area, the print-head carriage will automatically return to the standby position to protect the print heads from drying out if they have not been moved by the user for approximately three minutes. Perform the procedure again.
-
Long tap or tap , , , and to move the pointer to the position (print origin) so that it points to the center of the printing area.
MEMO
If Use coordinates to specify the printing area without moving the carriage or table. is enabled, specify the values for S and F.
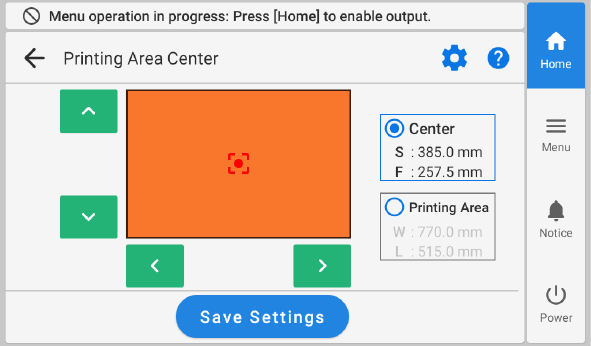 MEMO
MEMOPrint Origin cannot be changed if Base Printing Position is set to Center and Printing Area is set to the maximum. If Printing Area is set to the maximum, perform Printing Area Settings first.
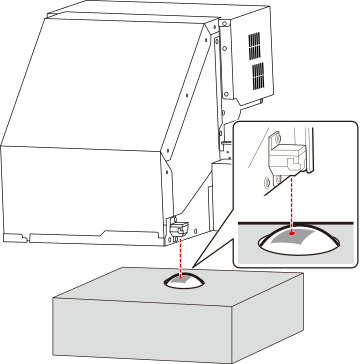
When the pointer is difficult to see- Depending on the material of the object to be printed on, such as transparent media or high-gloss media with dark colors used on the print surface, the pointer may be difficult to see. In such cases, the pointer may become more visible by placing masking tape on the print surface or on the back.
- By opening the front cover, this work can be performed while viewing up close. However, because the print-head carriage or flat table may start moving, be careful not to touch any moving parts.
- Tap Printing Area to select it.
-
Tap , , , and to set the printing area W (width) and L (length).
MEMO
The print-head carriage will not move if Base Printing Position is set to Center.
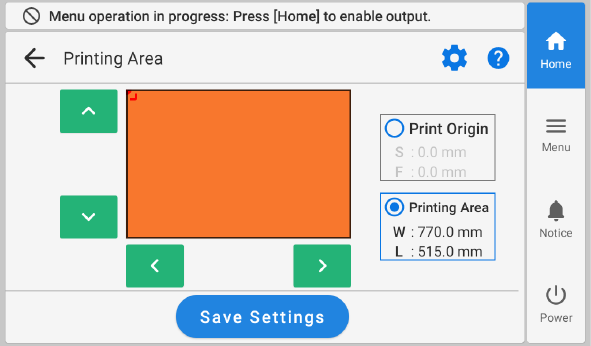
Make sure that the W and L values for the Printing Area are the values intended.
- Close the front cover if it is open.
-
Tap Complete Setup.
The printing area is specified and the print-head carriage returns to the standby position.
MEMOTap Save Settings to return to the setup item selection screen to change the settings as necessary.
MEMOSelect the Center on the Media under Position in VersaWorks to print.