3. Adjusting the Print Head Height Automatically
The height of the object to be printed on is automatically detected, and the print heads are adjusted to the appropriate height for printing. If height of the object to be printed on is known, the print head height can be set manually.
Setting the Print Head Height Manually
Check that the print-head carriage has returned to the maintenance station. If the machine detects an intrusion into the movable range of the print-head carriage while the carriage is not in the maintenance station, the safety protection function is activated to stop the machine.Safety Protection Function
-
Measure the thickness of the object to be printed on.
Measure using a measuring tape or vernier caliper.
-
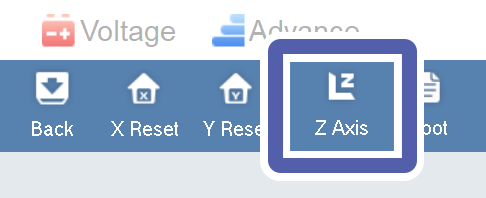
Click Z Axis.
The Z axis control panel window appears.
-
Click UP under Z axis move.
The print head will be moved over the object to be printed on in Step 6. Move the print head up to a height such that it does not contact the object to be printed on when it moves.

-
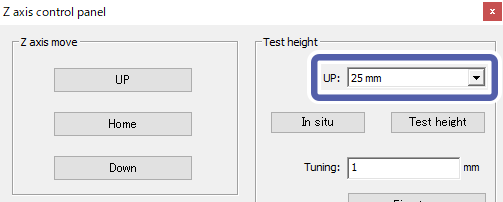
Select the value of UP in Test height.
The value selected here will be the print head height at which height detection starts.IMPORTANT
Select a value larger than the thickness of the measured object to be printed on.
If not selected correctly, there is the risk that the print heads may contact the object to be printed on, damaging the print heads.
-
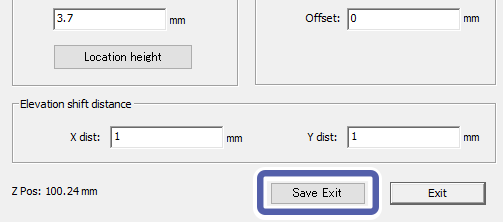
Click Save Exit.
The settings are saved and the Z axis control panel window closes.
-
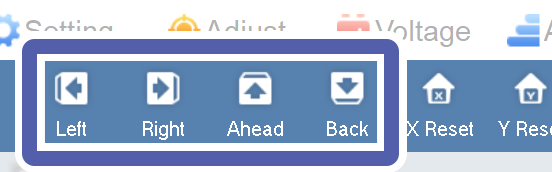
Click Left, Right, Ahead, or Back.
Move the print-head carriage to a position above the object to be printed on.
-
Click Z Axis.
The Z axis control panel screen appears.
IMPORTANTDetects the height of the object to be printed on in Step 8. Check that nothing other than object to be printed on is on the flat table.
-
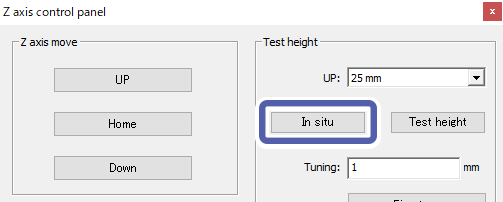
Click In situ.
Automatically detects the height of the object to be printed on at the position where the print-head carriage is located.