Setting the Print Head Height Manually
Set the print head height manually so that the distance between the print head and the object to be printed on is optimal.
Manual setting is suitable for printing on soft objects and when you want to set a specific distance between the print head and the surface of the object to be printed on. Set the distance between the print head and the surface of the object to be printed on within the range from 0.8 to 2.0 mm (31.50 to 78.74 mil). A smaller value decreases ink mist but increases the risk that the print head will contact the object to be printed on.
Check that the print-head carriage has returned to the maintenance station. If the machine detects an intrusion into the movable range of the print-head carriage while the carriage is not in the maintenance station, the safety protection function is activated to stop the machine.Safety Protection Function
-
Measure the thickness of the object to be printed on.
Measure using a measuring tape or vernier caliper.
-
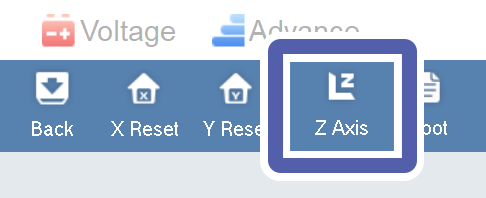
Click Z Axis.
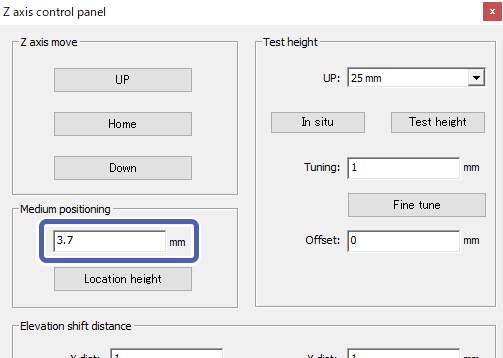
The Z axis control panel screen appears.
-
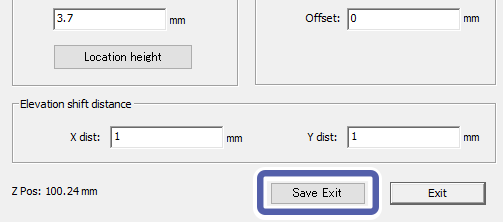
Enter the print head height in Medium positioning.
Set the print head height according to the thickness of the object to be printed on. Set a value derived by adding 0.8 to 2.0 mm (31.50 to 78.74 mil) to the thickness of the object to be printed on.
-
Click Save Exit.
The settings are saved and the Z axis control panel window closes.