
Creating Printing Data for Gloss Ink
This section describes how to add gloss printing data for embossing to the printing data in the following image.

* Use "Emboss_sample.ai" for the file name of this printing data.
* For details on how to create printing data including white printing, refer to the following.2. Printing Unaffected by the Color of the Target Object (White Printing on the Base)
-
Measure the sizes of the object to be printed on and the printing area.
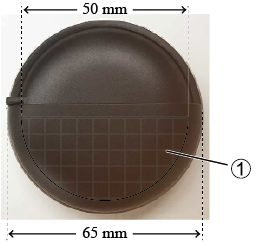
: Printing area: Semicircle with a diameter of 50 mm (2 in.)
- Click .
- Open "Emboss_sample.ai."
-
Create the embossing layer.
-
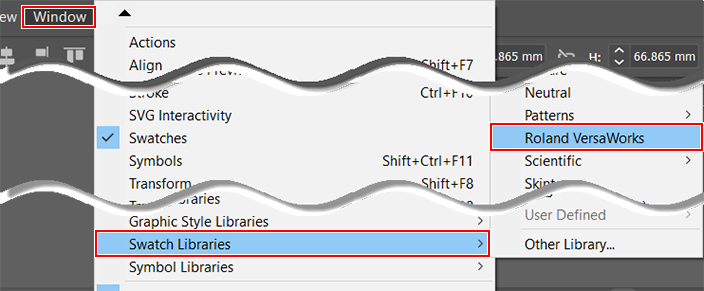
Click
 in the upper-right corner of the window, and then click New Layer.
-
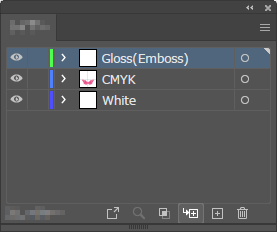
Set the layer name to "Gloss(Emboss)."
When finished, the layer composition will be as follows.
-
Click
-
Create the positioning shapes.
Create the shapes indicating the outer edge of the object to be printed on and the printing area and adjust the printing data position with these shapes. Printing does not require these shapes, so delete them before saving the printing data.
-
Place the printing data to save so it fits in the area indicated by (2) below.
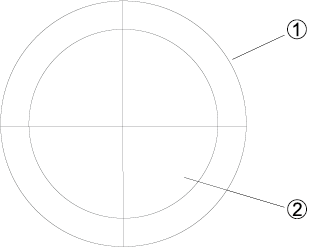
: Circle with a diameter of 65 mm (2.6 in.) modeling the pill case
: Printing area (interior of a semicircle with a diameter of 50 mm [2 in.]: The printing data must fit in this area.
-
Place the printing data to save so it fits in the area indicated by (2) below.
-
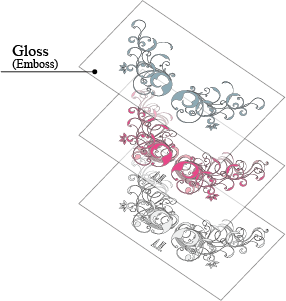
Create the printing data in the "Gloss(Emboss)" layer.
Create the following data. Place the shapes to emboss in the same location on a different layer.
- Select the object to emboss.
- Select the "Gloss(Emboss)" layer.
- Click .
-
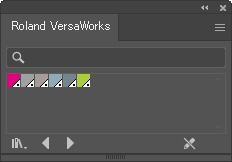
Click .
The Roland VersaWorks window appears.
-
Specify a spot color for the shape.
- Select all the shapes in the "Gloss(Emboss)" layer.
-
Click
 RDG_GLOSS in the Roland VersaWorks window.
- Click .
- Unlock and delete the shapes created in step 4.
-
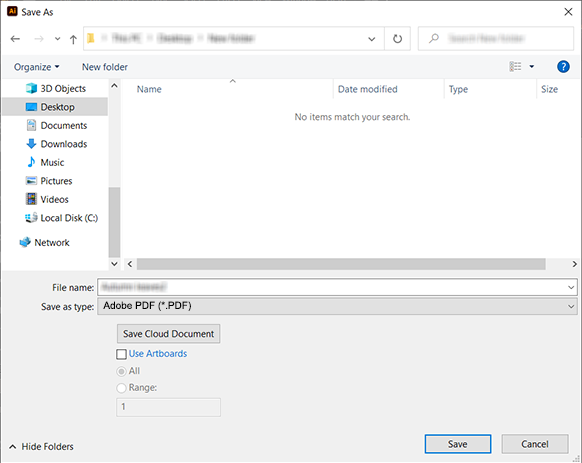
Click File - Save As.
Use the displayed panel to specify where to save the file.
Example: Destination folder: PC desktop
- Specify the File name.
-
Select Adobe PDF (*.PDF) for Save as type, and then click Save.
An artboard-size PDF is saved.
MEMO Selecting *.EPS or *.PS for Save as type still saves the printing data in a format that can be queued in VersaWorks.