
Adjusting the Position Again after Replacing a Fixing Jig
When a fixing jig was replaced, perform test printing and check that printing is made in the correct position.
If the print position is wrong in the results of test printing, adjust the jig position in the print layout and perform printing again. In this way, repeatedly set and perform printing to adjust the output position.
This must be performed by a user who has print layout edit privileges.
Procedure
-
If you are not logged in to PAM-Web, log in.
Log in using a PAM account and password, not Roland DG Connect.
-
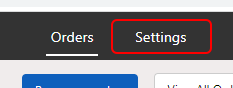
Click Settings.
-
Click Print Layouts.
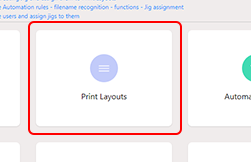 The Print Layouts display appears.
 -
Click
 of the print layout that you want to edit.
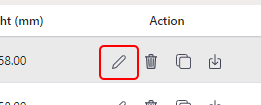 The Edit Print Layout display appears.
 -
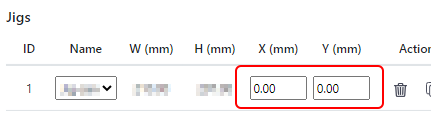
Change the jig position.
Enter the distance from the lower right point of the table to the lower right point of the jig in X and Y.
- Check the settings, and click Save.
-
Use the changed print layout and perform test printing to check the output position.
If the printing is made in the correct position, this work is completed.
if the position is incorrect, change the position in the print layout again.
Perform test printing again after changing and check the output position.