
Replacing the Print Head Caps
When it is time to replace the print head caps, the message The time for cap replacement has arrived. appears. In this situation, replace the print head caps.
For information about purchasing print head caps, contact your authorized dealer or visit our website (https://www.rolanddg.com/).
Be sure to perform operations as specified by the instructions, and never touch any area not specified in the instructions.
Sudden movement of the machine may cause injury.
| Required items | ||
|---|---|---|
|
 |
 |
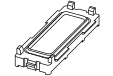
| Print head cap | Cloth (that is not fluffy) | Cleaning stick |
- To prevent the print heads from drying out, finish this procedure in 10 minutes or less. A warning beep sounds after 10 minutes. Stop work, close all the covers, and then tap Finish All to end the procedure. After that, restart the procedure from the beginning.
- Take care to prevent ink from adhering to the operation panel.
- When the message The time for cap replacement has arrived. appears, tap OK.
- Remove the object to be printed on.
-
Tap
 to display the messages.
-
Tap The time for cap replacement has arrived..
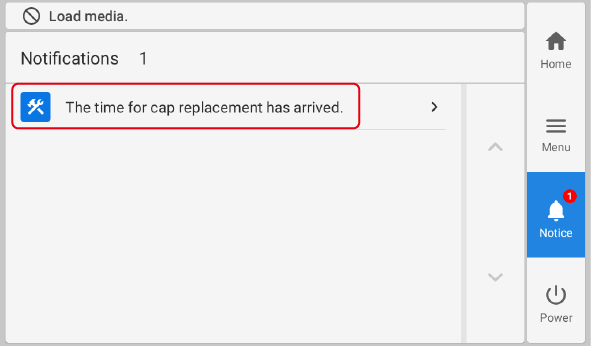
The Cap Replacement screen appears.
-
Tap Execute.
Tap Execute to display a message reminding the user to wear protective gear.
-
Tap OK.
Tap OK to move the print-head carriage to a location where print head cap replacement is possible.
-
Follow the instructions on the operation panel to replace the print head caps.
- Tap
 or
or  to check the procedure.
 - If you complete the work without viewing the instructions, tap Finish All.
IMPORTANTInk may drip from the removed print head cap. Exercise caution to prevent this fluid from soiling your hands or the floor.
To prevent ink from adhering to your hands, the machine, or the floor, cover the bottom surface of the removed print head cap with paper towels or something similar.
- Tap
- When the print head cap replacement is finished, tap Finish All.
-
When Close the cover. appears, close the right cover.
When you close the right cover, you are returned to the original screen.
-
Tap
 to return to the home screen.
MEMOAfter a print head cap is replaced, dot displacement may occur. You are recommended to perform the following work to check that there is no dot displacement.
to return to the home screen.
MEMOAfter a print head cap is replaced, dot displacement may occur. You are recommended to perform the following work to check that there is no dot displacement.- Perform Medium Cleaning.
- Perform [Nozzle Drop-out Test].
- Check for dot displacement.