Cleaning the Maintenance Station and Its Surrounding Areas
Clean the maintenance station and its surrounding areas periodically. Ink may adhere to these areas.
WARNING
Be sure to put on protective gloves and UV protective eyewear before performing this work.
Ink may drop or scatter.
IMPORTANT
- The print-head carriage needs to be moved during cleaning. Do not place anything on the table.
- It becomes difficult to remove dirt when it is completely hardened. Clean the maintenance station and its surrounding areas frequently if ink and dust are adhering to these areas.
Procedure
-
Click Right on the Print Exp toolbar.
Move the print-head carriage to a position above the flat table.

-
Clean the ink receiver (1) with a non-woven fabric impregnated with cleaning liquid.

-
Wipe the area around the ink receiver (2) with a soft cloth.
If this does not work, wipe with a cloth that has been wetted with water and then wrung out very well. After wiping with a wet cloth, wipe with a dry cloth to completely remove any moisture.
IMPORTANTDo not use the non-woven fabric impregnated with cleaning liquid used in Step 2.

-
Cancel the activated safety protection function.
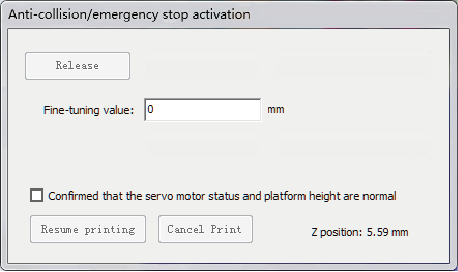
When the safety protection function is active, the Anticollision/emergency stop activation window is displayed on the PrintExp screen.
-
Check the safety of the surrounding area.
Check that there are no persons or objects within the machine movement range, then after confirming safety, proceed to the next step.
-
Perform the operations shown below in the Anticollision/emergency stop activation window.
- Select the confirmed that the servo motor status and platform height are normal check box.
- Click Release.

-
Click Left on the Print Exp toolbar.
Move the print-head carriage to a position above the maintenance station.