
Step 2: Activating the Ink
After ink filling has been completed, activate the ink using the Ink ID on the ink bottle label.
Procedure
-
Access http://124.71.46.129:8089/user/#/home.
The INK AUTHORIZATION screen appears.
MEMOTo change the display language, select from the pull-down menu at the top right of the screen.

-
Obtain the Ink authorization number.
-
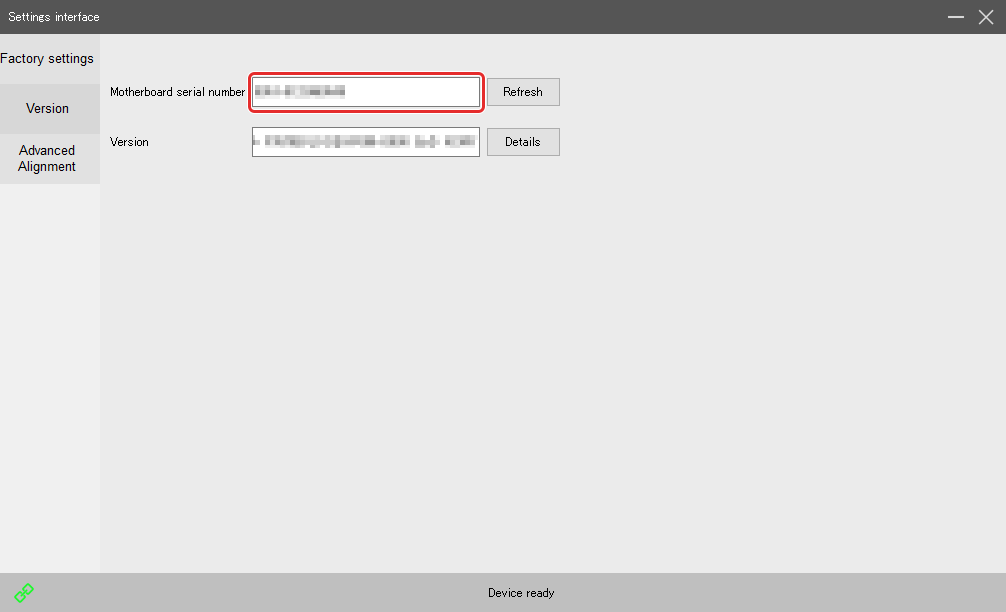
Enter the Board number.
The Board number can be checked by starting Future RIP.
Click in sequence, and make a note of the Motherboard serial number.
-
Enter the ink bottle Ink ID in the Ink number window.
MEMO
The first alphabet letter of the Ink ID indicates the ink color.

-
Click Get authorization number.
The Ink authorization number is acquired.

-
Enter the Board number.
-
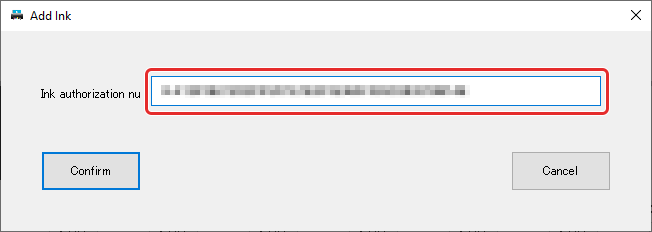
Enter the Ink authorization number into Future RIP.
-
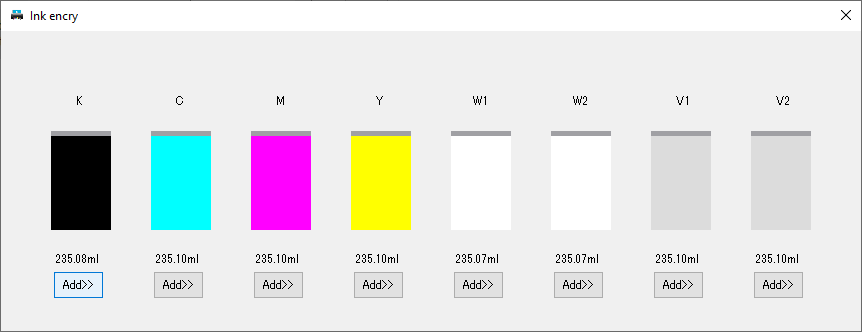
Click .
The Ink encry screen appears.
-
Enter the Ink authorization number that was acquired in step 2 in the Add Ink screen.
-
Click .
-
Repeat Steps 2 and 3 to activate all other inks.
MEMO
Ink activation must be performed for each ink tank.