
Step 5: Creating Data while Checking the Position
Procedure
-
Start Designer.
Click the Designer icon in Roland DG Connect Hub.
If the Roland DG Connect login screen is displayed, enter your email address and password to log in.
-
Follow the procedure below to import the captured file saved in
Step 4: Capturing the Image of the Object
into Designer.
-
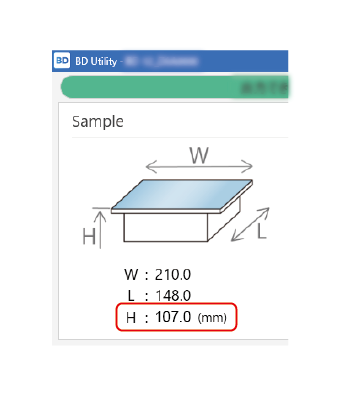
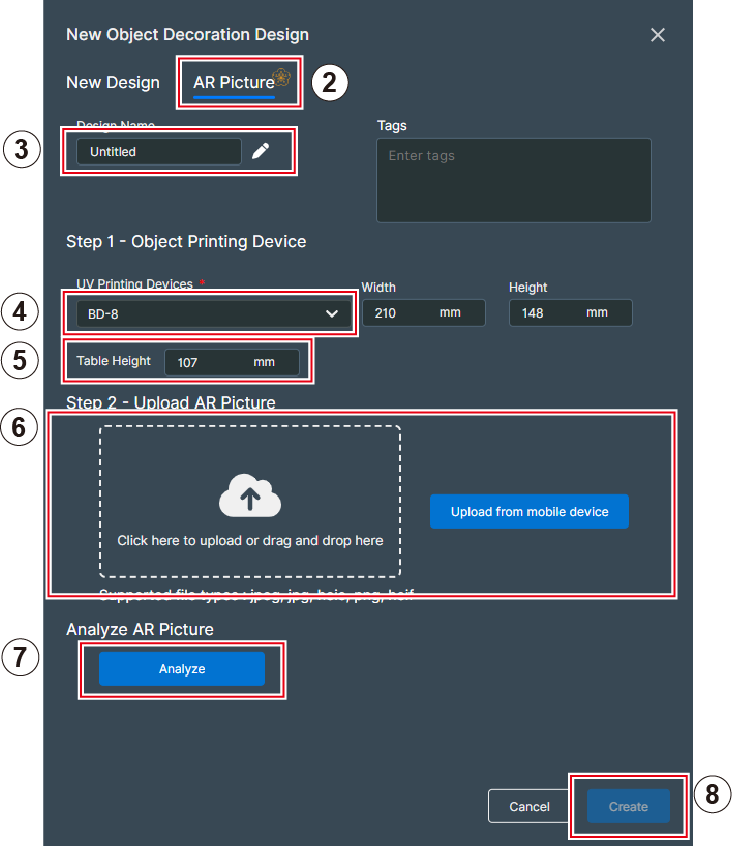
Enter the value of Flat Table Heightdisplayed
on the Utility home screen into Table Height
-
Click Create.
The captured image is cropped to the size of the four alignment markers (BD-8: W: 210 mm × L: 148 mm [W: 8.27 in. × L: 5.83 in.], BD-12: W: 305 mm × L: 210 mm [W: 12.01 in. × L: 8.27 in.]) and is displayed in the design area.
-
Enter the value of Flat Table Heightdisplayed
on the Utility home screen into Table Height
-
Create and save the print data.
Print data is created with the object in the background, so you can work while visualizing how it will look after printing.
For details on creating print data, see the Designer User's Manual.