Step 3: Setting Up the Object
You can set the flat table height while keeping a close eye on it by working with the front cover open.
However, clicking OK in these settings may cause the flat table to start moving. Therefore, when the front cover is open, be careful not to touch any moving parts as you work.
-
On the Utility home screen, click
 Setup.
-
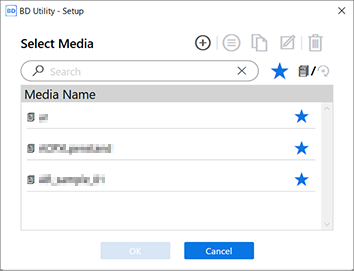
Register/select the object.
MEMO In Utility, "media" is used on the window used to register/manage objects.
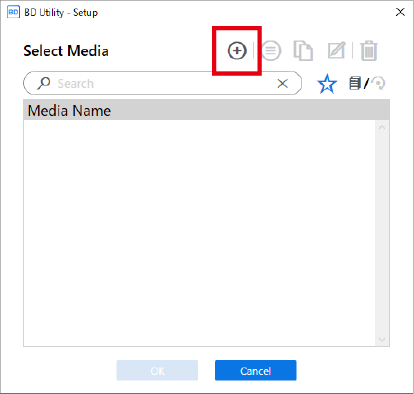
- When printing on an object for the first time
- Click
 .
.
- Enter a new media name and click OK.
Previously registered media names cannot be used. Enter a new media name.
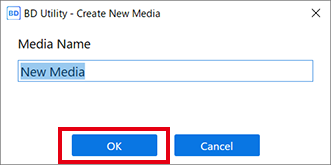
- Click
- For pre-registered objectsSelect the name of the media, and then click OK.MEMO
-
We recommend that you set frequently used objects as favorites.
- Click
 next to a registered media name to change this icon to
  .
. - Click
 next to the search box.
- Click
-
You can display all registered objects.
If a rotary axis unit is not attached, the names of the media to be used with the flat table are displayed. If a rotary axis unit is attached, the names of the media to be used with this unit are displayed.
Click
 or
or  to display all registered objects.
 - You can use the favorites function and the search function to easily find registered objects.
- Media registered to an optional item (the rotary axis unit) cannot be selected for the flat table.
Step 3 is not required. Proceed to step 4.IMPORTANT If the height may have changed due to a change in the securing method, suction mat, or similar, set the height (step 4). -
- When printing on an object for the first time
-
In the Object Type window, select one of the following, and then click OK.
- Transparent object: Select Smartphone Cases or Others from the Transparent item.
- Opaque object: Select Opaque.
MEMO- Transparent: A hand placed on the other side of the object to be printed on can be seen through it.
- Opaque: A hand placed on the other side of the object to be printed on cannot be seen through it.
See Object (Media) Registration Items for more information on objects.
-
Click Change next to Flat Table Height to set the height of the object.
-
Click
 or
or  on the right side of the window to align the highest point of the object with the forward-back position of the head gap sensor.
MEMO You can select 0.1 mm (0.004 in.), 1 mm (0.04 in.), 10 mm (0.39 in.), or 50 mm (1.97 in.) as the single-click moving distance.
on the right side of the window to align the highest point of the object with the forward-back position of the head gap sensor.
MEMO You can select 0.1 mm (0.004 in.), 1 mm (0.04 in.), 10 mm (0.39 in.), or 50 mm (1.97 in.) as the single-click moving distance. -
Click on the left side of the window to have the highest point of the object approach the head gap sensor.
Move the highest printing position of the object up to a position (a) a few mm away from the head gap sensor without coming into contact with the head gap sensor.

-
Click
-
Click OK.
If the Printing Area is not set, the maximum printing area (W: 210 mm × L: 148 mm [W: 8.26 in. × L: 5.82 in.] for the BD-8 and W: 305 mm × L: 210 mm [W: 12.0 in. × L: 8.26 in.] for the BD-12) becomes the Printing Area by default. If you are printing using alignment markers, set to the maximum printing area.Setup in progress. is displayed. When setup is completed, you are returned to the home screen, and the registered media name, and the set Flat Table Height, Print Origin, and Printing Area are displayed.
 , and the list of media set as favorites appears.