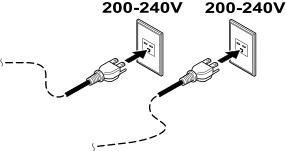
Step 9: Connecting the Power Cord and the Ethernet Cable
Perform this task with all power switches left switched off.
Otherwise sudden movement of the machine may cause injury.
Connect to an electrical outlet that complies with this machine's ratings (for voltage, frequency, and current).
Incorrect voltage or insufficient current may cause fire or electrical shock.
Handle the power cord, plug, and electrical outlet correctly and with care. Never use any article that is damaged.
Using a damaged article may result in fire or electrical shock.
When using an extension cord or power strip, use one that adequately satisfies the machine's ratings (for voltage, frequency, and current).
Use of multiple electrical loads on a single electrical outlet or of a lengthy extension cord may cause fire.
-
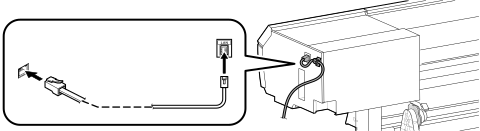
Connect the (commercially available) Ethernet cable and secure it with a clamp.
Attach the clamp in the location shown in the figure.
The recommended Ethernet and Ethernet cable are as follows.- Ethernet: 1000BASE-T
- Ethernet cable: Category 5 or higher
-
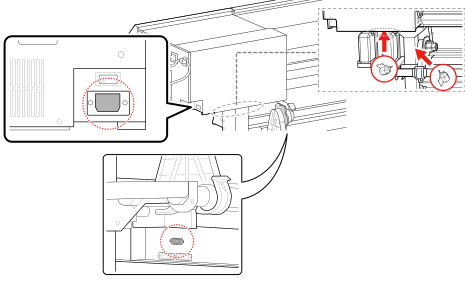
Connect the printer unit and the dryer controller with the relay power cord, securing this cord with the cable clamp shown in the figure.
-
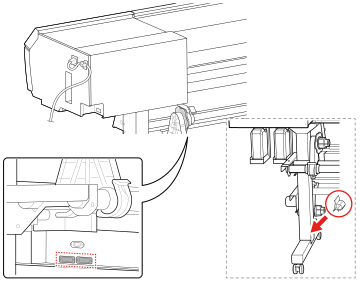
Connect the dryer controller's power cords (two cords), securing the power cords with the cable clamp shown in the figure.
-
Connect the power cords (two cords) to a 200 to 240 V power supply.
WARNING
Connect this machine to an electrical outlet. Never connect this machine directly to a power distribution panel or other such fixed wiring equipment.
Doing so increases the risk of fire or electrical shock.
WARNINGConnect to ground.
This can prevent fire or electrical shock due to current leakage in the event of malfunction.