Printing Using the Roland Color System Library
The Roland Color System Library is Roland DG's original spot color library. It consists of more than 1,000 spot colors.
When this library is used, you can easily create a color chart with your printer. In contrast to commercially available color charts, this feature generates a color chart printed using "your printer" and "your media" (slight color differences may occur depending on the conditions of the printer and media). By selecting colors from this color chart and creating print data with these colors, you can accurately reproduce the desired colors.
Step 1: Printing a Color Chart
- Load into the printer the media on which the color chart will be printed.
- Click
for the queue folder to be used.
The Queue Properties window appears. - Click
Quality, and then set Quality Settings.
- Click
Color Management, and then set Color Settings.
IMPORTANT When printing a color chart, the settings from the Queue Properties window are applied to the Quality Settings and Color Settings setting items. You cannot change the settings using the Settings window after the job has been added to the job list. - Click OK.The Queue Properties window closes.
- Select the printer to use, and then click
(the hamburger menu).
- Click the color chart that you want to print.
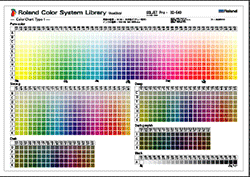
- Color Chart Type-1The colors in the library are categorized by saturation and arranged to vary in hue in the horizontal direction and in brightness in the vertical direction. To print this color chart in its original size, you need A1-size or larger media.

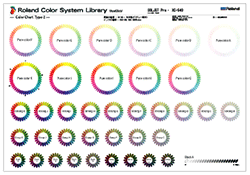
- Color Chart Type-2The colors in the library are categorized by color tone and a color wheel is printed for each tone. (Black colors are arranged linearly by brightness.) To print this color chart in its original size, you need A1-size or larger media.

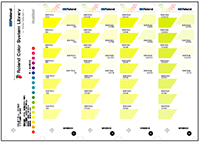
- Color SelectorPrints the ink combination chart. The chart shows the ink combination used for printing each spot color. Although each page is printed in A4 size, you can cut the pieces along the trimming marks and bind them in numeric order (outline numbers) to create a color sample book that can be used to compare the colors.

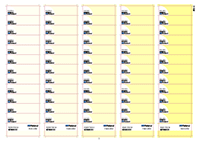
- Color ChipsPrints 12 color chips per color for 5 colors in A4 size. The colors are categorized by color tone. Click Color Chips and click the tone name to print the color chips for the selected tone.
 MEMO Color Chips are printed with cutting lines so that the color chips can be trimmed and used individually. If you print the color chips on media with a backing paper using a printer with a cutting function, you can create color chip stickers by setting Operation Mode under Cut Controls to Print & Cut.
The following message appears: The following job will be printed.Do you want to continue?Check whether the media loaded in the printer is large enough for the displayed page size.
- Color Chart Type-1
- Specify the queue folder with Add Job To and click OK.The selected type of color chart is added to the job list.
- Use one of the methods below to open the Settings window.
- Double-click the job to set.
- Right-click the job to set, and then click .
- With a job selected, click
on the left side of the job tool area, and then click
Settings.
- Click
Layout.
- Configure the Media Settings and other settings.
- Click OK.You are returned to the main window.
- Perform printing.The selected color chart is printed.
Step 2: Registering Roland Color System Library Colors in Illustration Software
Load Roland Color System Library colors into the illustration software color palette. This is very useful, as this allows you to easily specify the spot colors from the color palette when creating print data.
When Using Adobe Illustrator
- Roland Grapac Bri-o-coat Library
- Roland Green Color System Library
- Roland Orange Color System Library
- Roland Red Color System Library
- Roland Metallic Color System Library
- Roland Metallic Texture System Library
- Roland Texture System Library
- Roland Metallic Color
- Roland Structural Texture System Library
- Roland VersaWorks
- Access the following website.
- Click VersaWorks 7.
- Click Illustrator.Download Illustrator.zip according to the on-screen instructions.
- Open the Swatch or Swatch Library folder in the following folder on the target computer (the computer on which Adobe Illustrator is installed).
- Windows: [C:\Program Files\Adobe\Adobe Illustrator 20**\Presets\(used language)]
- Mac: [Macintosh HD\Applications\Adobe Illustrator 20**\Presets\(used language)]
- Extract the files from Illustrator.zip, and then save the file "Roland Color System Library.ai" in the folder opened in Step 4.
- Start Adobe Illustrator on the target computer.
- On the Adobe Illustrator menu, click .The "Roland Color System Library" panel is displayed. This completes the registration procedure.
When Using CorelDRAW
The procedure may vary depending on the version of this software. For details of the version, see the CorelDRAW website.
- Access the following website.
- Click VersaWorks 7.
- Click CorelDRAW.Download CorelDRAW.zip according to the on-screen instructions.
- Extract the files from CorelDRAW.zip.
- Save the "userinks.cpl" and "userinks.xml" files in the desired location on the target computer (the computer on which CorelDRAW is installed).
- "userinks.cpl": For each Roland library (such as the Roland Color System Library)
- "userinks.xml": For RDG spot colors (such as RDG_White)
- Start CorelDRAW.
- On the menu in CorelDRAW, select .The Palettes window appears.
- Click
 below the pull-down menu.
 - Select the "userinks.cpl" file that you saved in Step 5, and then click Open.
- Click
 under the pull-down menu again, select "userinks.xml," and then click Open.
 - Delete the two files that you saved in Step 5.
Step 3: Creating Print Data with Illustration Software
- Create print data with specified spot color that is registered in Roland Color System Library.
- Save the created data.
Step 4: Performing Printing
- Add the print data where the spot color was specified to the job list.
- Use one of the methods below to open the Settings window.
- Double-click the job to set.
- Right-click the job to set, and then click .
- With a job selected, click
on the left side of the job tool area, and then click
Settings.
- Click
Color Replacement.
- Select the Convert Spot Color checkbox.When spot colors are properly recognized, the following items are displayed:
Color Name The name of the spot color used with the job is displayed. MEMO If the spot color is one defined in the Lab color space, a caution mark ( ) is displayed when this color cannot be reproduced (it is out of the gamut) with the selected media and quality.
Nearest Color Finder When the checkbox is selected,  is displayed for any spot colors where the nearest color finder adjustments can be applied. When you are not applying these adjustments, clear this checkbox.
Output Color Displays the process color values that have been converted to. - Configure the layout, quality, and other settings necessary for printing.
- Click OK.You are returned to the main window.
- Perform printing.Processing by the RIP and printing are performed.