
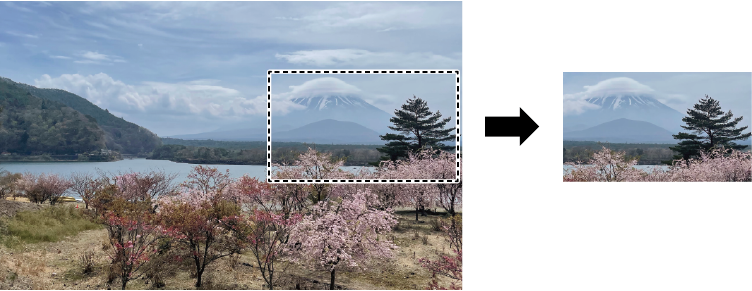
Printing the Selected Area of the Image: Clip Image
Procedure
-
Use one of the methods below to open the Job Settings window.
- Double-click the job to set.
- Right-click on the job to set, then click .
- With a job selected, click
 on the left side of the job tool area, and then click
  Job Settings.
-
Click
 Clip and Tile.
- Select the Clip Image checkbox under Clipping.
-
Set the part to be printed (the clip area).
- Entering the values
- In Size, enter the width and the height of the clip area.
- In Top Left Position, enter the location of the upper-left corner of the clip area with the origin at the upper-left corner of the image.MEMO
- Top Left Position can be set within the range such that the clip area set with Size does not go beyond the edges of the original image.
- Be sure to set Size before setting Top Left Position.
- Dragging the mouse in the layout area
- In the layout area, click
 .
.If the icon is blue, it is already selected.
- Point to the small square (the clip point) on the clip line (the red line in the figure).
- Drag the clip point to set the clip area.
To fine-tune the clip area, use
 and
and  to enlarge the preview image, and then drag the clip point again.
- In the layout area, click
MEMO You can also combine both methods to configure the settings. For example, you can set the clip area roughly in the layout area, and then fine-tune the clip area by entering the values. You can also perform Maintaining the Clipped Position. - Entering the values
-
Click OK.
You are returned to the main window.
-
Perform printing.
Processing by the RIP and printing are performed.