Output - Cutting Output
-
Correctly load the media or object in the machine, and then set the appropriate cutting conditions for the target media or object.
For details on how to load media or the various adjustments made before printing, refer to the documentation for the machine you are using.
-
Click
 .
.
The Send to Device dialog box appears.
-
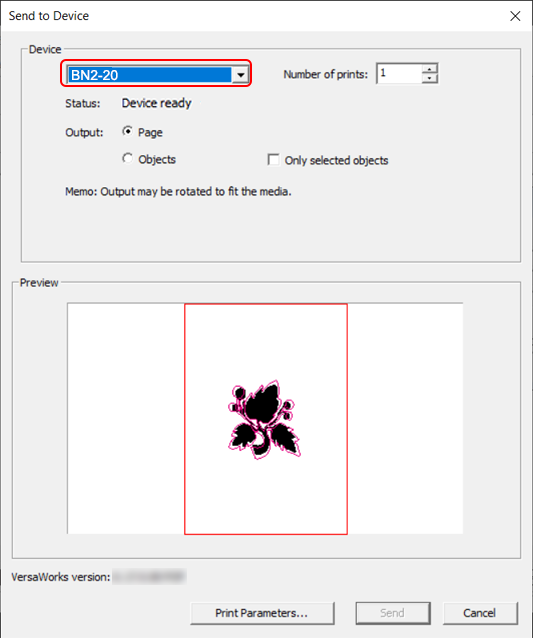
Select the machine where the data will be sent.
If the machine you are using is not displayed, it has not been set in VersaWorks.
For details on how to set the machine to output to, see the "VersaWorks Installation Guide."
-
In Output, select either Page or Objects.
IMPORTANT
Select Page to output at the Standard Page Sizes designated with Design Central. Select Objects to output at the size of the object.
You can check the Output of Page and Objects with Preview.
-
Click Print Parameters to configure the output settings.
Configure the following settings with Cutting Options on the Cut Controls tab.
- Operation Mode: Cut Only
- Check that Crop mark (Reading) check box is selected.
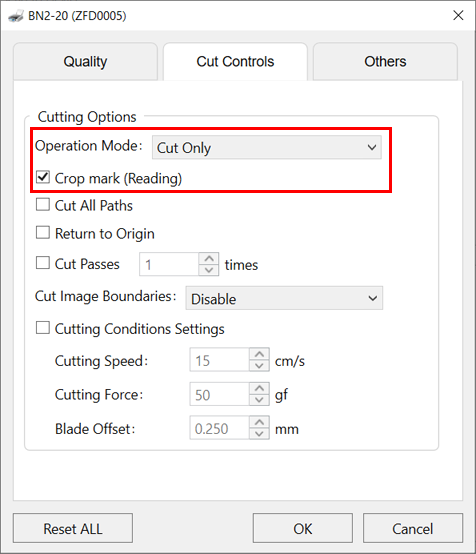
The Quality, Cut Controls, and Others tabs are located in Print Parameters. These tabs set operations during printing and cutting. For more information, refer to Print Parameters.
-
Click OK.
The Print Parameters window closes.
-
Click Send.
The data is sent, and cutting starts after the crop mark is read.
MEMOYou can check the progress of the printing in the display on the machine, in Utility, or by other means.
For details, refer to the user's manual for the model that you are using.