
1. Installing the Jig
Install a jig that can fix the object onto the rotary device.
If the object can be fixed with one of the provided jigs, install that jig onto the rotary device. If the object cannot be fixed with the provided jigs, it is necessary to prepare a special fixing jig. Keep the following points in mind when producing a special jig.
- Shape that can suitably load the object
- Material and surface treatment that will not scratch the object
- Design that allows the work to replace the object to be carried out efficiently
- Screw holes for installing onto the rotary device
Procedure
-
Tap
 Media when the media has not been selected.
The Attaching a Jig window appears.
Media when the media has not been selected.
The Attaching a Jig window appears. - Tap Execute.
- Open the front cover and the light shield cover.
-
Install the jig.
For the jig on the right side:
-
Attach the right-side jig adapter to the jig on the right side using a Phillips screwdriver.
When using a right-side jig created in-house, also attach the right-side jig spare that matches the size of the jig on the right side to the right-side jig adapter.
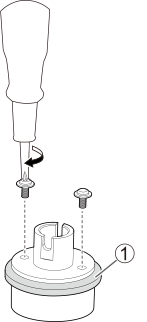
-
Attach (1) to the rotary device.
Install the right-side jig adapter so that the shorter of the two grooves is facing up.
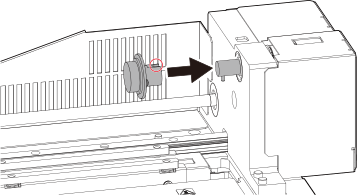
-
Tighten the screw on the right-side jig using the included 3.0 mm (0.12 in.) hexagonal wrench.
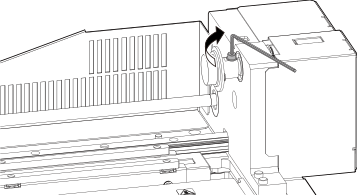
For the jig on the left side:When using a jig created in-house or the included left-side jig (only for models with the UV-LED device located in front of the support table), replace it according to the following procedure.
Use a Phillips screwdriver.-
Use a Phillips screwdriver to remove the left-side jig from the rotary device.
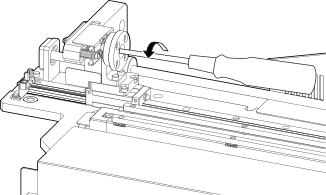
-
Replace the jig on the left side to match the object.
MEMO
- For a jig created in-houseAttach the included left-side jig spare to the jig on the left side.
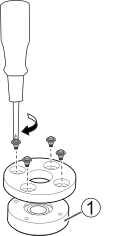
- For models with the UV-LED device located in front of the support tableUse the included left-side jig for irregularly shaped objects with narrow tops, such as wine bottles.
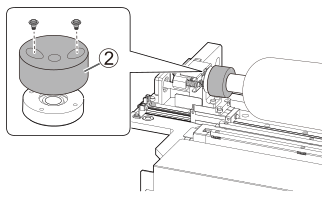
- For a jig created in-house
-
Attach the left-side jig to the rotary device.
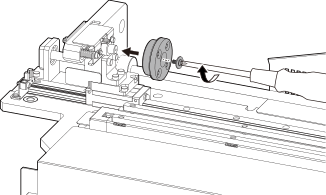
-
Attach the right-side jig adapter to the jig on the right side using a Phillips screwdriver.
- Close the light shield cover.
- Tap Finish All.
- Tap Next.