
2. Setting a Registered Object
Procedure
- Select the media to use from the list of registered media, and tap Next.
-
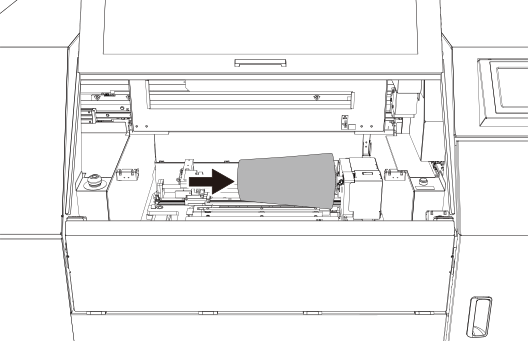
Open the light shield cover, place the object on the support table, and tap Next.
When the object has a conical shape or other shape where the diameter is not constant, place it so that the side with the larger diameter is on the right side. If it is placed with the smaller diameter on the right side, printing will not be possible.
-
To change the Print Origin Position Setup, tap .
The Print Origin Position Setup window appears.
If confirmation is not necessary or has been completed, tap Next.
-
Perform operations according to the on-screen instructions.
If this step is not necessary, tap Next without performing any operations.
-
Tap
 .
The pointer moves.
.
The pointer moves. -
Tap or
 and the rotate button on the rotary device (
 or
or  ) to move the pointer to the printing reference point.
-
Tap Save.
The Media Settings window appears.
-
To change the Printing Area, tap .
The Printing Area window appears.
If confirmation is not necessary or has been completed, tap Next.
-
Attach the light blocking sheet to the light shield cover in the gap between the loaded object and the irradiation window of the light shield cover.
Prevents UV light from passing through the gap. This operation is unnecessary if there is no gap.
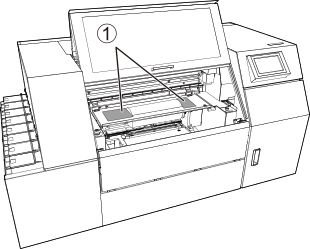 MEMO Use scissors to cut the light blocking sheet to fit the size of the gap.
 -
For models with the UV-LED device located in front of the support table, adjust the position of the UV-LED device.
-
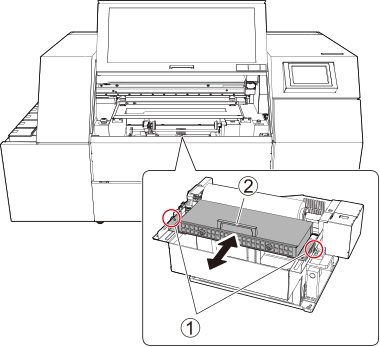
Hold on the UV-LED device and move the UV-LED device forward or backward so that the distance between the object and the UV-LED device is about 5 mm (0.2 in.) at the closest point.
-
Hold on the UV-LED device and move the UV-LED device forward or backward so that the distance between the object and the UV-LED device is about 5 mm (0.2 in.) at the closest point.
- Close the light shield cover.