
Performing a Nozzle Drop-out Test
Before performing the nozzle drop-out test at the start of daily operations, mix the white ink.
-
Check the type of guide attached to the rotary axis unit.
-
Short guide: Loosen the screw and position the guide at the lowest point.
-
Long guide: Loosen the screw and remove the long guide. Leave the guide removed until the nozzle drop-out test finishes.
IMPORTANT Executing the nozzle drop-out test with the long guide attached may cause the head gap sensor to collide with the long guide, resulting in printer damage. -
-
As shown in the figure, load the printing test object on the right end of the printing test stage of the rotary axis unit.
For printing tests, prepare an object with the following dimensions: W (width) = 160 mm (6.3 in.) or more,*1 L (length) = 100 mm (3.94 in.) or more, and H (height) = less than 0.5 mm (0.01 in.).
Secure the object to be printed on with tape or other means to prevent it from becoming loose or misaligned.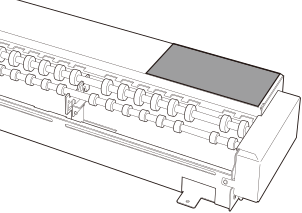
-
Tap
 on the home screen.
-
Decide Preset.
-
Tap New, and then tap Next.
Assuming this is the first time you are using this type of object to be printed on, select New here.
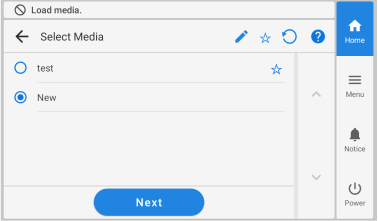
If the media is already registered to the rotary axis unit, select the media (printing settings) from the list of existing media, tap Next, and proceed to the next step.
MEMO-
Media registered to the flat table cannot be selected with the rotary axis unit.
-
Tapping
 makes it possible to search the registered media by keyword.
To reset the entered keyword, tap
 .
. -
Tapping
 to the right of the media name will change the symbol to
  , and the media will be registered to Favorites.
Tap the Favorites filter
at the top of the operation panel to turn the filter on and show only favorited media.Tap
to turn the Favorites filter off. -
Keyword searching and the Favorites filter can be used at the same time.
Tap
to turn the Favorites filter off and reset all keywords.
-
-
Enter the name of the object to be printed on, and then tap OK.
Tap the keyboard displayed on the screen to enter the name.

-
Configure the [Small-diameter Adapter] setting.
Select Enable when using the small-diameter adapter, and Disable when not using it.MEMOFor the nozzle drop-out test, a test pattern will be printed on the printing test stage. The small-diameter adapter setting can be set to either Enable or Disable.
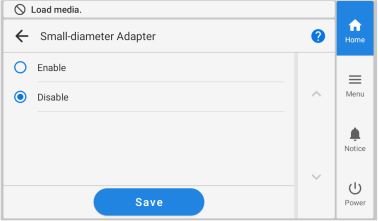
After selecting a setting, tap Save.
-
Tap New, and then tap Next.
-
Tap Complete Setup on the Setup screen.
IMPORTANT
When the rotary axis unit is connected, the printer will print the test pattern on the right side of the printing test stage. You do not need to set Table Height or Printing Area.
As the printing test position cannot be changed, you cannot perform printing tests alongside one another horizontally or vertically.
When performing consecutive printing tests, subsequent printing tests will be performed over the printing position used for the first printing test. When performing consecutive printing tests, make sure to replace the printing test object to be printed on.
-
Tap
 on the home screen.
IMPORTANT
on the home screen.
IMPORTANT- Check that nothing other than the printing test object is loaded on the printing test stage before tapping this icon.
-
Check that the object to be printed on is not attached above the rotary axis unit rollers.
Failure to do so may lead to collisions between the head gap sensor and the object to be printed on, resulting in machine damage.
-
Tap Execute next to Printing Test.
When the following screen is displayed on the operation panel, tap Yes.
Printing of the test pattern starts.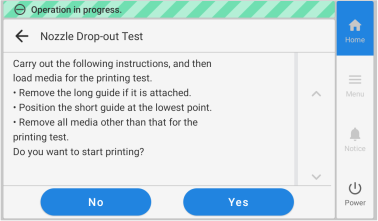 MEMO
MEMODepending on the color of the object to be printed on, it may be difficult to check the white ink test pattern.
Tap
on the home screen, select in that order, and then tap to make the base of the white ink black, making it easier to check the white ink.Nozzle Drop-out Test (Base: Black) is not displayed if the machine is not equipped with white ink.
-
Check whether there is dot drop-out or dot displacement in the test pattern.
Missing blocks indicate dot drop-out. Collapsed or inclined blocks indicate dot displacement.
If there is no dot drop-out or dot displacement, proceed to the next step.
If dot drop-out or dot displacement occurs, perform cleaning of the print heads (normal cleaning).
https://downloadcenter.rolanddg.com/IO-300
MEMO-
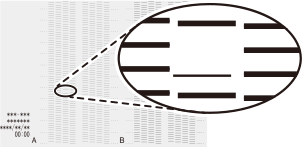
The rotary axis unit being attached or not results in a different test pattern. However, the way to view the target print head is the same. In the case of the figure below, the space from [A] to [B] is head A.
-
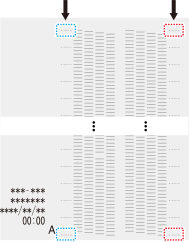
Test patterns are also printed in the columns indicated with the arrows in the figure. The test patterns not being printed at the top, at the bottom, and on both side edges indicates that there is dot drop-out on the edges.
-
Note that After cleaning, perform a printing test. is not displayed on the Normal Cleaning screen when a rotary axis unit is attached.
-
- If you removed the long guide in Step 1, attach it.
-
Tap
 to return to the home screen.