
Determining the Print Surface Height and Printing Position
Set Table Height, and then set Print Origin.
Table Height adjusts the flat table height and rotates the object to be printed on to ensure appropriate clearance between the object and the print heads. This is why Table Height must be set before Print Origin, otherwise Print Origin may be misaligned due to rotation of the object to be printed on.
The Print Origin and Printing Area settings can be configured with the front cover open.
-
Tap
 on the home screen.
-
Decide Preset.
-
Tap New, and then tap Next.
Assuming this is the first time you are using this type of object to be printed on, select New here.
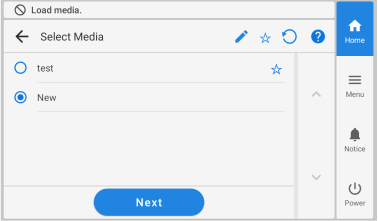
If the media is already registered to the rotary axis unit, select the media (printing settings) from the list of existing media, tap Next, and proceed to the next step.
MEMO-
Media registered to the flat table cannot be selected with the rotary axis unit.
-
Tapping
 makes it possible to search the registered media by keyword.
To reset the entered keyword, tap
 .
. -
Tapping
 to the right of the media name will change the symbol to
  , and the media will be registered to Favorites.
Tap the Favorites filter
at the top of the operation panel to turn the filter on and show only favorited media.Tap
to turn the Favorites filter off. -
Keyword searching and the Favorites filter can be used at the same time.
Tap
to turn the Favorites filter off and reset all keywords.
-
-
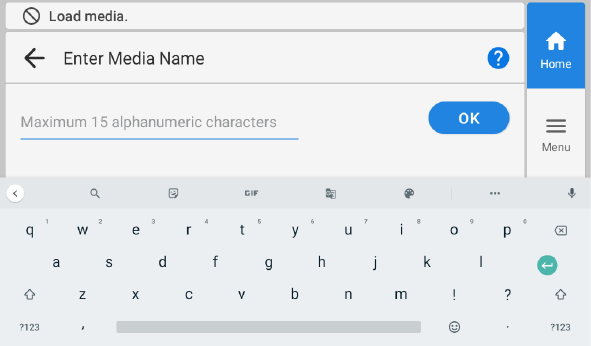
Enter the name of the object to be printed on, and then tap OK.
Tap the keyboard displayed on the screen to enter the name.
-
Configure the [Small-diameter Adapter] setting.
Select Enable when using the small-diameter adapter, and Disable when not using it.MEMO
Be sure to select Enable when using the small-diameter adapter. Selecting Disable will cause the object to be printed on to rotate in a different direction, preventing correct printing.
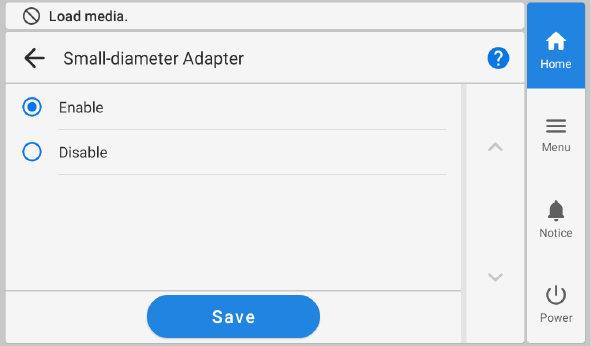
After selecting a setting, tap Next.
-
Tap New, and then tap Next.
-
Set the Table Height.
-
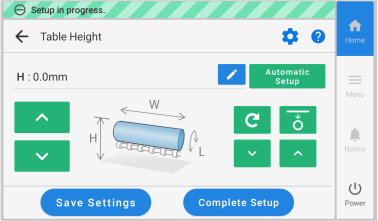
Tap Change next to Table Height.
The Table Height screen appears.
-
Tap
 .
The flat table will automatically move to the location for setting the flat table height.MEMO You can also tap
.
The flat table will automatically move to the location for setting the flat table height.MEMO You can also tap or
or  on the right side of the operation panel to move the flat table manually.
 -
Move the print surface so that it is close to the head gap sensor.
Move the print surface as close as possible to the head gap sensor beforehand to avoid needlessly increasing the time required for automatic height setting.
Tap or long tap
or on the left side of the operation panel.A long tap will speed up the movement after 2 seconds, so take care to avoid going too far.
-
Tap Automatic Setup.
The height of the object to be printed on will be set automatically to a position about 1 mm (39.4 mil) away from the print head's ink emission surface.MEMO
- You can also tap
 and then enter a value to set the height.
 -
Tap
 to enable the setting of Table Lowering Amount.
For details, see "Adjusting the Distance between the Object to Be Printed on and the Print Heads" in the printer's User's Manual.
- You can also tap
-
Tap Change next to Table Height.
-
Configure the settings in Print Origin and Printing Area.
-
Tap Change next to Printing Area.
The Print Origin screen appears.MEMO
Tap
to change the operation performed when configuring the settings.For details, see "Changing the Operation Performed When Setting Up the Printing Area" in the printer's User's Manual.
Note that Return to Maximum Printing Area is not displayed if a rotary axis unit is attached.
Note that Use coordinates to specify the printing area without moving the carriage or table. is not displayed if a rotary axis unit is attached and Base Printing Position is set to Center.
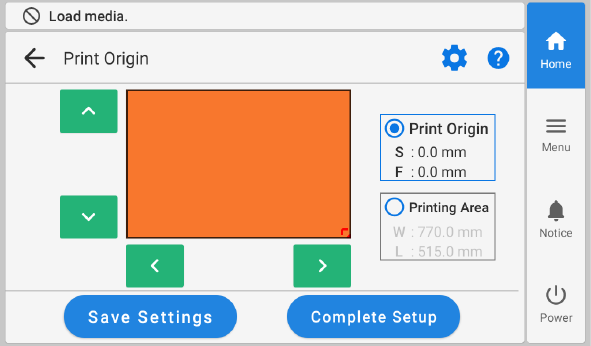
-
Select , ,
 , or
, or  .
The print-head carriage moves to the bottom right point of the currently set printing area, and the pointer is irradiated.MEMO If left without user input for approximately 3 minutes, the print-head carriage automatically returns to the standby position to prevent the print heads from drying out.
.
The print-head carriage moves to the bottom right point of the currently set printing area, and the pointer is irradiated.MEMO If left without user input for approximately 3 minutes, the print-head carriage automatically returns to the standby position to prevent the print heads from drying out.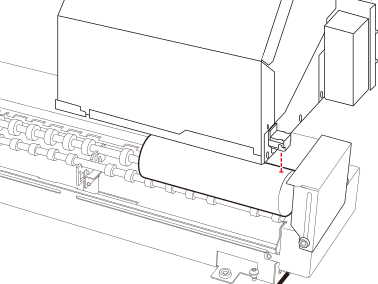
-
Tap or long tap , , , or .
MEMO
-
When the pointer is difficult to see
Depending on the material of the object to be printed on, such as transparent media or high-gloss media with dark colors used on the print surface, the pointer may be difficult to see. In such cases, the pointer may become more visible by placing masking tape on the print surface or on the back.
- Print Origin cannot be changed if Base Printing Position is set to Center and Printing Area is set to the maximum. If Printing Area is set to the maximum, perform Printing Area Settings first.
- If Base Printing Position is set to Center, select Center on the Media under Printing Position in VersaWorks.
-
-
Tap or long tap , , , or .
Set the printing area in the left/right (SCAN) direction and in the rotation direction for the loaded object to be printed on using the pointer.
-
Tap Change next to Printing Area.
-
Tap Complete Setup.
To reconfigure Table Height, tap Save Settings. Tap Save Settings to return to the setup item selection screen to change the settings as necessary.MEMO When the small-diameter adapter is set to Enable, the image shown on the home screen changes from A to B.
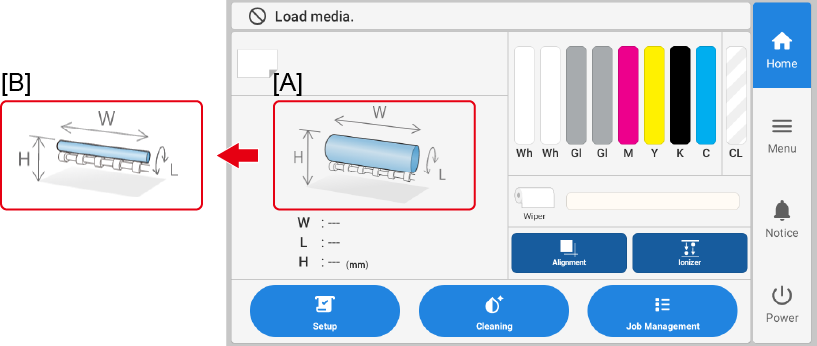
[A]: Display when the small-diameter adapter is disabled [B]: Display when the small-diameter adapter is enabled