
Performing Printing
Print data is created and then output to the machine using VersaWorks.
Print data is created in an application such as Adobe Illustrator and then saved in a file format (e.g., PDF or EPS) that can be read by VersaWorks.
The methods for creating print data differ depending on the color layering and whether a primer has been applied. See the "VersaUV Usage Guide" for a description of how to create typical print data.
If you are using white ink
When printing for the first time for the day, remove just the white ink cartridge, shake it 50 times (about 20 seconds), and then reinsert the cartridge. So that the ink mixes well, shake the ink cartridge horizontally with a stroke length of around 5 cm (2 in.) from each end of the ink cartridge.
The ingredients in white ink tend to settle. Each day, before starting the day's operations, be sure to shake this cartridge. Allowing the ink to stand can cause the settled material to harden, resulting in malfunctions or other problems.

- Before shaking the ink cartridge, wipe off any ink from around its mouth. If you do not wipe off the ink, it may splatter when you shake the ink cartridge.
- When shaking the ink cartridge, firmly hold it with both hands to prevent the ink cartridge cover from coming loose. The cover and ink pouch coming loose and falling may lead to damage or printer failure.
- When you have finished mixing the ink, reattach the ink cartridge immediately. Taking time to reattach the ink cartridge will adversely affect the ink path.
- Even if you are not using the printer, shake the white ink cartridge 50 times (about 20 seconds) once a week.
- Close the front cover if it is open.
- Start VersaWorks.
-
Click the printer to use.
Check that:
- VersaWorks Dual connects to the machine.
- The machines status is Ready to Print.
-
Click the [Gear Icon] of the folder (one of A to E) to enter print data.
The Queue Properties screen appears.
-
Click Get Media Width.
Obtain and then set the printing area set in "Determining the Print Surface Height and Printing Position" from the printer.
For other VersaWorks settings, see the VersaWorks manual.
- Click OK.
-
Enter the print data in the queue folder for which the size was obtained in step 5.
Drag the print data to the job list in the target queue folder.
-
Double-click the entered print data.
The job settings screen is displayed.
Use this screen to fit the print data in the printing area and adjust its position.
The white part in the layout area is the loaded printing area. Note that print data that does not fit within the printing area will be automatically split and then printed as separate pages.
MEMOTo set Base Printing Position to Center, select the Center on the Media under Position in VersaWorks.
- When the size and position are adjusted, clickOK.
-
Click the [Printing Icon].
The Advanced Print Settings screen appears.
Set the Print Count, and then click Print.
Printing starts.
The operation panel will change to the display indicating that printing is in progress.
MEMO-
When you send the output data, Ink circulation in progress. or Normal cleaning in progress. may be displayed on the operation panel. These indicate the preparation operations performed before output. Output will begin after the time displayed on the screen elapses.
- The data being output can be viewed as an image. Tap
 shown in the following figure to switch to the Printing Area screen. Tap this icon again to return to the screen for checking the data being output. However, this functionality is limited to software RIPs that support the display of the output data image (thumbnail).
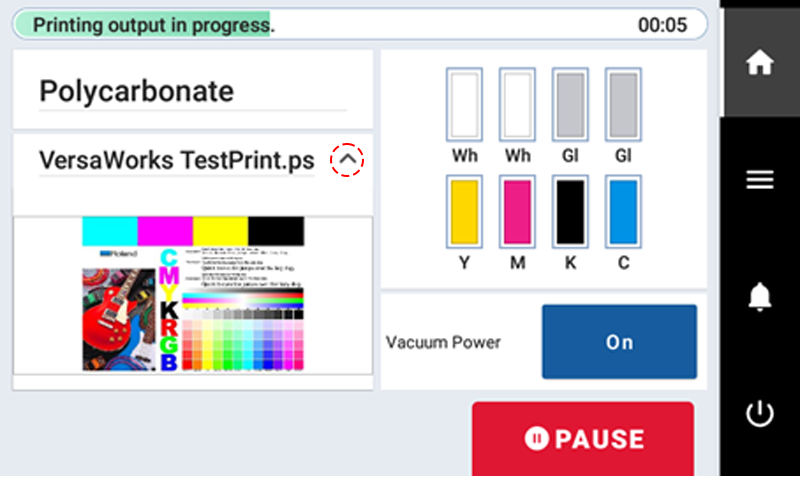
-