Ethernet Connection
A connection to the Internet is required to download and install the software.
Among the various pieces of software to use with this machine, first download and install Roland DG Connect Hub on the computer to connect to the machine. Then, install the other required software.
-
Start the computer, and then log on with an account with "Administrator" rights.If you do not have these rights, ask the administrator to perform this work.MEMO
Only the account with "Administrators" rights that was used to install this software can use it.
-
Access the following URL.MEMO
Depending on where you live, you may be asked to complete user registration before downloading the software.
-
Click [Roland DG Connect / Connect Hub].
-
Click [Installer / Updater[20**-**-**]].The explanation window for Roland DG Connect appears. Review the information and follow the on-screen instructions to download the file.
A Roland DG Connect Hub setup video is available. The contents of this video aid in understanding the flow of setup and the setup details, so view it before performing setup. https://downloadcenter.rolanddg.com/contents/software_parts/connect_info_jp.html
-
Extract the files from [xxxxxxxx.zip], the file you downloaded, to the desired location.
-
Double-click [xxxxxxxx.exe] in the extracted folder.
When the [User Account Control] window appears, click [Yes] (or [Allow]). -
Select the language to use from the pull-down list, and then click [OK].
-
Follow the on-screen instructions to install Roland DG Connect Hub.
Use Roland DG Connect Hub to install the related software. After the software is installed, you can perform operations such as starting and updating the software from Roland DG Connect Hub.
-
Start [Roland DG Connect Hub].
Click the [Roland DG Connect Hub] icon in the notification area. -
Refer to the Master Initial Setting Guide to perform the following operations.
https://downloadcenter.rolanddg.com/contents/software_parts/connect_info_jp.html- Create a Roland DG Connect ID.
If you already have an ID, proceed to the next step. - Configure the Connect Hub settings.
- Create a Roland DG Connect ID.
-
In the main window, select the machine to use.MEMO
If the printer to register cannot be detected, refer to the Roland DG Connect Help.
https://support.rolanddg.co.jp/hc/ja/sections/7536518110105-Roland-DG-Connect -
Click the software icon.
The sidebar is displayed on the right side of the screen.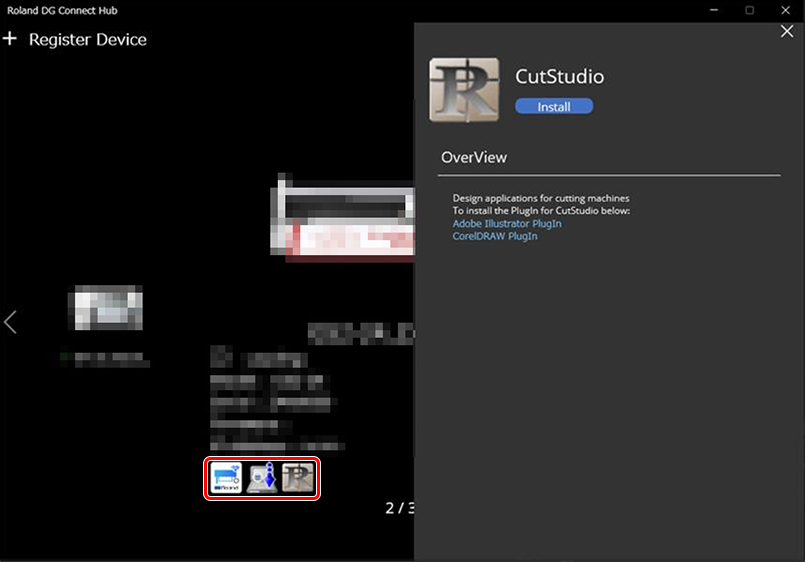
-
Click [Install].
The software installation starts.
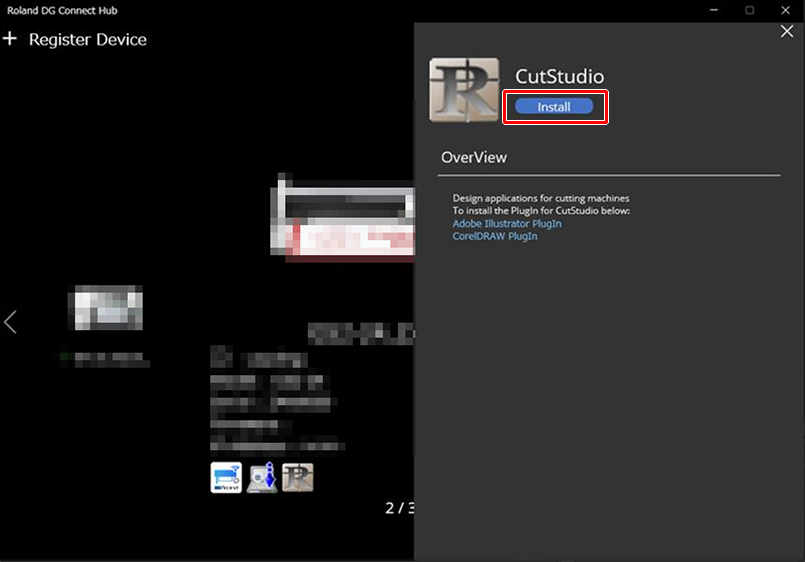 To install multiple pieces of required software, click the icon for each piece of software in the same way.
Note the following points during an installation with an Ethernet connection.
Installing the driver- When the following window appears, select [Install], [Roland DG GS2-24] for the Model, and [IP_(AUTO)] for the Port, and then click [Start].
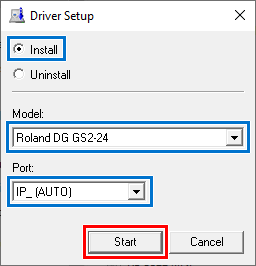
-
If the machine cannot be detected, check the following points, and then click [Refresh].
- The machine is on.
- The machine is connected to the same LAN as the computer by an Ethernet cable.
- The computer is connected to the same LAN as the machine.
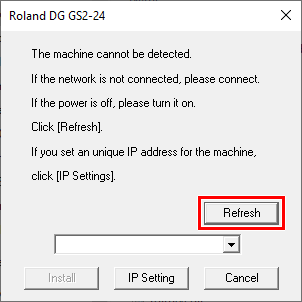 If the machine cannot be detected even after clicking [Refresh], proceed to Setting the IP Address Manually.
After completing the network settings, restart the installation. Do not close the window.
- When the following window appears, select [Install], [Roland DG GS2-24] for the Model, and [IP_(AUTO)] for the Port, and then click [Start].
-
When the installation is complete, from [Control Panel], click [View devices and printers]. When the machine appears under "Printers," this procedure is complete.
If CutStudio is already installed on the computer to connect to this machine, uninstall this software.
Setting the IP Address Manually
If you cannot set the IP address automatically, use the following procedure. If the settings were configured automatically, this procedure is not necessary.
-
Determine the IP addresses.
- Computer: 192.168.0.XXX
- Device: 192.168.0.YYY
"XXX" and "YYY" represent numbers from 1 to 254. Ensure that they are different from the numbers of other network equipment.
-
Determine the subnet mask.
- Computer: 255.255.255.0
- Device: 255.255.255.0
Use the same number for the computer and this machine.
-
Determine the default gateway.
- Computer: 192.168.0.AAA
- Device: 192.168.0.AAA
"AAA" represents numbers from 1 to 254. It may not be necessary to set this number, so check with your network administrator.
1. Determine the network addresses.
The settings listed here are only an example. The procedure and settings given in this manual do not match every environment. In an environment where the computer being used is connected to multiple network devices and the Internet, inappropriate settings will have a large effect on the entire network. For detailed information about the settings, consult your network administrator.
Determine the IP addresses, subnet mask, and default gateway to connect the computer and this machine to a network.-
Display the "Ethernet Properties" screen.Windows 11:
- On the [Start] menu, click [Settings].
- Click [Network & Internet], and then click [Dial-up].
- Click [Network and Sharing Center].
- Click [Ethernet] or [Wi-Fi].
- Click [Properties].
Windows 10:- On the [Start] menu, click [Settings], and then click [Network & Internet].
- Click [Network and Sharing Center].
- Click [Ethernet] or [Wi-Fi].
- Click [Properties].
-
Select [Internet Protocol Version 4 (TCP/IPv4)], and then click [Properties].If the [Internet Protocol Version 4 (TCP/IPv4)] check box was clear, click the check box to select it.
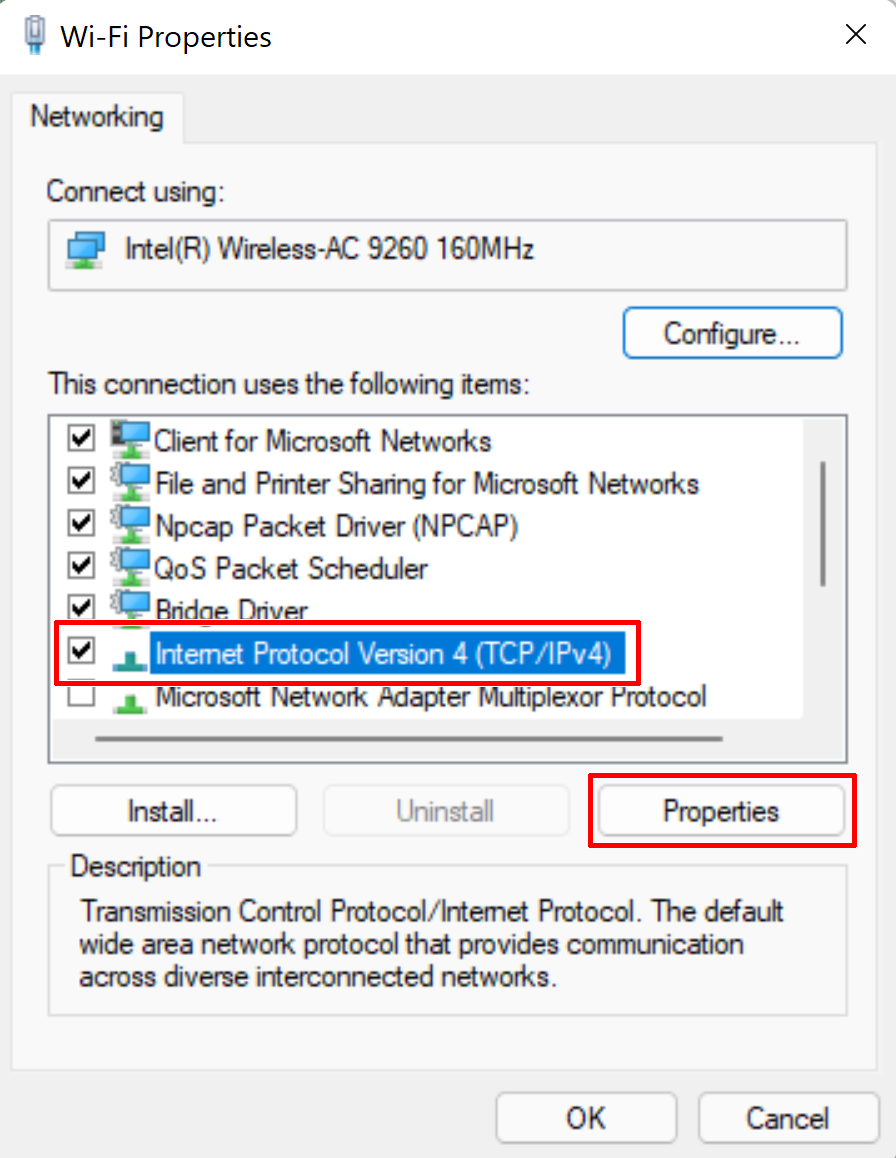
-
Select [Use the following IP address], and then enter the computer network addresses determined under [1. Determine the network addresses.].
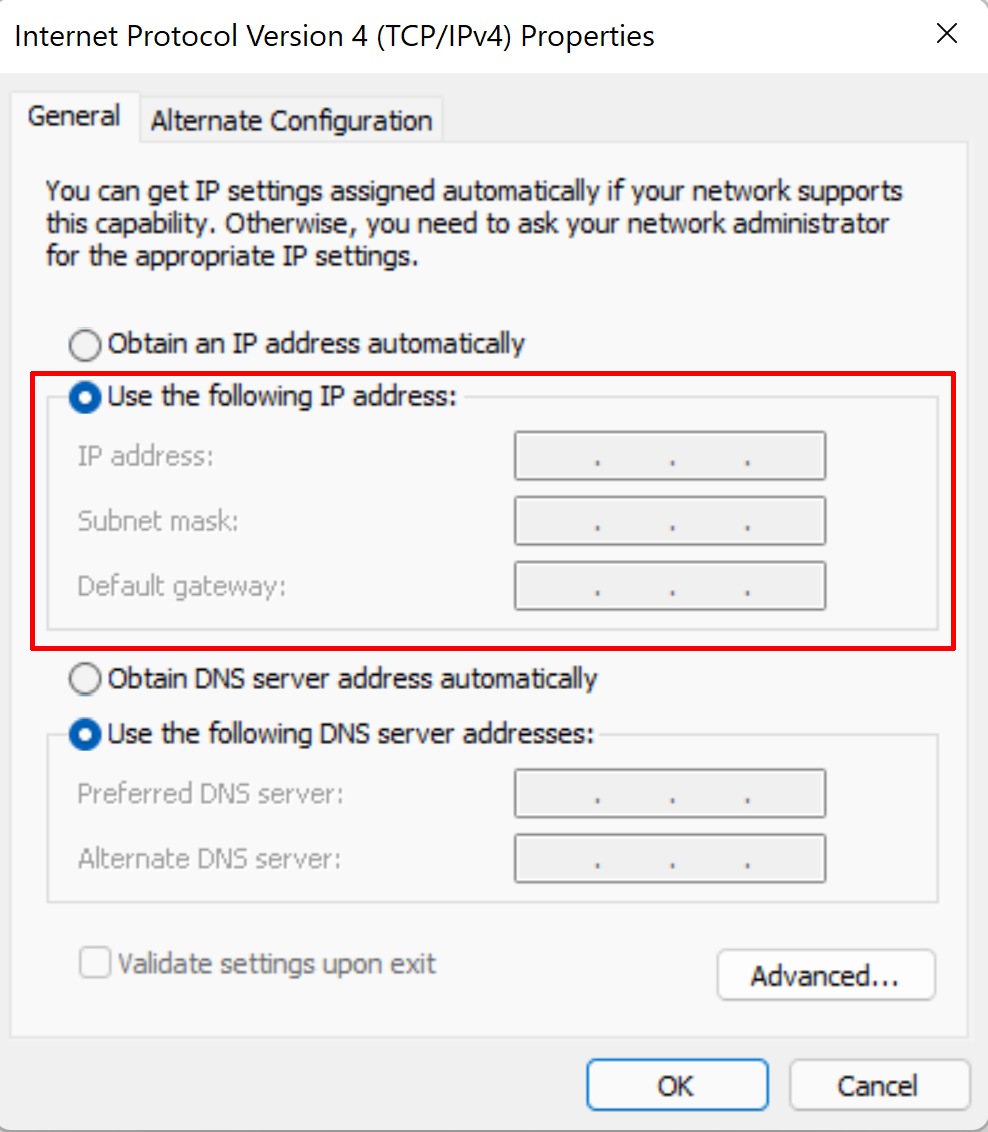
-
Click [OK].
-
Close all the windows opened for the network settings.
2. Set the computer's network.
This step is not necessary when connecting to an existing network environment.
-
If the machine is off, press the power button to start the machine.
-
Press [MENU] twice to display the screen shown below.
-
Press [▼] once to display the screen shown below.
-
Press [▶] once to display the screen shown below.
-
Press [▼] three times to display the screen shown below.
-
Press [▶] twice to display the screen shown below.
-
Press [▶], then [▼] to set DHCP to OFF.
-
Press [ENTER].
-
Press [▼] once to display the screen shown below.
-
Press [▶] twice.
-
Set the IP address.
- Press [▲] or [▼] to enter the IP address of the machine determined under [1. Determine the network addresses.].
Press [◀] or [▶] to move the cursor. - Press [ENTER].
- Press [▲] or [▼] to enter the IP address of the machine determined under [1. Determine the network addresses.].
-
Press [◀], then [▼] to display the screen shown below.
-
Press [▶] twice.
-
Set the subnet mask.
- Press [▲] or [▼] to enter the subnet mask of the machine determined under [1. Determine the network addresses.].
Press [◀] or [▶] to move the cursor. - Press [ENTER].
- Press [▲] or [▼] to enter the subnet mask of the machine determined under [1. Determine the network addresses.].
-
Press [◀], then [▼] to display the screen shown below.
-
Press [▶] twice.
-
Set the gateway address.
- Press [▲] or [▼] to enter the gateway address of the machine determined under [1. Determine the network addresses.].
Press [◀] or [▶] to move the cursor. - Press [ENTER].
- Press [▲] or [▼] to enter the gateway address of the machine determined under [1. Determine the network addresses.].
-
Press [MENU] to return to the original screen.
3. Set the machine's network.
-
Note the following points and restart the software installation.
Follow the on-screen instructions to proceed with the installation.- Click [IP Setting] and enter the IP address of the machine determined under [1. Determine the network addresses.].
After entering the IP address, click [OK].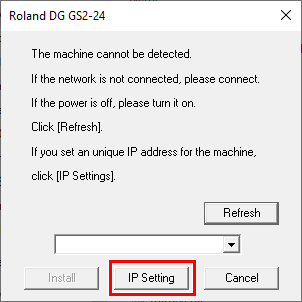
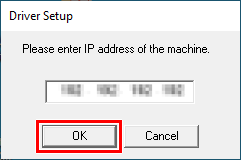
- Click [IP Setting] and enter the IP address of the machine determined under [1. Determine the network addresses.].
-
When the installation is complete, from [Control Panel], click [View devices and printers]. When the machine appears under "Printers," this procedure is complete.
4. Restart installation.