USB Connection
A connection to the Internet is required to download and install the software.
Among the various pieces of software to use with this machine, download and install Roland DG Connect Hub and any other necessary software on the computer to be connected to the machine before connecting the computer to the machine. After installing the software, connect the machine to the computer using a USB cable and register the machine in VersaWorks.
-
Start the computer.
-
Access the following website.
-
Click [Sign Up], and then create a Roland DG Connect account.
MEMOYou can also use your Roland DG Connect account with [Sign In] in Roland DG Connect Hub.
-
Log in to Roland DG Connect.MEMO
If you have not closed the page displayed after you created a Roland DG Connect account, you do not need to log in again. Proceed to step 2.
-
On the sidebar, click
 .
. -
Download Roland DG Connect Hub.There is a Windows version and a Mac version of Roland DG Connect Hub. Download the version that matches the OS of your computer.
-
After downloading Roland DG Connect Hub, install it.Follow the on-screen instructions to install Roland DG Connect Hub.
Start Roland DG Connect Hub and sign in.
If you selected the [Launch Roland DG Connect Hub] checkbox in the Roland DG Connect Hub setup wizard, the software will start automatically when setup finishes.
To sign in, use the Roland DG Connect ID that you created when you created your Roland DG Connect account.
Download the printer driver on the computer to connect to the machine.
-
Access the following URL.
-
Click [Roland DG GS2 Driver].
-
Click
 to the right of Roland DG GS2-24 Driver Win11 x64 Installer/Updater [202*-**-**, Ver.*].The explanation screen appears.
 -
Click [Next].
-
Read the software license agreement and click [I agree] if you agree with the contents.Download [Roland DG_GS2-24_Driver_Win11_x64.zip] to the desired location.
- Use the included USB cable.
- Never use a USB hub.
- Do not use a USB extension cable.
-
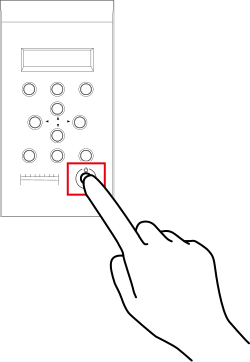
Press the power button to start the machine.
-
Right-click [Roland DG_GS2-24_Driver_Win11_x64.zip], and then click [Extract All...].
-
Click [Browse...], specify the folder in which to extract the files, and then click [Extract].
-
Double-click the extracted folder [Roland DG_GS2-24_Driver_Win11_x64].
-
Double-click [SETUP64.EXE].When the [User Account Control] window appears, click [Yes] (or [Allow]). The setup menu screen appears automatically.
-
Note the following points during installation.
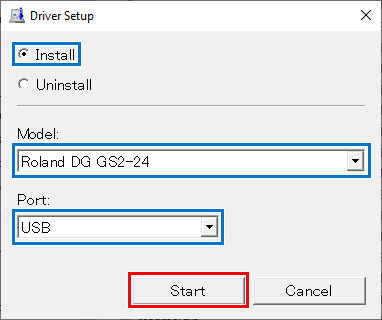
- When the following window appears, select [Install], [Roland DG GS2-24] for the Model, and [USB] for the Port, and then click [Start].
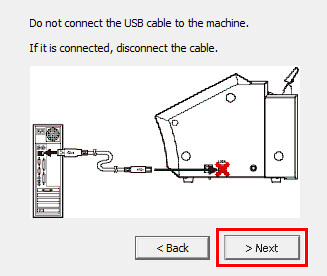
- If the machine and the computer are connected with a USB cable, the following window will appear. Disconnect the USB cable and click [Next].
This window will not appear if the machine is off.
- When the following window appears, select [Install], [Roland DG GS2-24] for the Model, and [USB] for the Port, and then click [Start].
-
When installation is complete, connect the machine and the computer using a USB cable.
From [Control Panel], click [View devices and printers]. When the machine appears under "Printers & Scanners," this procedure is complete.
Before connecting the computer and the machine using a USB cable, be sure to install the driver.
When connecting the machine and the computer using a USB cable, follow the precautions below.

