Installing the Plug-ins
Downloading the Plug-in for CorelDRAW
Use this plug-in when sending data created in CorelDRAW to CutStudio and outputting it from there. Do not use it when outputting data created in CutStudio.
Supported version: CorelDRAW 2018 or later
Follow the procedure below to download [CorelDRAW Plugin].
- USB Connection
- Ethernet Connection
Downloading the plug-in for CorelDRAW (USB connection)
Downloading the plug-in for CorelDRAW (USB connection)
-
Double-click the extracted folder [Roland_DG_GS2-24_Full_Package_Web_Installer].
-
Double-click [Roland_DG_GS2-24_Full_Package_Web_Installer.exe].When the [User Account Control] window appears, click [Yes] (or [Allow]). The setup menu screen appears automatically.
-
Click [CorelDRAW PlugIn] under [Roland_DG_GS2-24_Full_Package_Web_Installer].Read the software license agreement and click [I agree] if you agree with the contents.
Download [CutStudio_Corel-PlugIn_Win.zip] to the desired location.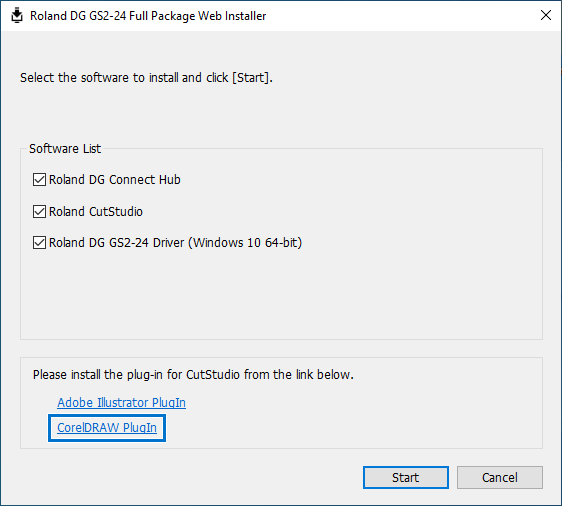
Downloading the plug-in for CorelDRAW (Ethernet connection)
-
Start [Roland DG Connect Hub].
Click the [Roland DG Connect Hub] icon in the notification area. -
In the main window, select the machine to use.
-
Click the CutStudio icon.
The sidebar is displayed on the right side of the screen.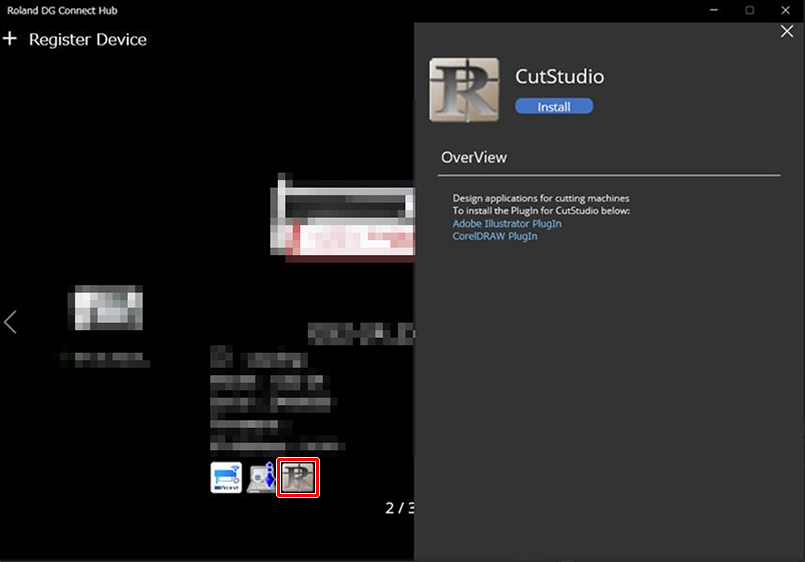
-
Click the plug-in for CorelDRAW.
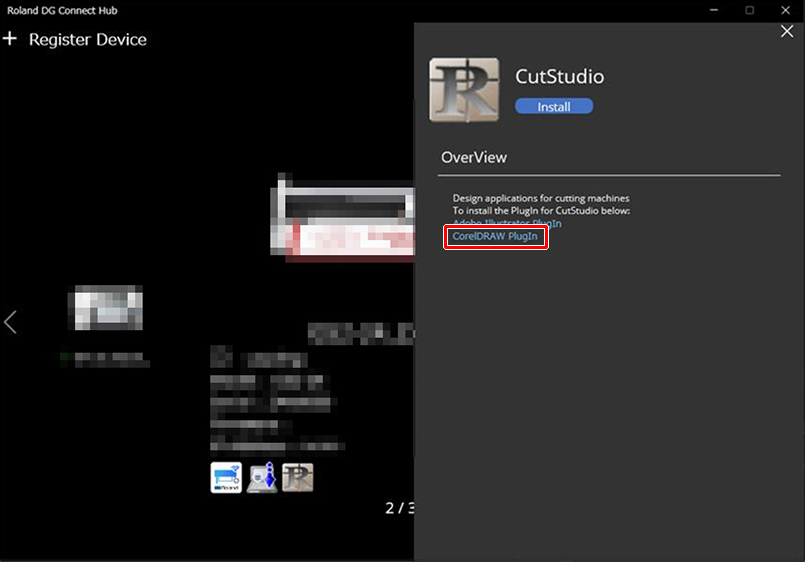
-
Read the software license agreement and click [I agree] if you agree with the contents.Download [CutStudio Corel-Plugin for Win.zip] to the desired location.
Installing the Plug-in for CorelDRAW
1. Place the plug-in files in the prescribed location.
-
If CorelDRAW is running, exit it.
-
Right-click [CutStudio Corel-Plugin for Win.zip], and then click [Extract All...].
-
Click [Browse...], specify the folder in which to extract the files, and then click [Extract].
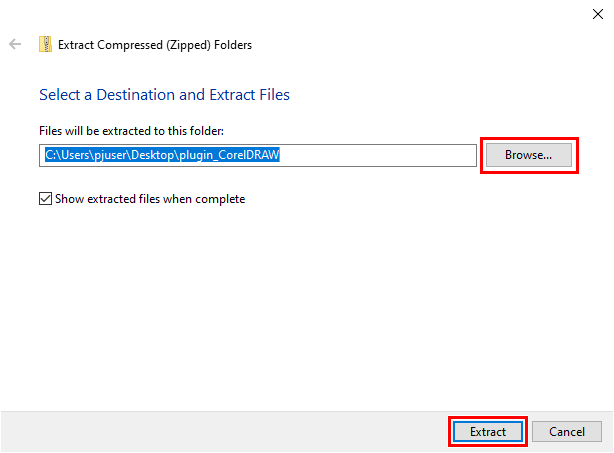
-
Open the folder [CutStudio Corel-Plugin for Win] that is created.This folder contains the following folder and files.
- [CutStudioPlugInSupportFiles] folder
- CutStudioPlugIn.gms
- CutStudioPlugIn.ico
- Readme.txt (contains information such as the installation procedure [English version])
- Readmej.txt (contains information such as the installation procedure [Japanese version])
-
Copy [CutStudioPlugIn.gms], [CutStudioPlugIn.ico], and the [CutStudioPlugInSupportFiles] folder.
-
Open [Local Disk (C)] - [Users] - [User name] - [AppData] - [Roaming] - [Corel] - [CorelDRAW Graphics Suite xxxx] - [Draw] - [GMS].
[xxxx] is the number of the CorelDRAW version that you are using.
MEMO- Select the [Show hidden files, folders, and drives] option.
- If the [GMS] folder does not exist, create a new [GMS] folder.
-
Paste [CutStudioPlugIn.gms], [CutStudioPlugIn.ico], and the [CutStudioPlugInSupportFiles] folder, which you copied in an earlier step.
2. Add the plug-in's start button to the toolbar.
-
Start CorelDRAW.
-
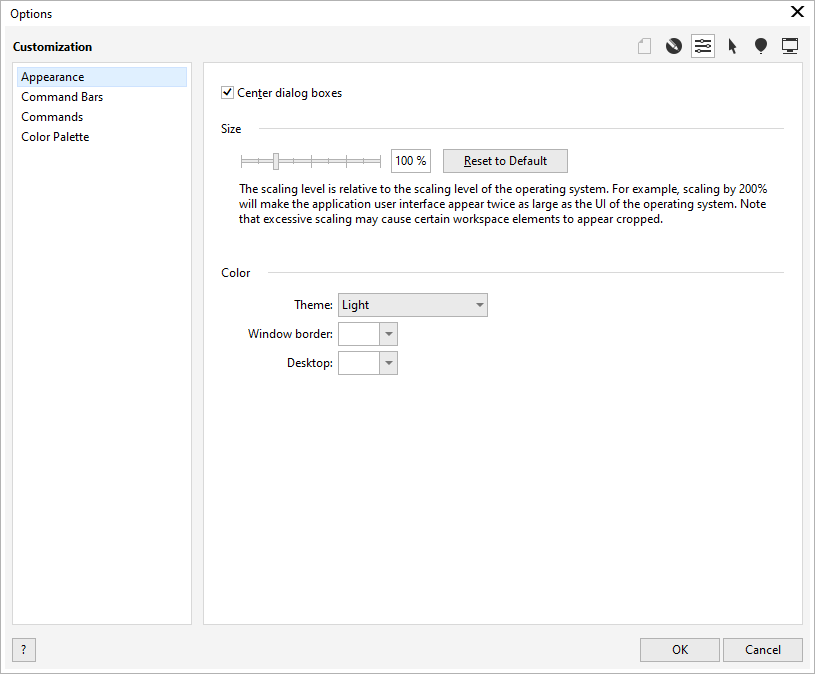
On the [Tools] menu, click [Options], and then click [Customization...].The [Options] window appears.
-
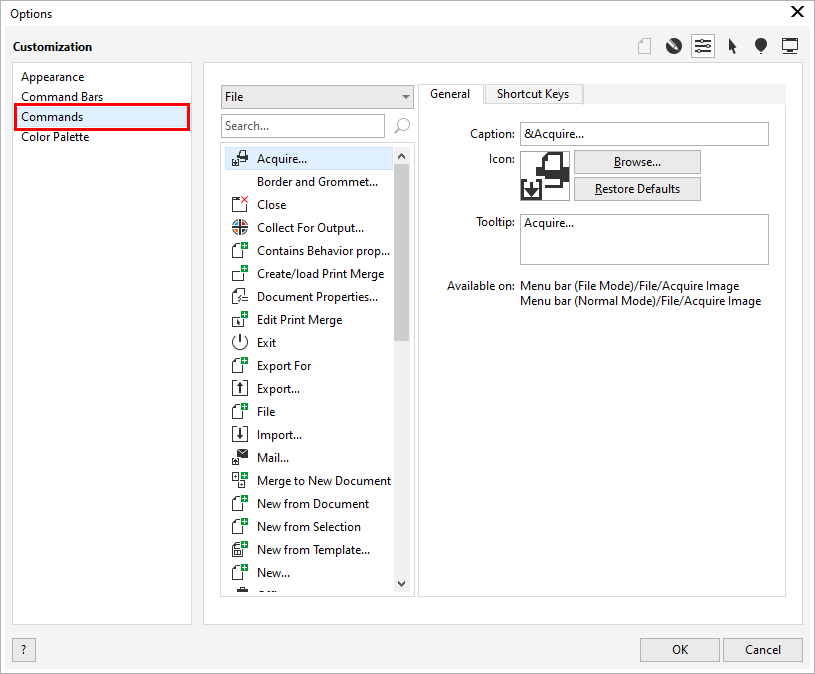
From the submenu, click [Commands].
-
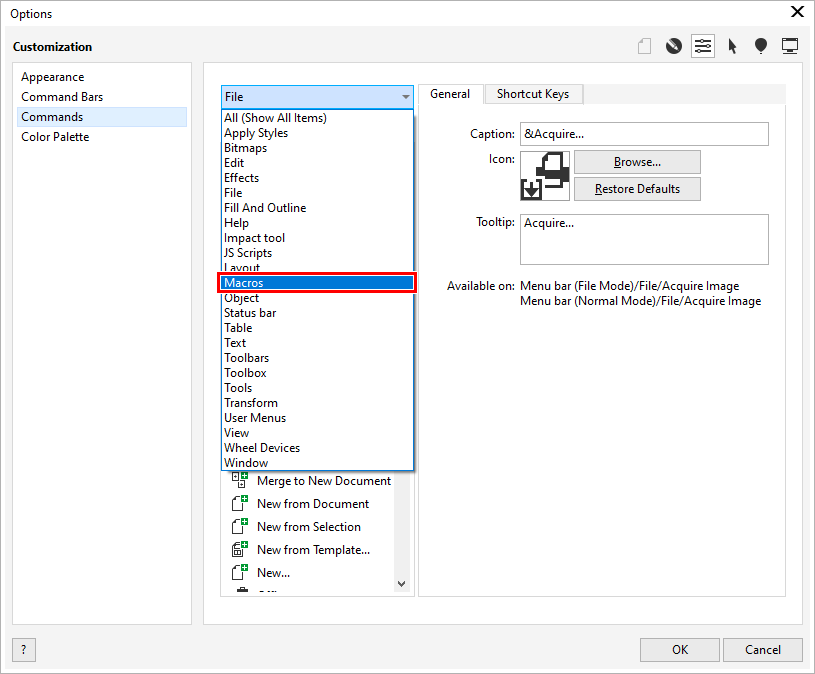
Select [Macros] from the pull-down menu.The macro details will appear.
-
Select [ThisMacroStorage.ShowCutStudioPlugIn] from the macro list, and then drag this item to the toolbar.
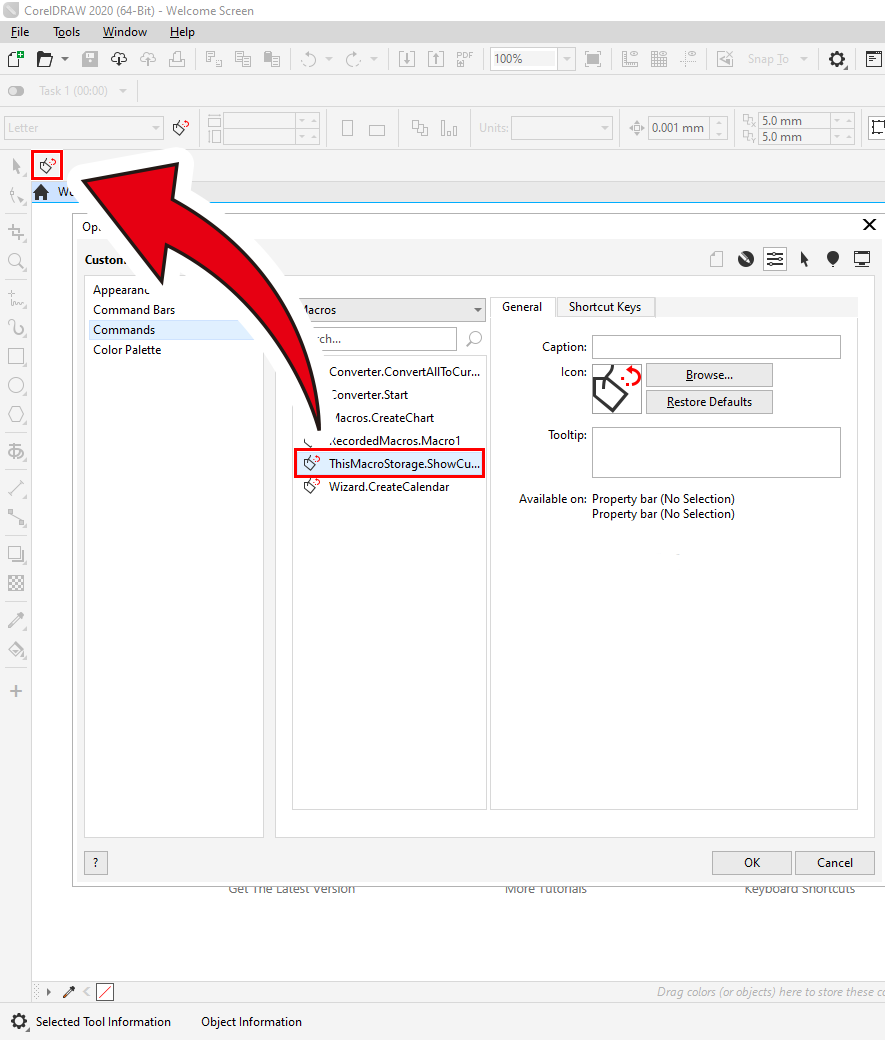 If the macro is dragged to a location other than the existing toolbar, a toolbar for Roland CutStudio Plugin for CorelDRAW is created.
 -
Click [OK] to close the [Options] window.
-
Exit CorelDRAW.This completes the "Adding the Plug-in's Start Button to the Toolbar" procedure.
3. Change the icon of the start button.
-
Start CorelDRAW.
-
On the [Tools] menu, click [Options], and then click [Customization...].The [Options] window appears.

-
From the submenu, click [Commands].

-
Select [Macros] from the pull-down menu.The macro details will appear.

-
Select [ThisMacroStorage.ShowCutStudioPlugIn] from the macro list.
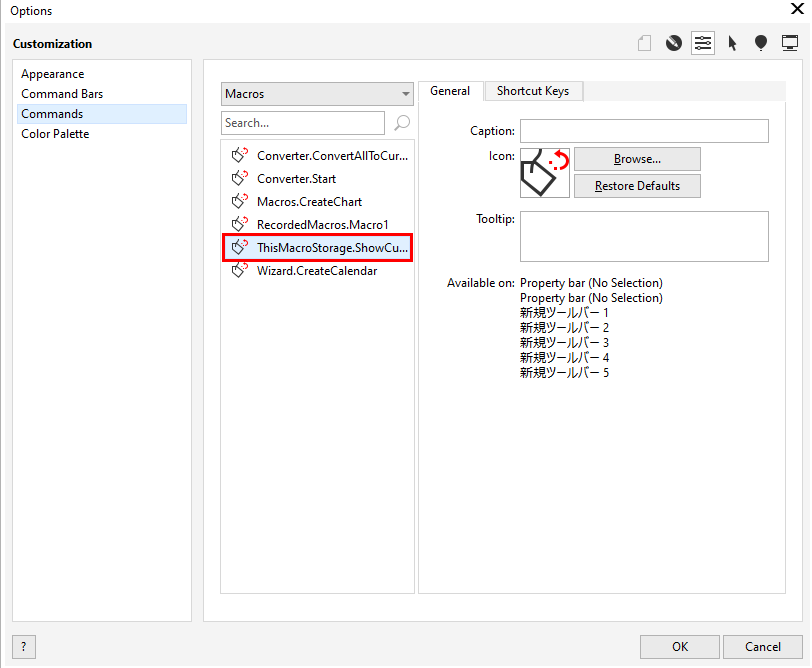
-
Click [Browse...].
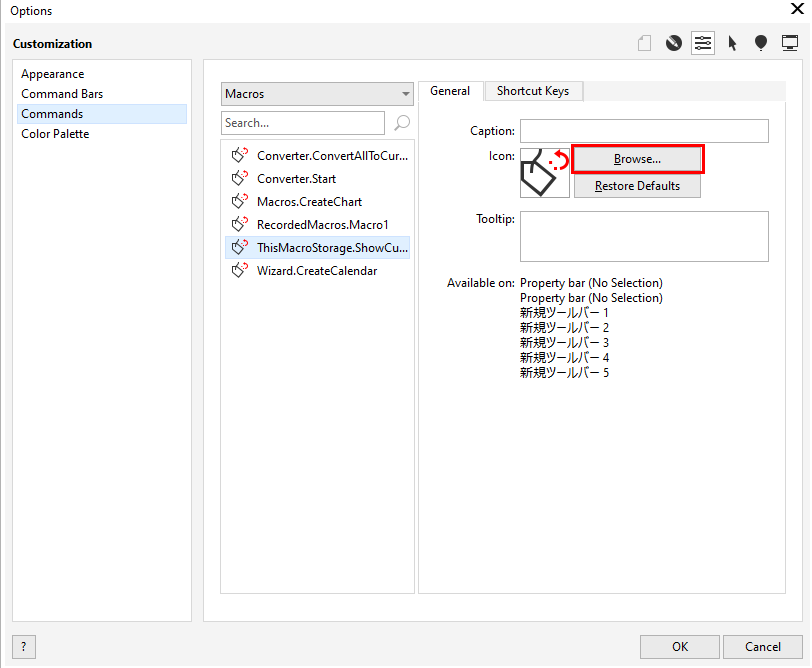
-
Change the icon of the start button.Open [Local Disk (C)] - [Users] - [User name] - [AppData] - [Roaming] - [Corel] - [CorelDRAW Graphics Suite xxxx] - [Draw] - [GMS] folder, select the [CutStudioPlugIn.ico] file, and then click [Open].
[xxxx] is the number of the CorelDRAW version that you are using.
The start button icon changes to the specified icon.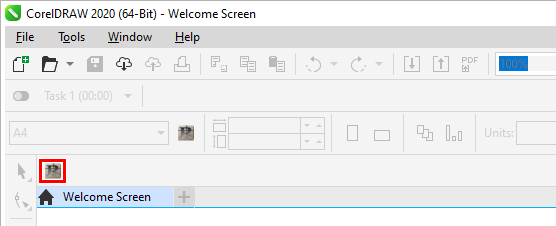
-
Click [OK] to close the [Options] window.
-
Exit CorelDRAW.This completes the "Changing the Icon of the Start Button" procedure.
Even if you do not perform this work, the plug-in has already been installed. If you do not need to change the icon, there is no need to perform this work.