Installation and Initial Settings
Ethernet Connection (Manually Set IP Address)
Important
A connection to the Internet is required to download and install the software.
Among the various pieces of software to use with this machine, first download and install Roland DG Connect Hub on the computer to connect to the machine. Then, install the other required software.
1. Configuring the Machine's Network Settings
Contact your network administrator for the IP address, subnet mask, and default gateway.
-
Press the power button to start the machine.

-
Press [MENU] twice to display the screen shown below.

-
Press [▼] once to display the screen shown below.

-
Press [▶] once to display the screen shown below.

-
Press [▼] three times to display the screen shown below.

-
Press [▶] twice to display the screen shown below.

-
Press [▶], then [▼] to set DHCP to OFF.

-
Press [ENTER].
-
Press [▼] once to display the screen shown below.

-
Press [▶] twice.
-
Set the IP address.
- Press [▲] or [▼] to enter the IP address of the machine.
Press [◀] or [▶] to move the cursor. - Press [ENTER].
- Press [▲] or [▼] to enter the IP address of the machine.
-
Press [◀], then [▼] to display the screen shown below.

-
Press [▶] twice.
-
Set the subnet mask.
- Press [▲] or [▼] to enter the subnet mask of the machine.
Press [◀] or [▶] to move the cursor. - Press [ENTER].
- Press [▲] or [▼] to enter the subnet mask of the machine.
-
Press [◀], then [▼] to display the screen shown below.

-
Press [▶] twice.
-
Set the gateway address.
- Press [▲] or [▼] to enter the gateway address of the machine.
Press [◀] or [▶] to move the cursor. - Press [ENTER].
- Press [▲] or [▼] to enter the gateway address of the machine.
-
Press [MENU] to return to the original screen.
2. Downloading Roland DG Connect Hub
-
Start the computer, and then log on with an account with "Administrator" rights.If you do not have these rights, ask the administrator to perform this work.MEMO
Only the account with "Administrators" rights that was used to install this software can use it.
-
Access the following URL.MEMO
Depending on where you live, you may be asked to complete user registration before downloading the software.
-
Click [Roland DG Connect / Connect Hub].
-
Click [Installer / Updater[20**-**-**]].The explanation window for Roland DG Connect appears. Review the information and follow the on-screen instructions to download the file.
3. Installing Roland DG Connect Hub
Important
A Roland DG Connect Hub setup video is available. This video aids in understanding the flow and details of the settings, so view it before performing setup. https://downloadcenter.rolanddg.com/contents/software_parts/connect_info_en.html
-
Double-click the downloaded [RolandDGConnectHub-installer.dmg] file, and then double-click the [RolandDGConnectHub-installer.pkg] file.
-
Follow the on-screen instructions to install Roland DG Connect Hub.
4. Installing the Driver from Roland DG Connect Hub
Use Roland DG Connect Hub to install the driver.
-
Connect the machine and the computer with a LAN cable.

-
Start [Roland DG Connect Hub].
Click the [Roland DG Connect Hub] icon in the notification area. -
Refer to the Master Initial Setting Guide to perform the following operations.
https://downloadcenter.rolanddg.com/contents/software_parts/connect_info_en.html- Create a Roland DG Connect ID.
If you already have an ID, proceed to the next step. - Configure the Connect Hub settings.
- Create a Roland DG Connect ID.
-
Register the machine in Connect Hub.
- Click [Register Device].
- Select [Search by IP address.].
- Enter the IP address.
- Click the magnifying glass icon.
The network will be searched for the machine. - Select the machine to register, and then click [Register].
The machine will be registered.
-
In the main window, select the machine to use.
-
Click the printer driver icon.
The sidebar is displayed on the right side of the screen.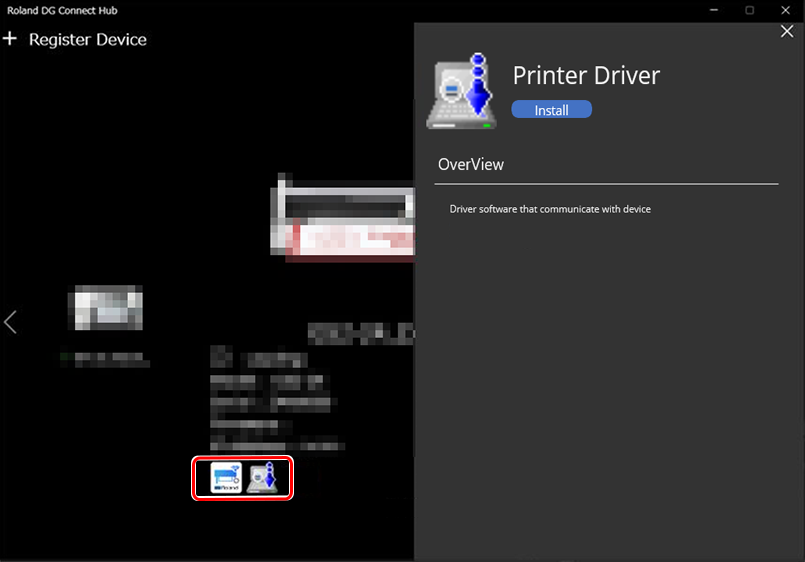
-
Click [Install].
Specify the download destination and click [Open]. The dmg file will be downloaded.
-
Double-click the downloaded [Roland_DG_GS2_Driver.dmg] file.
Specify the download destination and click [Open].
-
Double-click [RolandDG_GS2-24_Installer.pkg].
The Roland DG Cutter Driver installation screen appears. Follow the on-screen instructions to install the Mac driver.
5. Configuring the Driver on the Computer
-
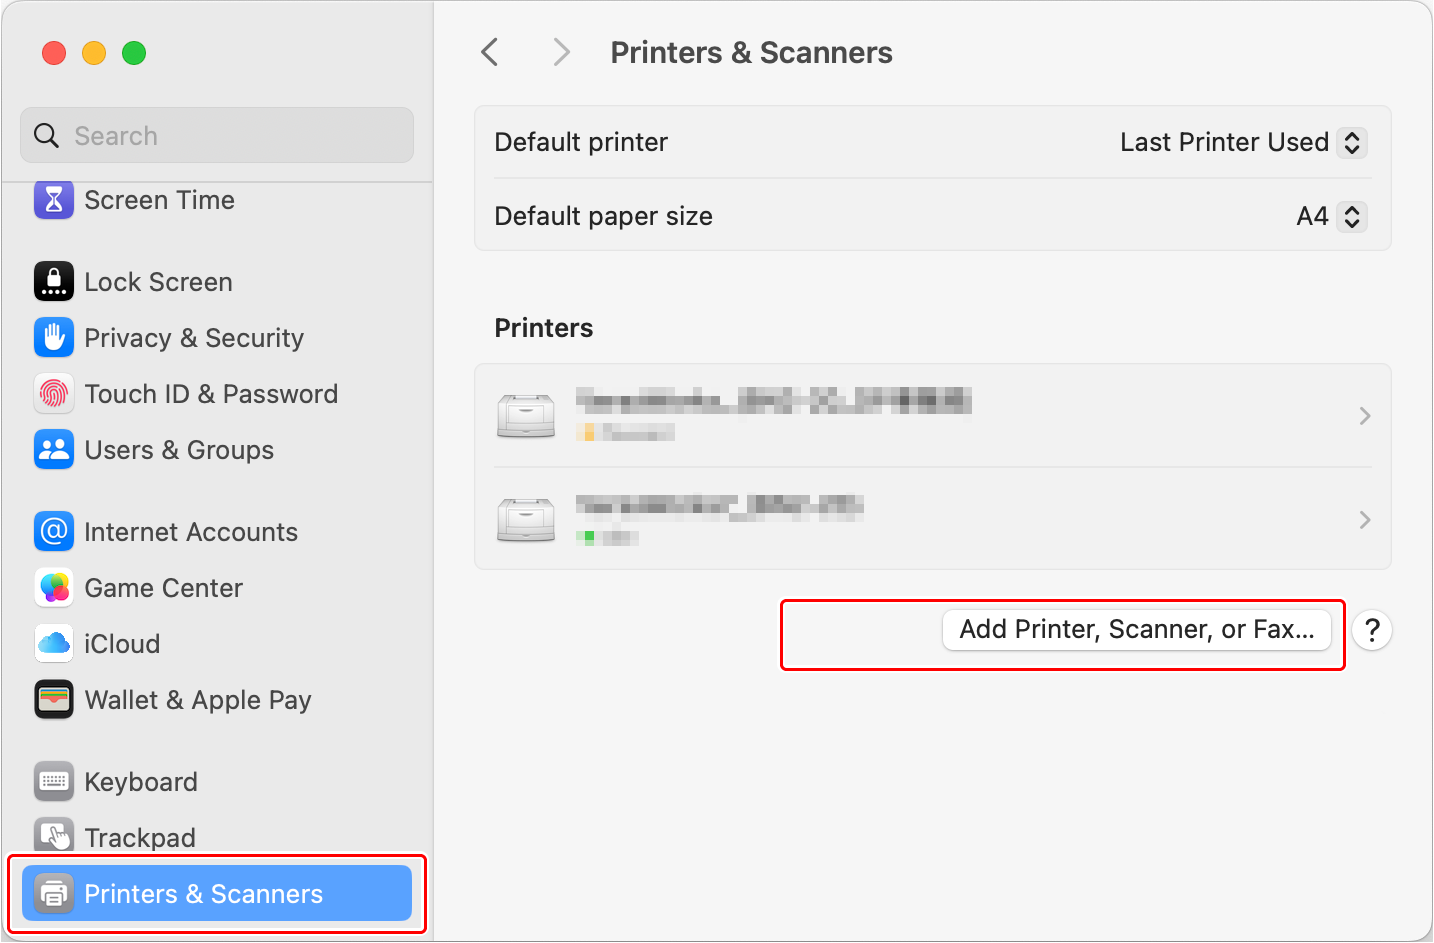
From the Apple menu, click [System Settings...].
-
Click [Printers & Scanners].
-
Click [Add Printer, Scanner, or Fax...].
-
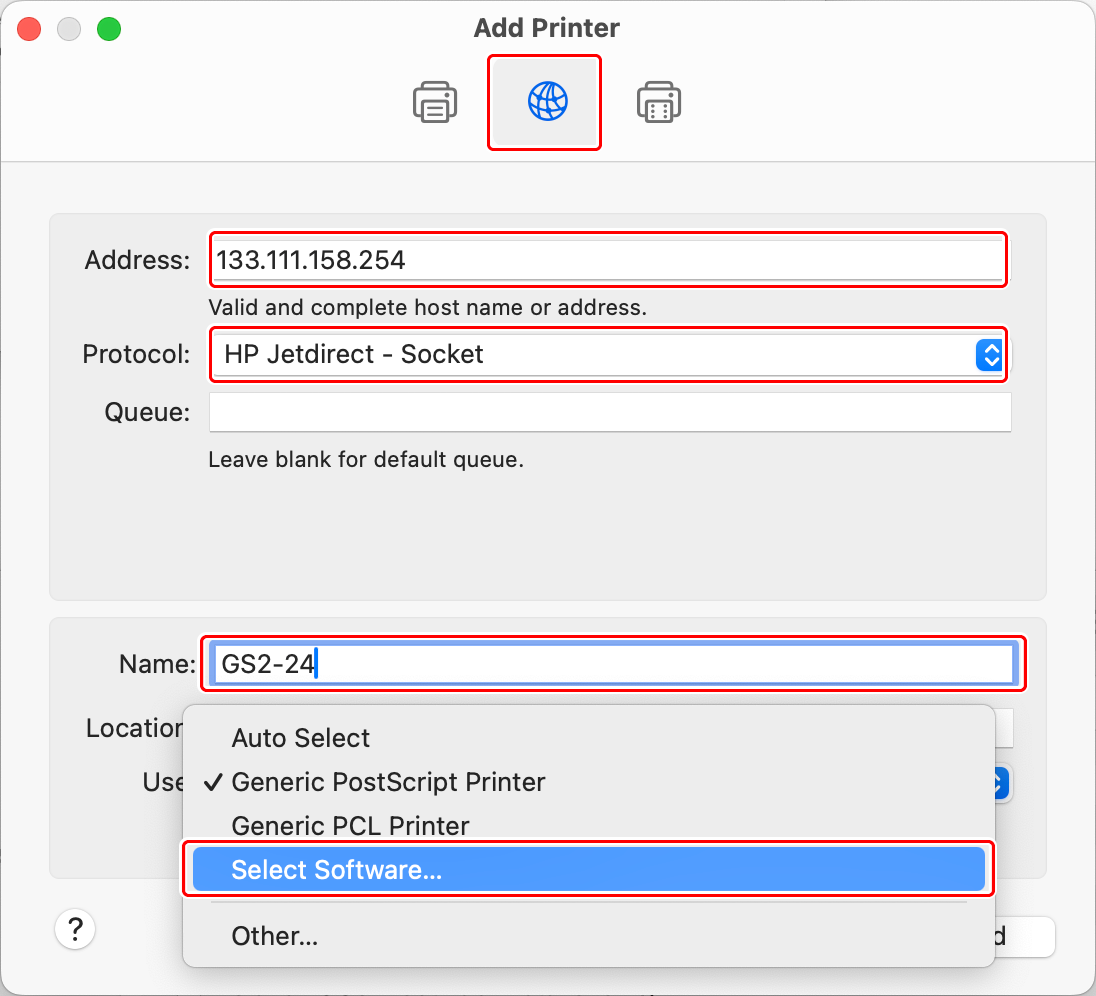
Add the printer.
- Select [IP].
- Enter the IP address in [Address:].
- Select [HP Jetdirect - Socket] from the [Protocol:] pull-down menu.
- Enter the desired name in [Name:].
The IP address entered in [Address:] will be displayed in [Name:]. "GS2-24" is entered here. - From the [Use:] pull-down menu, click [Select Printer Software...].
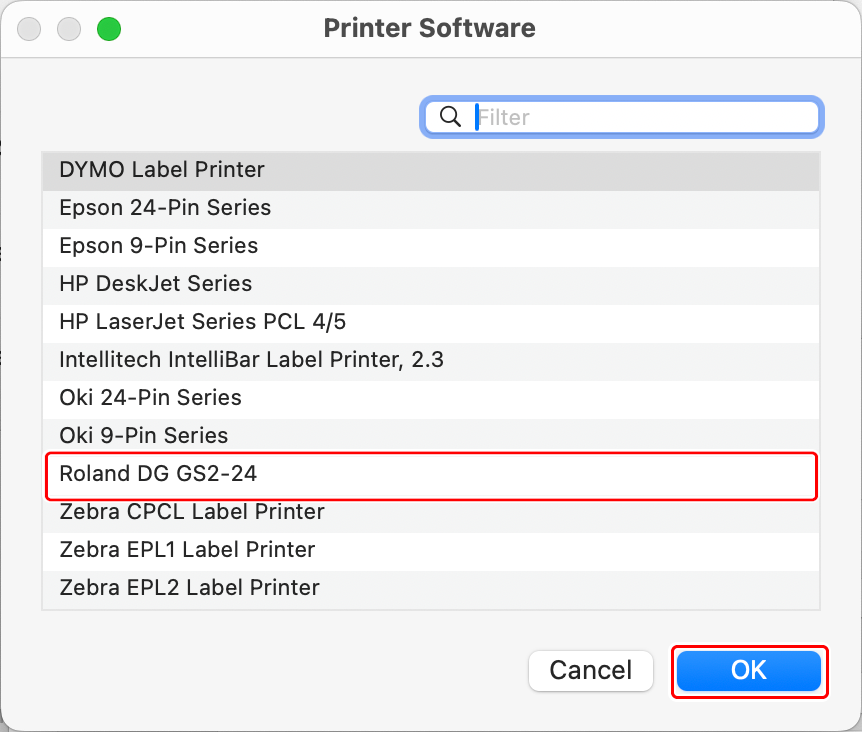
- Click [Roland DG GS2-24].
- Click [OK].
- Click [Add].
-
Check that "GS2-24" has been added under [Printers].
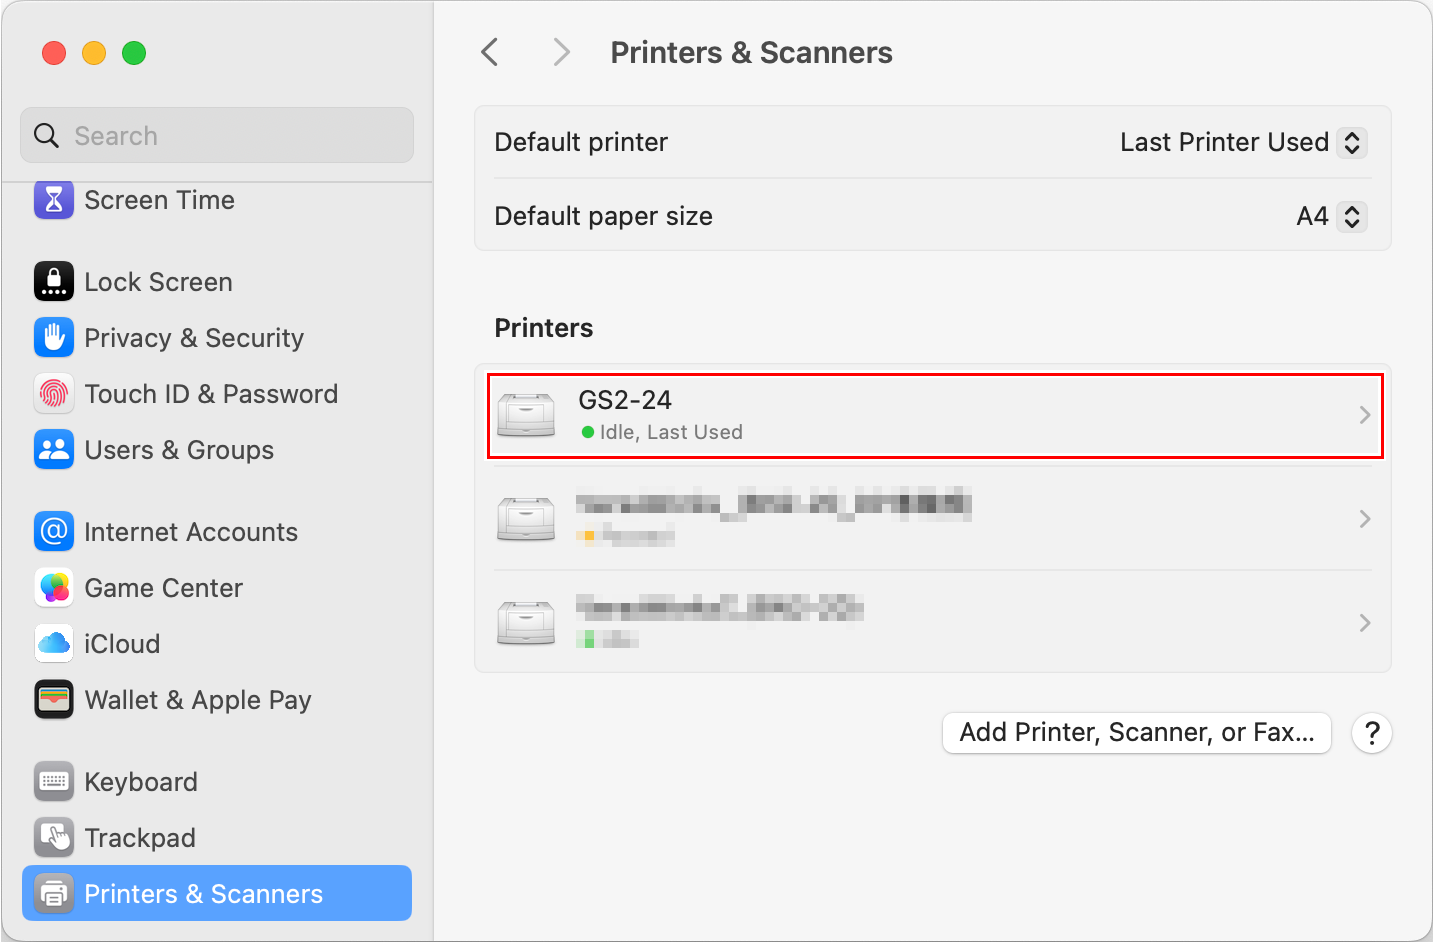 If it has been added, setup is complete.

