
Maintenance
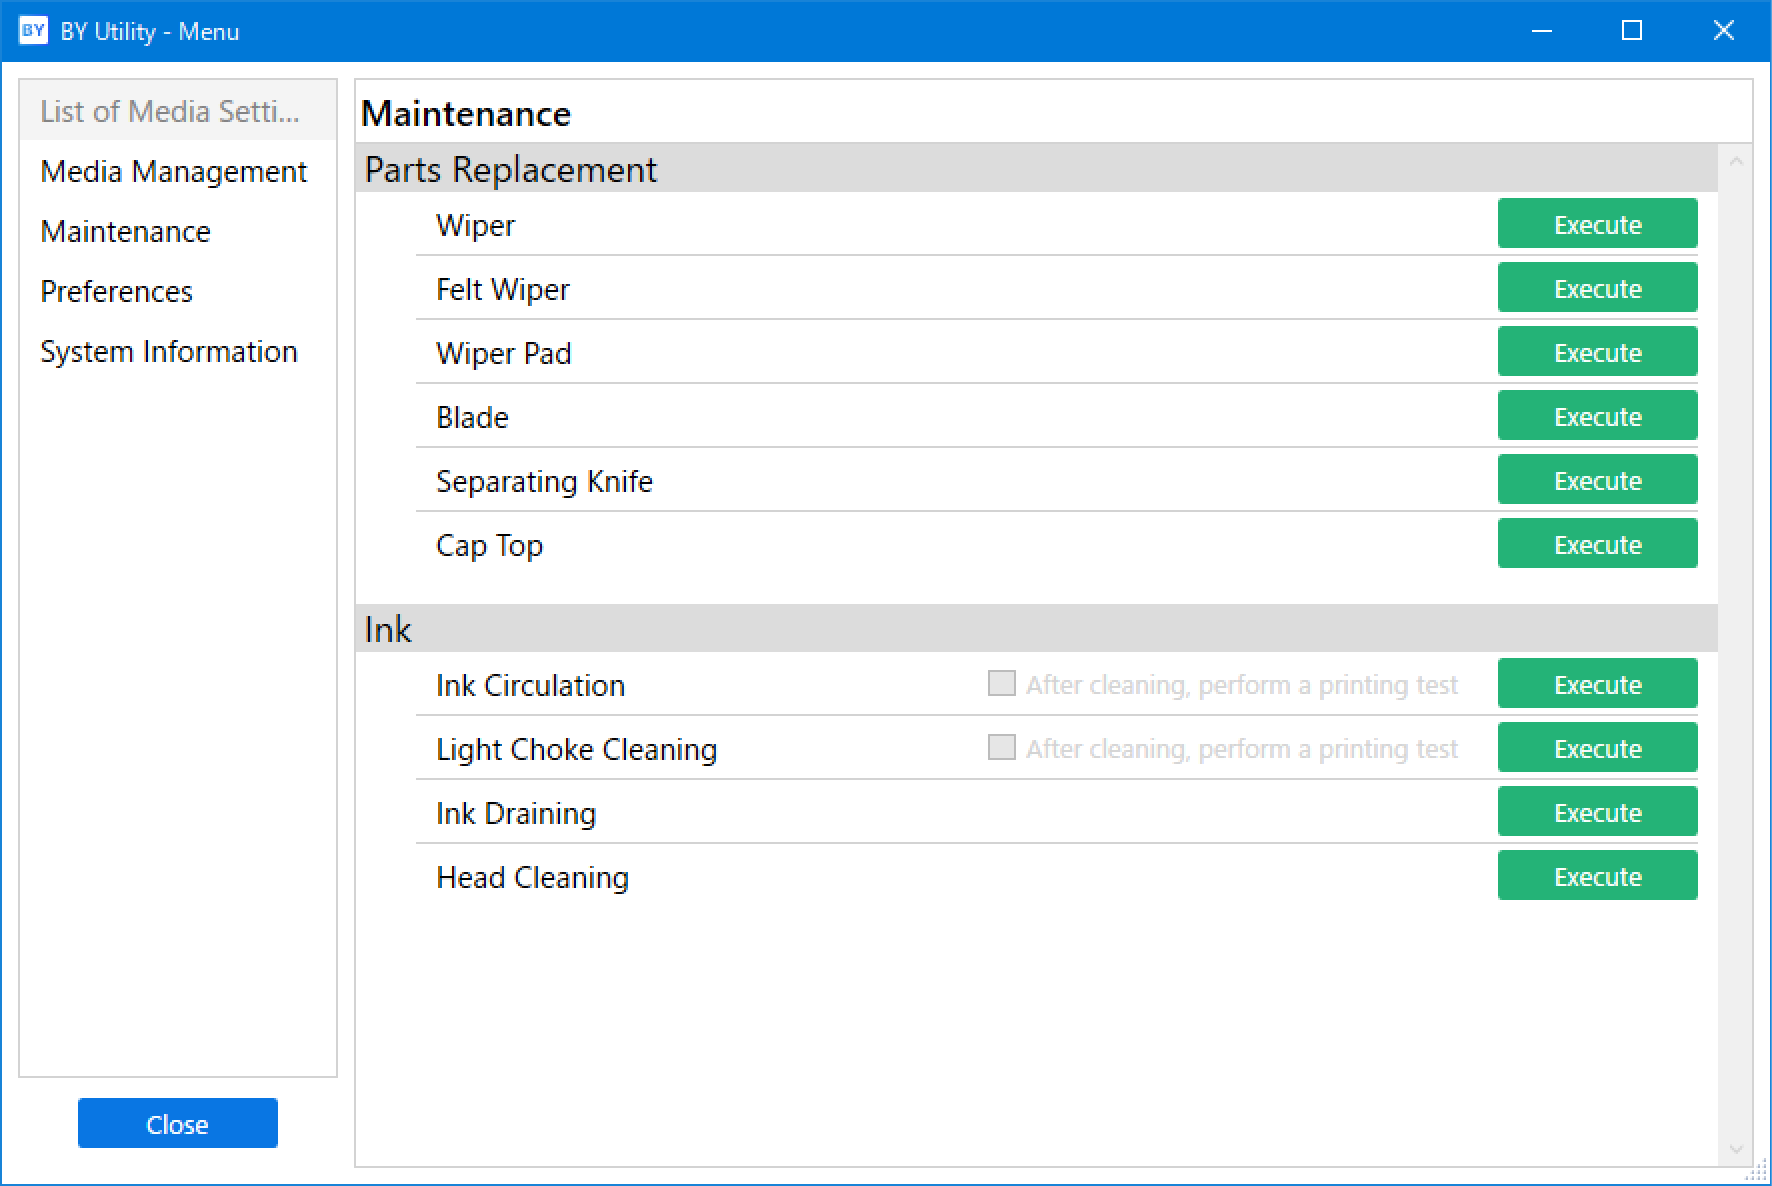
Wiper
Click Execute to switch to Wiper Replacement execution screen. Follow the on-screen instructions to replace the wiper.
For more information, refer to Replacing the Wiper.
Felt Wiper
Click Execute to switch to Felt Wiper Replacement execution screen. Follow the on-screen instructions to replace the felt wiper.
For more information, refer to Replacing the Felt Wiper.
Wiper Pad
Click Execute to switch to Wiper Pad Replacement execution screen. Follow the on-screen instructions to replace the wiper pad.
For more information, refer to Replacing the Wiper Pad.
Blade
Click Execute to switch to Blade Replacement execution screen. Follow the on-screen instructions to replace the blade.
For more information, refer to Replacing the Blade.
Separating Knife
Click Execute to switch to Separating Knife Replacement execution screen. Follow the on-screen instructions to replace the separating knife.
For more information, refer to Replacing the Separating Knife.
Cap Top
Click Execute to switch to Cap Top Replacement execution screen. Follow the on-screen instructions to replace the cap top.
For more information, refer to Replacing the Cap Top.
Ink
- Ink Circulation
Circulates ink to prevent uneven color issues with white ink.
Click Execute to display the Ink Circulation window.
MEMO If the media has already been set up, the After cleaning, perform a printing test menu appears. When this is turned on, a printing test is performed after cleaning. - Light Choke Cleaning
Performs cleaning to improve uneven color issues with ink and severe dot drop-out.
Click Execute and check the remaining amount of white ink. Then, click OK to start Light Choke Cleaning.
When there are uneven color issues with ink
Perform Light Choke Cleaning if uneven color issues are not improved by carrying out the following operations in order: ink mixing, Ink Circulation (only when uneven color issues with white ink occur), and Powerful Cleaning.
When there is severe dot drop-out
When ink discharge issues such as dot drop-out are not resolved even after you perform normal, medium, and powerful cleaning, perform Light Choke Cleaning.
IMPORTANT Light choke cleaning consumes a lot of ink, and overly frequent use may damage the print heads themselves. Avoid performing this operation more than necessary.MEMO If the media has already been set up, the After cleaning, perform a printing test menu appears. When this is turned on, a printing test is performed after cleaning. - Ink Draining
Drains the ink from the machine so ink does not leak when the machine is tilted, such as when it is moved. Ink drying in the ink paths may damage the print heads, leading to malfunctions. Fill the machine with ink as soon as possible after the machine is moved.
Click Execute to switch to Ink Draining execution screen. Follow the on-screen instructions to drain the ink.
- Head Cleaning
Perform this maintenance before moving the machine.
The ink will be drained from the machine, and the ink paths will be cleaned with cleaning liquid.
Click Execute to switch to Head Cleaning execution screen. Follow the on-screen instructions to execute the head cleaning.
For more information, refer to Operations When Moving the Unit.