Preparation Before Use
Setting Up the Printer
- Perform the following operations in order.
- Close the front cover.
- Turn on the main power switch.
- Press the [POWER] key.
When the [POWER] key indicator changes from flashing to steady, startup is completed.
- Connect the machine to the computer by USB cable.
MEMO
- Remove the label affixed to the USB port on this machine.
- Use the supplied USB cable.
- Do not use a USB hub.
The driver is installed automatically.
- After a while, the screen shown in the figure will appear.
Click [Next].

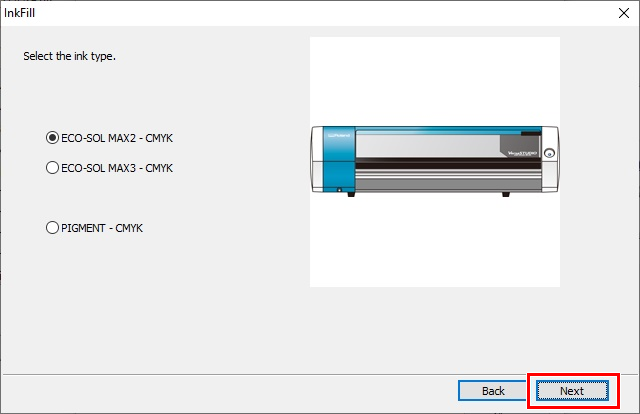
- Select the ink type, and click [Next].
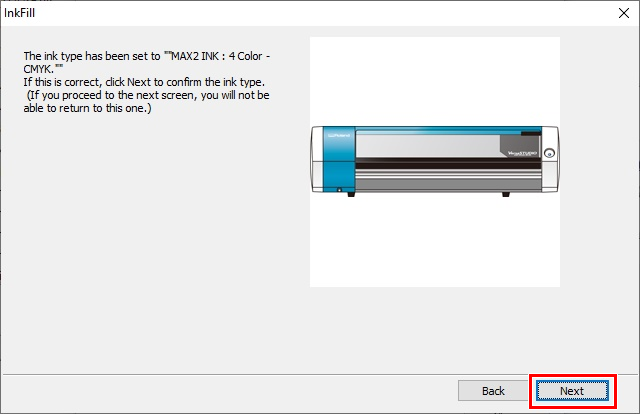
- When the following window is displayed, click [Next].
- Follow the instructions on the screen to perform manual cleaning before ink filling.
MEMO
To prevent discharging problems, perform cleaning before filling the machine with ink.
ImportantImportant notes on this procedure
- Perform cleaning twice. Use one cleaning stick per cleaning session, and then discard the stick after use.
- Never use any implements other than the included cleaning sticks.
- Do not put a cleaning stick that has been used for cleaning into the cleaning liquid. Doing so will deteriorate the cleaning liquid.
- Never rub the nozzle surface of the heads.

- Start filling with ink.
MEMOBefore inserting ink cartridges, shake each of them 50 times (about 20 seconds).
The precipitation of the ingredients in the ink disables printing in normal color. So that the ink mixes well, shake the ink cartridge horizontally with a stroke length of around 5 cm (2 in.) from each end of the ink cartridge.The ink filling procedure is displayed on the Utility screen.
Proceed by reading the on-screen instructions. The [POWER] key will flash while filling with ink. When the message of "The ink tanks have been filled" appears, filling with ink is completed.MEMO
Please note, you will be asked to remove and re-insert the cleaning cartridge into the same ink cartridge slot several times, before being asked to move the cleaning cartridge to the next ink cartridge color slot. Please make you have the cleaning cartridge inserted into the slot that matches the ink cartridge color slot shown on the computer screen of the BN-20A Utility software program.
- Click [Close].
When the manual cleaning is finished, ink filling will start.

