Preparation Before Use
Making Adjustments before Output
Before output, perform printing tests and test cuts, and make the
necessary adjustments.
This is required to make the most of BN-20A's printing and cutting
capabilities. Perform this task before daily operations and when
changing the media type.
1. Starting the adjustment
-
Click
 in
the computer's task tray.
in
the computer's task tray.
The BN-20 utility is displayed.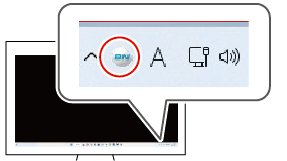
-
In the [Adjustment] tab, click [Adjust All].
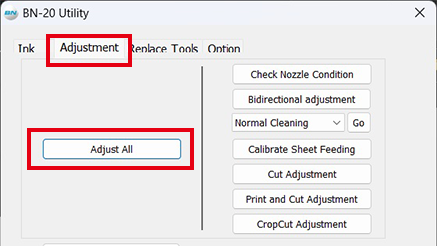
- Click [Next] on the displayed screen.
2. Check for nozzle clogging
-
Click [Test Print].
The test pattern is printed. Follow the on-screen instructions to check for nozzle clogging.Nozzle is clogged, proceed to step 2.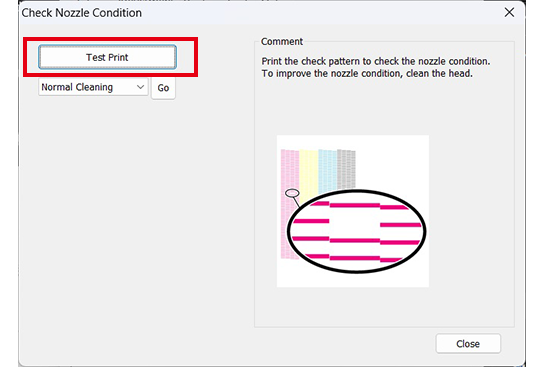
Nozzle is not clogged, proceed to step 4. -
Select [Normal Cleaning] and click [Go].
Normal cleaning starts.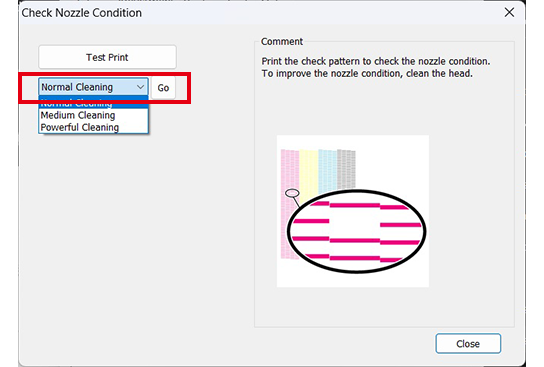
-
Click [Test Print] to check for nozzle clogging again in the
same manner as step 1.
If the nozzle clogging is not fixed, perform "Normal Cleaning" again.
For information about "Medium Cleaning" and "Powerful Cleaning," refer to pages regarding maintenance in "BN-20A User's Manual." - Click [Next] on the displayed screen.
3. Bidirectional adjustment
-
Click [Test Print].
The test pattern is printed.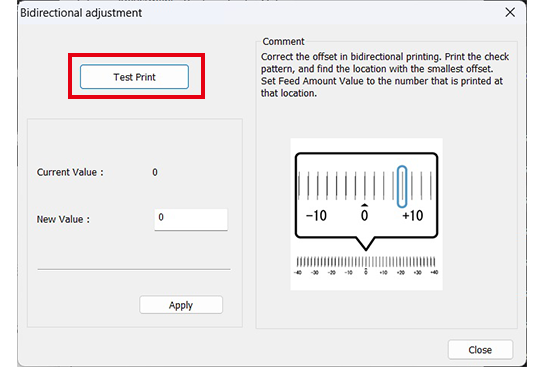
- Read the on-screen instructions and then enter a value in the [New Value] box.
-
Click [Apply].
The value in [Present Value] changes to the entered value. - Click [Close].
- Click [Next] on the displayed screen.
4. Media feed correction
-
Click [Test Print].
The test pattern is printed.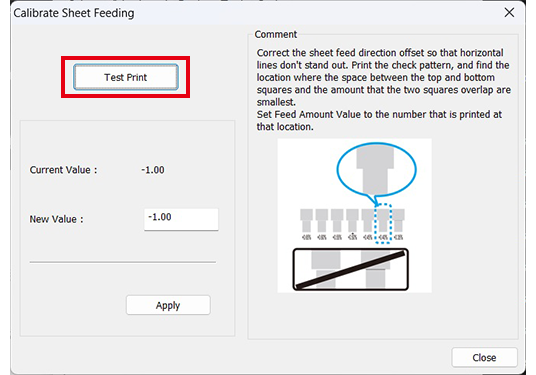
- Read the on-screen instructions and then enter a value in the [New Value] box.
-
Click [Apply].
The value in [Present Value] changes to the value entered. - Click [Close].
- Click [Next] on the displayed screen.
5. Adjusting cutting
-
Click [Test Cut].
Test cutting is performed.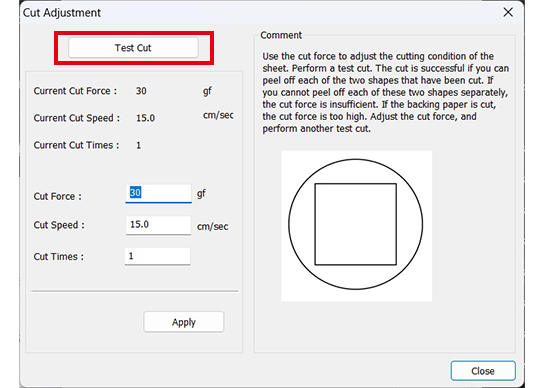
- Read the on-screen instructions and then enter values in the [Cut Force] box.
-
Click [Apply].
Repeat steps 1 to 3 until adjustment is done to allow the two shapes to peel off separately. - Click [Close].
- Click [Next] on the displayed screen.
6. Adjusting printing and cutting
-
Click [Print and Cut Pattern].
The test pattern is printed.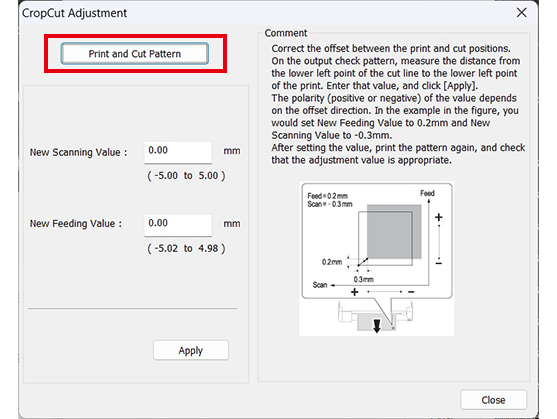
- Follow the on-screen instructions and enter the values for [New Value for Scanning] and [New Value for Feeding].
-
Click [Apply].
The values in [New Value for Scanning] and [New Value for Feeding] change to "0." - Click [Close].
-
Click [Skip] on the displayed screen.
"Crop cut adjustment" will not be done here. It is not necessary for printing and cutting. -
Click [OK] on the displayed screen.
Adjustment is completed.


[close]