
Step 2: Performing Normal Cleaning
Procedure
-
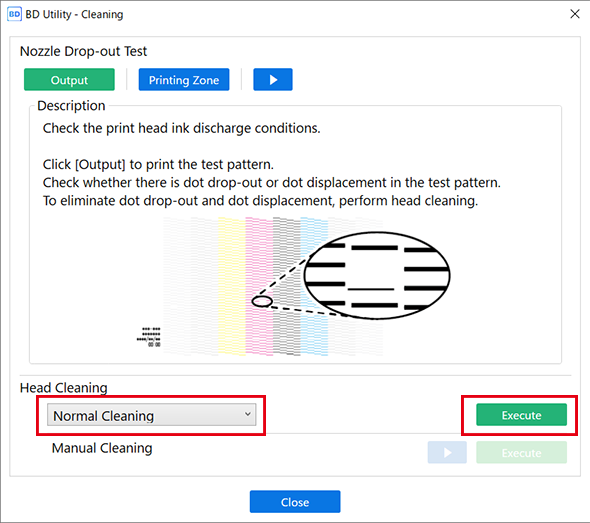
Select Normal Cleaning under Head Cleaning, and then click Execute.
Cleaning in progress. and an estimate for the remaining cleaning time are displayed on the Utility home screen.
-
Set up the nozzle drop-out test paper again.
- If you have removed the nozzle drop-out test paper and checked the test pattern, set up the printer again.
- If you have checked the test pattern without removing the nozzle drop-out test paper, click
 , and then change the Print Origin you have specified with List of Media Settings.
- Click Output under Nozzle Drop-out Test.
- When printing is complete, open the front cover.
-
Check whether there is dot drop-out or dot displacement in the test pattern.
Missing blocks indicate dot drop-out. Collapsed or inclined blocks indicate dot displacement.
 MEMO
MEMO- If the problem persists, try performing normal cleaning again.
- If problems such as dot drop-out and dot displacement persist even after you have performed normal cleaning several times, use a different cleaning method.
If no dot drop-out or dot displacement occurs, preparations for output are finished. - Close the front cover.
- Click Close to return to the original screen.