
Step 1: Performing a Nozzle Drop-out Test
MEMO
Use the following link to view a reference video for this procedure. We recommend that you view this video to understand the overall flow of work.
Procedure
- Set up the nozzle drop-out test paper.
-
On the Utility home screen, click
 Cleaning.
-
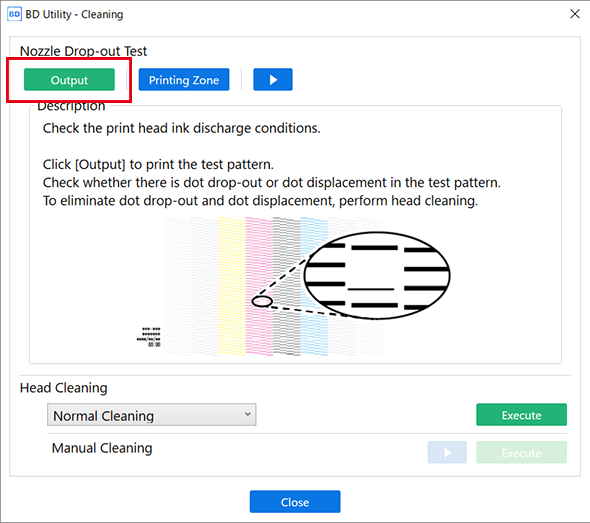
Click Output under Nozzle Drop-out Test.
Printing of the test pattern starts.
-
Check whether there is dot drop-out or dot displacement in the test pattern.
Missing sections in the test pattern indicate "dot drop-out," while a collapsed or sloping test pattern indicates "dot displacement." If the test pattern is difficult to see, open the front cover or remove the nozzle drop-out test paper, and then change the angle to check the pattern.
- If no dot drop-out or dot displacement occurs: Proceed to the next step.
- If dot drop-out or dot displacement occurs: Proceed to Step 2: Performing Normal Cleaning.

- Remove the nozzle drop-out test paper, and then close the front cover.
- Click Close to return to the original screen.