Step 2: Prepare to Create a Profile

Follow the procedure below to prepare to create a profile that matches the printing quality of the selected media.
Procedure
  1. Set the measurement instrument.
    Set it to make it ready to perform the measurement.
  2. Select the media you created.
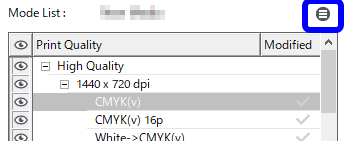
  3. Select the printing quality mode that will be used for the selected media from the Mode List.
    • Variable dot modes (modes that use dots of varying sizes) have "(v)" next to their name. Modes without "(v)" next to their name are printed using dots of a fixed size.
    • Halftone printing mode is available in some of the modes that use fixed dots (the Halftone setting becomes Angled Screen).
    • Clear the Hide Non-recommended Modes check box to display all the available modes. You can show/hide the modes by clicking .
  4. Click .

    The display of the window changes.
  5. Perform Quality Settings.
    1. Under Category - Quality Settings, click Print Quality.
    2. If necessary, set the Direction, Head Speed, Feed Speed, Overprint, and Optimizer Level. (Also set Frequency, Dot Shape, and Angle under Halftone Options if Angled Screen is selected for the Halftone.)
  6. Perform Calibration Settings.
    1. Click Print Chart under Category - Calibration Settings, then click Print.
      Check whether the media loaded in the printer is large enough for the displayed page size.
      The following message appears: The following job will be printed. Do you want to continue?
    2. Specify the queue folder to add the job to.
    3. Click OK .

      The swatch used for density measurement is printed.

      The swatch pattern varies depending on the selected measurement instrument.

    4. Prepare for calibrating the measurement instrument.
    5. Click Measure Chart under Category - Calibration Settings, then click Calibrate.
      The measurement instrument is calibrated.
    6. Set the swatch used for density measurement that was printed in (3) on the measurement instrument, and then click Measure.
    7. Follow the on-screen instructions to start the measurement.
    8. When the measurement is finished, click to save the measurement results.
      The Save As window appears.
    9. Enter the file name, then select labt file for File type and click Save….
    10. Click Fine Tune and Apply under Category - Calibration Settings.
    11. Select Channel, and then check the density curve for each measurement data channel.
    12. If the slopes of the density curves are always positive, click Apply.
    13. If the slope of any portion of a density curve is zero or negative as shown in the figure, adjust the curve so that its slope is always positive, and then click Apply.

    14. To adjust the curve, click the Output value that you want to adjust, and then overwrite the density (percentage) value.
  7. Set the Total Ink Limit.
    1. Click Print Chart under Category - Total Ink Limit, then click Print.
      The following message appears: The following job will be printed. Do you want to continue? Check whether the media loaded in the printer is large enough for the displayed page size.
    2. Click OK .
      The ink limit chart is printed.
    3. Check for oversaturation, bleeding, and ink drying on the printed chart to determine the total ink limit.
    4. Click Set Ink Limit under Category - Total Ink Limit, and then enter the total ink limit that you determined in the previous step into Total Ink.
  8. Click OK .
    The display of the window changes.
  9. Click OK.
    A confirmation window appears to confirm that you want to apply the changes.
  10. Click Yes.
    The settings of the new media are saved.
    IMPORTANT Be sure to click Yes. Clicking No closes the window without saving the settings of the new media.
Step 3: Create a Profile