
Creating Printing Data for Gloss Ink
When creating printing data for gloss ink in Adobe Illustrator, follow the procedure below to create two layers for easy operation: one for colors and one for the gloss ink of spot color swatch RDG_GLOSS.
In this section, create data containing both gloss and matte finishes.
Procedure
-
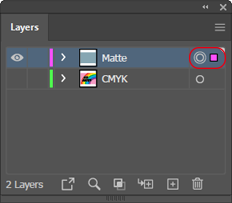
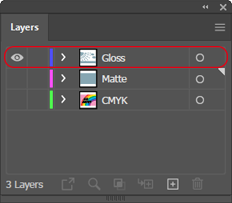
In the Layers window, select the layer with the printing data and click
 .
Select the CMYK layer in this section.
.
Select the CMYK layer in this section.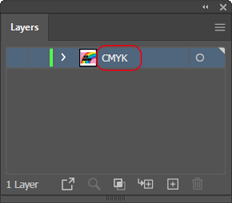
-
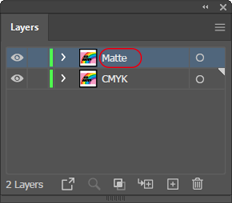
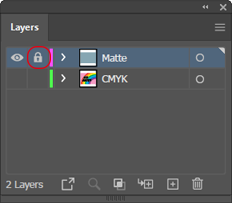
Click Duplicate "Layer Name".

The duplicate layer is created in a position that overlaps the source layer. Create the data to print with a matte finish in this duplicate layer. To identify this layer, it is a good idea to change its name and color.
-
Change the layer name.
Double-click the duplicate layer and change its name to Matte.
-
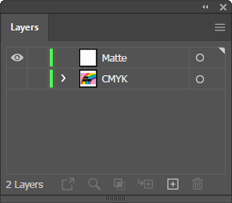
Click
 to the left of the "CMYK" layer to hide it.
-
Delete the duplicated CMYK illustration from the "Matte" layer.
-
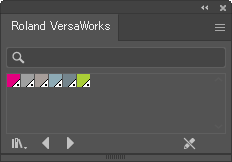
Click .
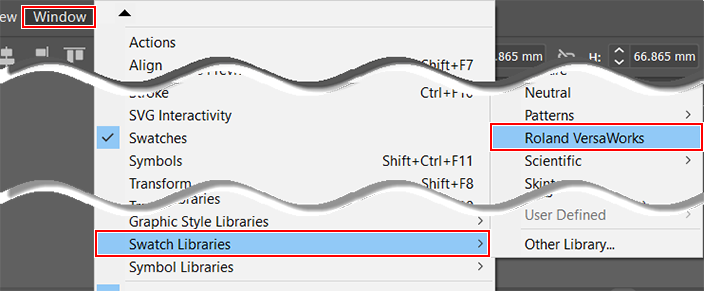
The Roland VersaWorks window appears.
-
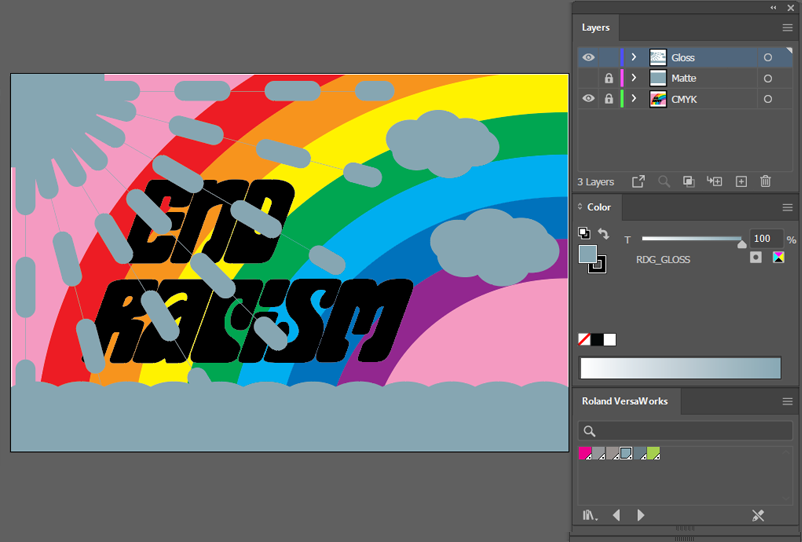
In the Layers window, select the "Matte" layer.
-
In the Color window, select Fill.
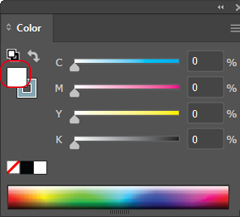 Point: You may also have to select Stroke depending on the matte-printed parts.
 -
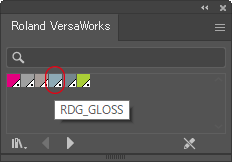
Click RDG_GLOSS in the Roland VersaWorks window.
RDG_GLOSS is specified for Fill in the Color window. The parts specified with RDG_GLOSS are recognized as those to print with gloss ink when the data is opened in VersaWorks.Point: Point to the swatch color to display its name.
-
Click the icon indicated with a red circle to lock the "Matte" layer.
-
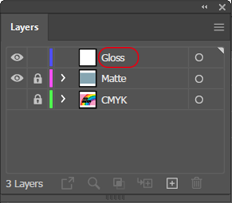
Click
 to create a new layer.
-
Change the new layer's name to "Gloss."
-
Refer to steps 9 to 11, select the illustration created in the "Gloss" layer, and specify RDG_GLOSS.
-
Save the print data.
Even if a piece of data has a "Matte" layer and a "Gloss" layer, VersaWorks recognizes all the locations specified with RDG_GLOSS. Save these layers to separate pieces of data with different jobs.
-
Click for the "Gloss" layer to show only the "CMYK" and "Matte" layers.

-
Select Adobe PDF (*.PDF) for Save as type, specify a folder, and then click Save.
An artboard-size PDF is saved.
Set the file name to "Rainbow_CMYKMatte.pdf" to identify it as having CMYK and matte data.
Point: To avoid errors, only use alphanumeric characters in the file name.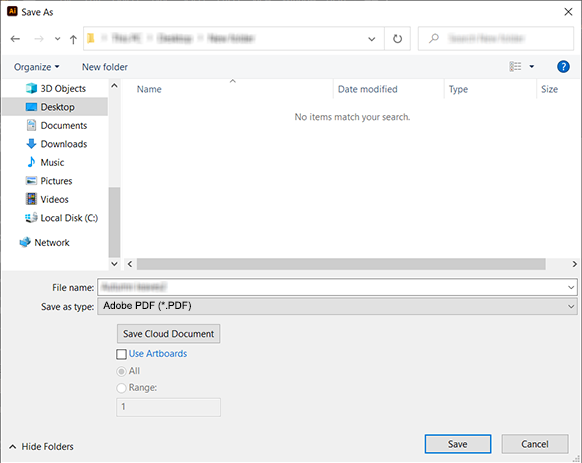
-
Refer to step 2 and show only the "Gloss" layer.
-
Click