
Cleaning the Print Heads
Perform manual cleaning to clean the print head caps and the nozzle guards.
| Required items | |
|---|---|
 |
 |
| Cleaning stick | Cleaning liquid |
Do not perform cleaning immediately after printing has finished. (Wait approximately 15 minutes after printing finishes.)
The area around the UV-LED device is hot and may cause burns.
Be sure to perform operations as specified by the instructions, and never touch any area not specified in the instructions.
Sudden movement of the machine may cause injury or burns.
- Never use any implements other than the included cleaning sticks. Cotton swabs or other lint-producing items may damage the print heads.
- Do not use cleaning liquid other than the included cleaning liquid.
- Do not dip the used cleaning stick in the cleaning liquid again during cleaning. To add cleaning liquid, use a new cleaning stick.
- Use a clean pair of tweezers to remove clumps of ink. Do not pull with excessive force when clumps of ink are difficult to remove.
- If you use up the cleaning sticks or cleaning liquid, contact your authorized dealer or visit our website (https://www.rolanddg.com/).
- The print heads are components that wear out. Periodic replacement is required, with the frequency of replacement depending on use. Contact your authorized dealer.
- Remove the object.
-
Tap
 on the operation panel.
- Tap .
- Tap Execute.
-
Follow the instructions on the operation panel to perform the work.
After finishing the work as instructed on the screen, tap
 to display the next step. In this manner, perform each step of the work in order. If you want to check the previous step or perform it again, tap
  .
.When you finish the last step, tap Finish All. When print-head cleaning finishes after this work, the cleaning is finished. Dispose of used cleaning sticks.
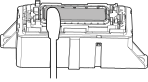
IMPORTANT- Press the cleaning stick against the colored area in the center of the cap to soak it with cleaning liquid.
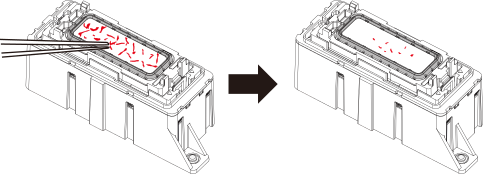
- Use a pair of tweezers to remove the pieces of hardened ink that are 3 mm (0.12 in.) or more in length.
Do not use excessive force when pulling on pieces of hardened ink that are difficult to remove. Doing so may damage the print head caps.
- Press the cleaning stick against the colored area in the center of the cap to soak it with cleaning liquid.
-
Tap
 .
The home screen appears.
.
The home screen appears.