
Setting Up Nozzle Drop-out Test Paper
Follow this procedure to set up nozzle drop-out test paper. It is recommended that you use a media size that is at least 110 mm × 70 mm (4.33 in. × 2.76 in.).
Procedure
-
Open the front cover.

-
Remove any objects (media) in the machine.
IMPORTANT Attempting to perform a nozzle drop-out test with an object in the machine may cause the print head to contact the object, damaging the machine or the print head.
-
Slide the tail stopper to the left edge.
IMPORTANT Do not hold the part shown in the figure. Holding this part and sliding the tail stopper may cause the tail stopper to bend, leading to decreased print quality and malfunctions.


-
Lower the machine guide to its lowermost point and secure it there.
IMPORTANT Failure to lower the guide to its lowermost point will cause the print head to collide with the guide, and this may lead to malfunctions.
-
Loosen the guide fixing screw.

-
Lower the guide to its lowermost point.

-
Tighten the guide fixing screw.

-
Loosen the guide fixing screw.
-
When using white ink, remove the white ink cartridge and shake it.
Remove the white ink cartridge, shake it 50 times (about 20 seconds), and then reinsert this cartridge.
-
Load the nozzle drop-out test paper into the machine's nozzle drop-out test stage.
This example describes the procedure used to load the nozzle drop-out test paper that is 110 mm × 70 mm (4.33 in. × 2.76 in.) in size.IMPORTANT
- When a rotary axis unit is connected, the printer will print the test pattern on the right end of the nozzle drop-out test stage. You do not need to set the height of the flat table or the printing position.
- As the test pattern position cannot be changed, you cannot print test patterns alongside one another horizontally or vertically.
- When performing consecutive nozzle drop-out tests, subsequent test patterns will be printed over the test pattern on the printing test position used for the first test. When performing consecutive nozzle drop-out tests, make sure to replace the nozzle drop-out test paper.
-
Using tape, fasten the test media in place so that it does not move.

-
Register or select the object for the rotary axis unit.
-
On the Utility home screen, click
 Setup.
-
Register or select the object for the rotary axis unit.
MEMO In Utility, "media" is used on the window used to register/manage objects.
When registering an object for the rotary axis unit for the first time
- Click
 .
.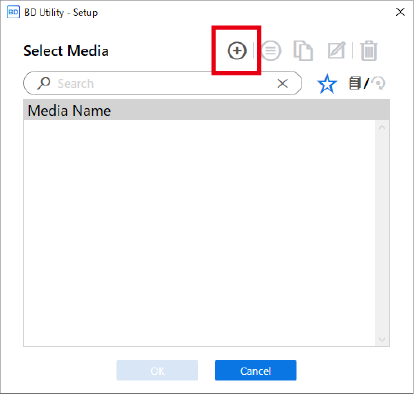
- Enter the media name, and then click OK.

For an object that has already been registered for the rotary axis unit
- Select the rotary axis unit media (media with a
 mark), and then click OK.MEMO
-
We recommend that you set frequently used objects as favorites.
- Click
 next to a registered media name to change this icon to
  .
. - Click
 next to the search box.The icon changes to
 , and the list of media set as favorites appears.
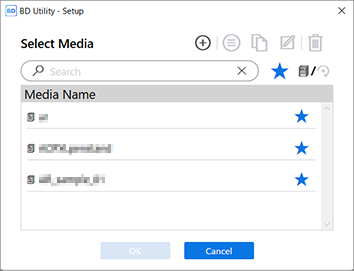
- Click
-
You can display all registered objects.
If a rotary axis unit is not attached, the names of flat table media are displayed. If a rotary axis unit is attached, the names of rotary axis unit media are displayed.
Click
 or
or  to display all registered objects.
 - You can use the favorites function and the search function to easily find registered objects.
- Media registered to the flat table cannot be selected for the optional item (rotary axis unit).
-
- Step (3) is not required. Proceed to Step (4).
- Click
-
On the Utility home screen, click