Cleaning All Print Heads
This operation requires seven unused SOL INK cleaning cartridges (five for cleaning and two for refilling ink). Have these on hand before you start.
The effect on white ink is the same as Handling Severe Dot Drop-out with White Ink. If you want to perform maintenance on white ink, see Handling Severe Dot Drop-out with White Ink.
-
All ink is discharged in this operation. Perform this operation only when ink emission failures (such as dot drop-out) cannot be improved even after performing "normal," "medium," "powerful," and "manual" cleaning.
-
Be sure to use SOL INK cleaning cartridges. Use of any other type may result in breakdown.
-
Fill the machine with ink as soon as possible after cleaning is finished. Allowing the machine to stand without ink may damage the print heads.
-
Press [▼] several times to display the screen shown below.

-
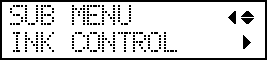
Press [▶] once, and then press [▼] several times to display the screen shown below.
-
Press [▶] once, and then press [▼] several times to display the screen shown below.

-
Press [ENTER] when the following screen appears.

-
When the following screen is displayed, open the panel cover.
Remove the screw on the top of the panel cover, tilt the panel cover forward slightly, and then pull out the panel cover in the direction indicated by the arrow.

-
Remove the drain bottle and discard the discharged fluid.
IMPORTANT:When you remove the drain bottle, a few drops of discharged fluid may come out of the machine. Exercise caution to prevent this fluid from soiling your hands.
- Round drain bottle
- While supporting the drain bottle, turn it in the direction shown in the figure.
- Detach the drain bottle.

 : Upper limit. Discard the discharged fluid before this line is passed.
- Square drain bottle

IMPORTANT:Tilting the drain bottle too much may lead to discharged fluid spilling out. Slide the drain bottle while ensuring that it stays on the bottom plate.
-
Quickly attach the drain bottle to the machine once more.
- Round drain bottle
- While supporting the drain bottle, turn it in the direction shown in the figure to attach the bottle.

- Square drain bottle
-
While pushing down on the opening, slide the bottle to the back, ensuring that the bottle stays on the bottom plate.

-
When the drain bottle reaches the wall, remove your hand.
Point: Push the drain bottle all the way to the back, ensuring that the opening does not get caught on the frame (A).

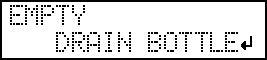
IMPORTANT:If the message "EMPTY DRAIN BOTTLE" is displayed even after you have attached the drain bottle, the drain bottle may not have been set in place correctly.
Remove the drain bottle, and then attach it again.
-
Close the panel cover.
Catch the panel cover pins on the notches, and then attach the panel cover.

IMPORTANT:The following operations will discharge large amounts of fluid. If you do not empty the drain bottle, the discharged fluid may overflow.
-
Press [ENTER].
The screen shown below appears.