
Manual Cleaning Method
Be sure to perform manual cleaning after daily operations are finished. If you want to perform unmanned printing at night, perform manual cleaning before sending the print data.
Do not perform cleaning immediately after printing has finished. (Wait approximately 15 minutes after printing has finished.)
The area around the UV-LED device is hot and may cause burns.
Be sure to perform operations as specified by the instructions here, and never touch any area not specified in the instructions.
Sudden movement of the machine may cause injury.
Important notes on this procedure
- Before attempting this operation, remove any media.
- To prevent the print heads from drying out, finish this procedure in 10 minutes or less. A warning beep sounds after 10 minutes.
- Never use any implements other than the included cleaning sticks. Cotton swabs or other lint-producing items may damage the print heads.
- Use only the included cleaning liquid.
- Use one cleaning stick per cleaning session, and then discard the stick after use. Reusing cleaning sticks will adversely affect the printing results.
- Do not put a cleaning stick that has been used for cleaning into the cleaning liquid. Doing so will deteriorate the cleaning liquid.
- Never rub the print head surface (nozzle surface).
- Stroke the sponges very gently, applying as little pressure as possible. Never rub, scrape, or crush them.
- If you use up the cleaning sticks or cleaning liquid, contact your authorized Roland DG Corporation dealer or visit our website (http://www.rolanddg.com/).
If a warning beep sounds during cleaning
- A warning beep sounds 10 minutes after operation begins. Stop work, close all the covers, and then press [ENTER] to end the manual cleaning mode. After that, restart the procedure from the beginning.
| Required items | |
|---|---|
 |
 |
| Cleaning sticks | Cleaning liquid |
1. Clean the print heads.
-
Press [▼] several times to display the screen shown below.
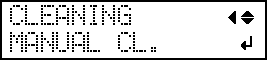
-
Press [ENTER].
When the media clamp removal message is displayed, press [ENTER] again. After "NOW PROCESSING.." is displayed, the screen shown below appears.Also, the print head moves to the left end of the platen.

IMPORTANT:Do not press [ENTER] at this stage. Press the [ENTER] key after cleaning is complete. If you press the [ENTER] key at this stage, wait for the screen to change as shown in the following figure, and then press the [ENTER] key again.

-
Open the left covers (top and bottom).

-
Touch the location shown in the figure to discharge any static electricity.

-
Remove the cut rail.

-
Move the print-head carriage to the left end.

Move the print-head carriage by hand.CAUTION:When moving the print-head carriage by hand, be sure to hold the specified position.
Moving it by holding positions other than those specified may deform and damage the cover.

 : Position to hold with your hand
 -
Apply a large amount of cleaning liquid to the cleaning stick.
IMPORTANT:
Be sure to use one of the included cleaning sticks.

-
Clean the locations shown in the following figure.
Be especially careful to clean away any fibrous dust (lint).

-
Use the wide surface of the cleaning stick to wipe off the left side. Then, use the opposite surface (which is not dirty) to wipe off the right side.

-
Stand the cleaning stick upright and wipe off the left side. Then, use the opposite surface to wipe off the right side.


-
Use the wide surface of the cleaning stick to wipe off the left side. Then, use the opposite surface (which is not dirty) to wipe off the right side.
-
When you have finished cleaning, move the print-head carriage to above the platen.

Move the print-head carriage by hand.CAUTION:When moving the print-head carriage by hand, be sure to hold the specified position.
Moving it by holding positions other than those specified may deform and damage the cover.
: Position to hold with your hand -
Attach the cut rail.

2. Clean the print head caps.
-
Open the right cover.

-
Clean the locations shown in the following figure.
Be especially careful to clean away any fibrous dust (lint).
- After wiping off the hooked side of the wiper (a) with a cleaning stick, wipe off the opposite side (b).
- Wipe off the area in the figure with a cleaning stick.
- Use the wide surface of the cleaning stick, and then shift it to a different location, pressing the cleaning stick against the location to absorb the dirt there.

-
Remove any hardened ink on top of the print head caps.
Use a pair of tweezers to remove the pieces of hardened ink that are 3 mm (0.12 in.) or more in length.IMPORTANT:Do not use excessive force when pulling on pieces of hardened ink that are difficult to remove. Doing so may damage the print head caps.

-
Press [ENTER].
The screen shown below appears, and then cleaning starts. The (approximate) remaining time for the procedure is displayed on the screen. (The display shown below is an example. "01:45" = "1 minute and 45 seconds")
When cleaning finishes, the screen shown below appears again.
3. Perform a printing test to check the results.
-
Press [▼], then [▶] to display the screen shown below.
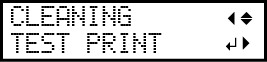
-
Check whether there is dot drop-out or dot displacement in the test pattern.
Missing blocks indicate dot drop-out. Collapsed or inclined blocks indicate dot displacement.
