
Printing Tests and Normal Cleaning
1. Perform a printing test.
MEMO:
-
This operation is unnecessary if you will only perform cutting.
-
When performing printing tests successively, you can select "FEED" (vertical printing) or "SCAN" (horizontal printing) as the print position for the 2nd and later tests in comparison to the 1st test.
Procedure
-
Press [▼], then [▶] to display the screen shown below.
-
Check whether there is dot drop-out or dot displacement in the test pattern.
Missing blocks indicate dot drop-out. Collapsed or inclined blocks indicate dot displacement.

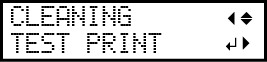
2. Perform normal cleaning.
Procedure
- Press [▼] to display the screen shown below.

- Press [ENTER].The screen shown below appears, and then cleaning starts. The (approximate) remaining time for the procedure is displayed on the screen. (The display shown below is an example. "01:45" = "1 minute and 45 seconds")
 When finished, the screen shown below appears again.
 - Press [▲].