
Step 2: Cutting after Automatic Aligning
Never touch the cutting carriage while output is in progress.
The cutting carriage moves at high speed. Coming into contact with the moving carriage may cause injury.
-
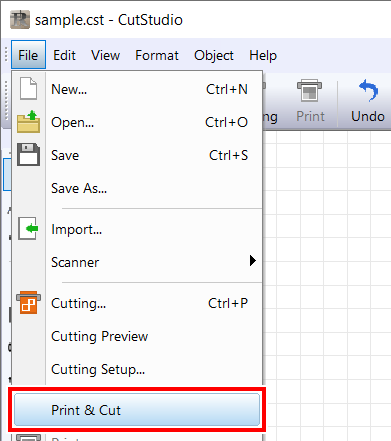
When of CutStudio is unselected, select this.
-
Send cutting data.
The screen shown below appears.
MEMODo not change the following settings when transmitting data.- Windows
Do not change [Rotate] from [Off (0)] in CutStudio.
- Macintosh
Do not change Rotate from
 in Adobe Illustrator.

- Windows
-
Remove the blade holder and install the alignment tool.
The alignment tool can be installed in the same manner as the blade holder.

-
Press [ENTER].
The screen shown below appears.

-
Press [▲][▼][◀][▶], and align the tip of the alignment tool with tool mark 1.
Hold down the alignment tool gently from above, and check that the tip of the alignment tool overlaps with the tool mark.

-
Press [ENTER].
The tool moves to a position near the lower-right crop mark, and the screen shown below is displayed.

-
Press [▲][▼][◀][▶], and align the tip of the alignment tool with tool mark 2.
MEMO To perform aligning again, press [MENU] during setup to return to the previous screen, and perform the procedure again.

-
Press [ENTER].
The tool moves to a position near the upper-left crop mark, and the screen shown below is displayed.

-
Align tool marks 3 and 4 in the same way.
Tool Mark 3 Tool Mark 4 

-
After aligning tool mark 4, press [ENTER].
The screen shown below appears.

-
Remove the alignment tool and install the blade holder.

- Press [ENTER].
-
Press [ENTER] when the following screen appears.
Cutting starts.

- Remove the cut material.