
Replacing the Collet
Replacement Time
The times for replacing the collet are as shown below. Replace it at the appropriate time.
To purchase a new collet, contact your authorized DGSHAPE Corporation dealer or access our website.
- When scratches or rust appears on the tapered portion of the collet
- If the collet is deformed.
Required item
| Included items | ||||
|---|---|---|---|---|
 |
 |
 |
 |
 |
| Collet replacement jig | Collet tap | Taper cleaner | Collet brush | Grease |
1. Remove the collet.
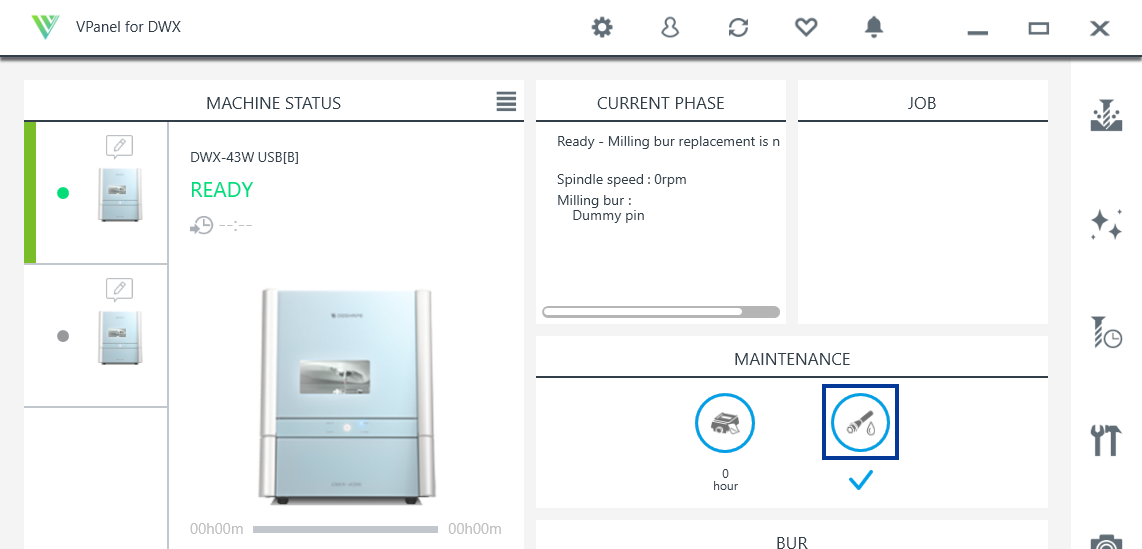
- Show VPanel.
-
Click
 .
.
-
Open the front cover.
Hold the parts shown in the figure with both hands and open the cover.

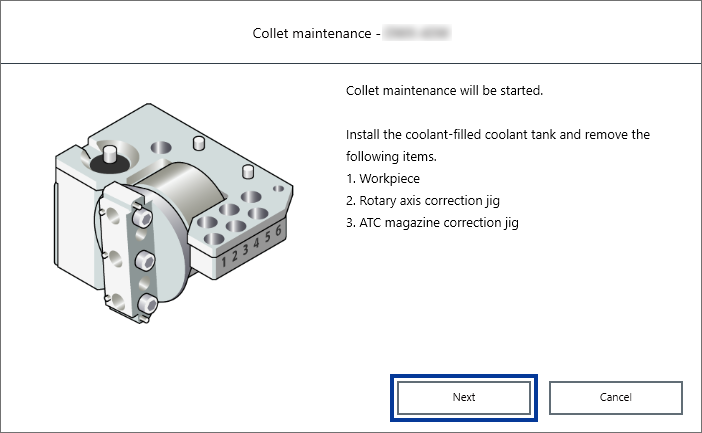
- Remove the workpiece, rotary axis correction jig, and ATC magazine correction jig.
-
Click Next.
-
Press the collet replacement jig () against the collet, and then insert the collet tap ().
Align the hexagonal tip of the collet and the hexagonal portion of the collet replacement jig.

-
While gently pressing the collet tap up into the hole, rotate the collet replacement jig in the direction indicated in the figure.
Rotate the collet replacement jig until the collet naturally comes free.
CAUTIONRotate the collet replacement jig with the collet tap inserted.
If the collet replacement jig is rotated without the collet tap inserted, the collet may be damaged.

2. Attach the new collet.
-
Clean the inside of the spindle (where contact with the collet is made) with the taper cleaner.
Insert about 2/3 of the taper cleaner tip into the spindle and clean the entirety of the inside of the spindle while moving the cleaner up and down aligned with the tapered (slanted) part.
MEMO As a general guide, the taper cleaner should be replaced after 20 cleaning operations.
-
Apply a thin layer of grease to two locations: the tapered portion on the outside of the new collet () and the spindle head ().
A thin application of grease is sufficient. Do not apply excessively.

-
Assemble the collet (), collet replacement jig (), and collet tap () as shown in the figure, and then insert this assembly into the spindle.

-
While gently pressing the collet tap up into the hole, rotate the collet replacement jig in the direction indicated in the figure to tighten the collet.
Keep rotating until the collet replacement jig will not rotate any more.

-
Remove the collet replacement jig () and the collet tap ().

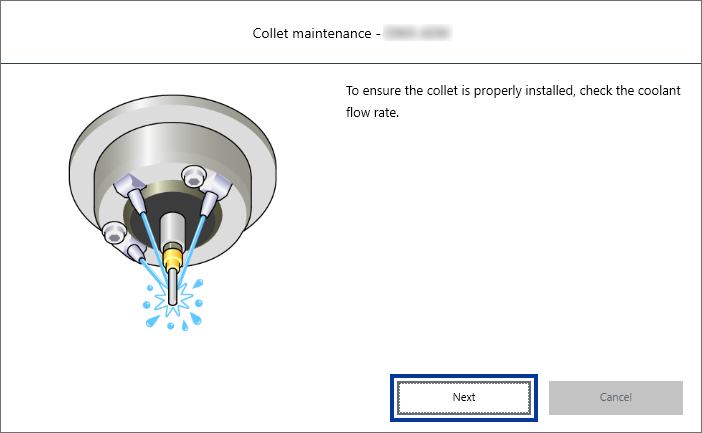
3. Check the coolant flow rate
-
Close the front cover.
Hold the parts shown in the figure with both hands and close the cover.

-
Click Next.
Coolant is discharged and contacts the dummy pin.
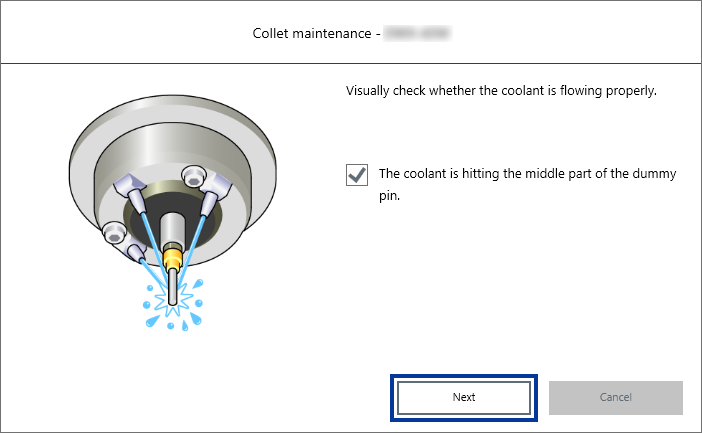
-
Visually check that coolant is applied to the middle of the dummy pin.
-
If coolant is applied to the middle of the dummy pin
- Select The coolant is hitting the middle part of the dummy pin., and then click Next.
- Click Complete.
This completes the procedure for checking the coolant flow rate.
-
If coolant is not applied to the middle of the dummy pin
- Click Next without selecting The coolant is hitting the middle part of the dummy pin..
-
Check the following items, and then click Close.
- There must be a sufficient amount of coolant.
- Filling the Coolant Tank
- Coolant nozzles must not be clogged.
- Cleaning the Coolant Nozzle
- The tank filter must not be clogged.
- Replacing the Coolant
-
Check the coolant flow rate again.
Follow the procedure below to check the coolant flow rate.
-